- Published on
- // 16 min read
OpenShift Virtualization Lab Build
- Authors
- Name
- Shane Boulden
- @shaneboulden


In the last article I introduced how I've setup OpenShift in my home lab. I went through the deployment architecture, including DNS provided via Route53 and networking with the Ubiquiti UDM Pro, and how I've installed OpenShift on a Dell PowerEdge R620 using the OpenShift Assisted Installer.
The initial reason for this metal lab build was to get started with OpenShift Virtualization. In this article I wanted to closer look at how OpenShift Virtualization is configured in my lab and get a few VMs up and running.
Firstly some clarity on spelling and grammar. I'm Australian, so I usually spell the word 'virtualisation'. But, I recognise that the capability name is 'OpenShift Virtualization' (with a 'z'). So for this blog:
- When I use 'Virtualization', I'm talking about the 'OpenShift Virtualization' capability built-in to OpenShift
- When I use 'virtualisation', I'm talking generally about virtual machines and workload virtualisation.
With that cleared up, let's crack on!
OpenShift Virtualization intro
OpenShift has supported virtualisation since the 4.2 release, wayyy back in October 2019. Back then it was called 'Container Native Virtualization', and was initially released in a technology preview with OpenShift 4.2. In OpenShift 4.5, this capability was renamed 'OpenShift Virtualization' and graduated to generally available (GA). You can see this in the OpenShift 4.5 release notes.
OpenShift Virtualization allows you to run containers alongside virtual machines. There's a few reasons I want to do this in my lab:
- Manage containers and VMs using a single control plane, on the same platform. This is the biggest advantage for me. My home lab has limited hardware, and I don't have the 'brain space' to manage multiple platforms. I want VMs, and I want containers, and I need it on the same platform and hardware.
- Declaratively managing virtual machines. Often managing VMs becomes a 'click ops' activity, particularly for on-premises capabilities. Managing VMs on OpenShift means that you can use the Kubernetes API to describe a VM state.
- Automate VM deployments. Using the Kubernetes API to provision VMs means that I can automate VM creation - from provisioning, to lifecycle management and decommissioning, all using the API and able to be automated.
- Apply network policy consistently to workloads. I'll show in this blog how to use Kubernetes services to expose virtual machines through the OpenShift software-defined network. You could extend this to create network policy around VMs, and use OpenShift egress firewalls to mitigate data egress.
OpenShift Virtualization is built from the KubeVirt open source project. KubeVirt essentially adds a virtualisation API for Kubernetes, and extends Kubernetes capabilities to include virtual machine (VM) managementt. It operates by adding new resource types through Kubernetes' Custom Resource Definitions API, which allows VMs to run within standard Kubernetes pods. VMs can then be managed using familiar Kubernetes tools like kubectl, making it easier for users to handle both container and virtualization workloads.
KubeVirt achieves this by implementing several custom resources, such as VirtualMachine, VirtualMachineInstance, and VirtualMachineInstanceReplicaSet, and controllers like virt-controller, virt-launcher, and virt-handler. This integration simplifies the deployment and management of VMs, enabling a more streamlined operation of both traditional and cloud-native applications within a single platform.
Validating the OpenShift Virtualization deployment with CirrOS
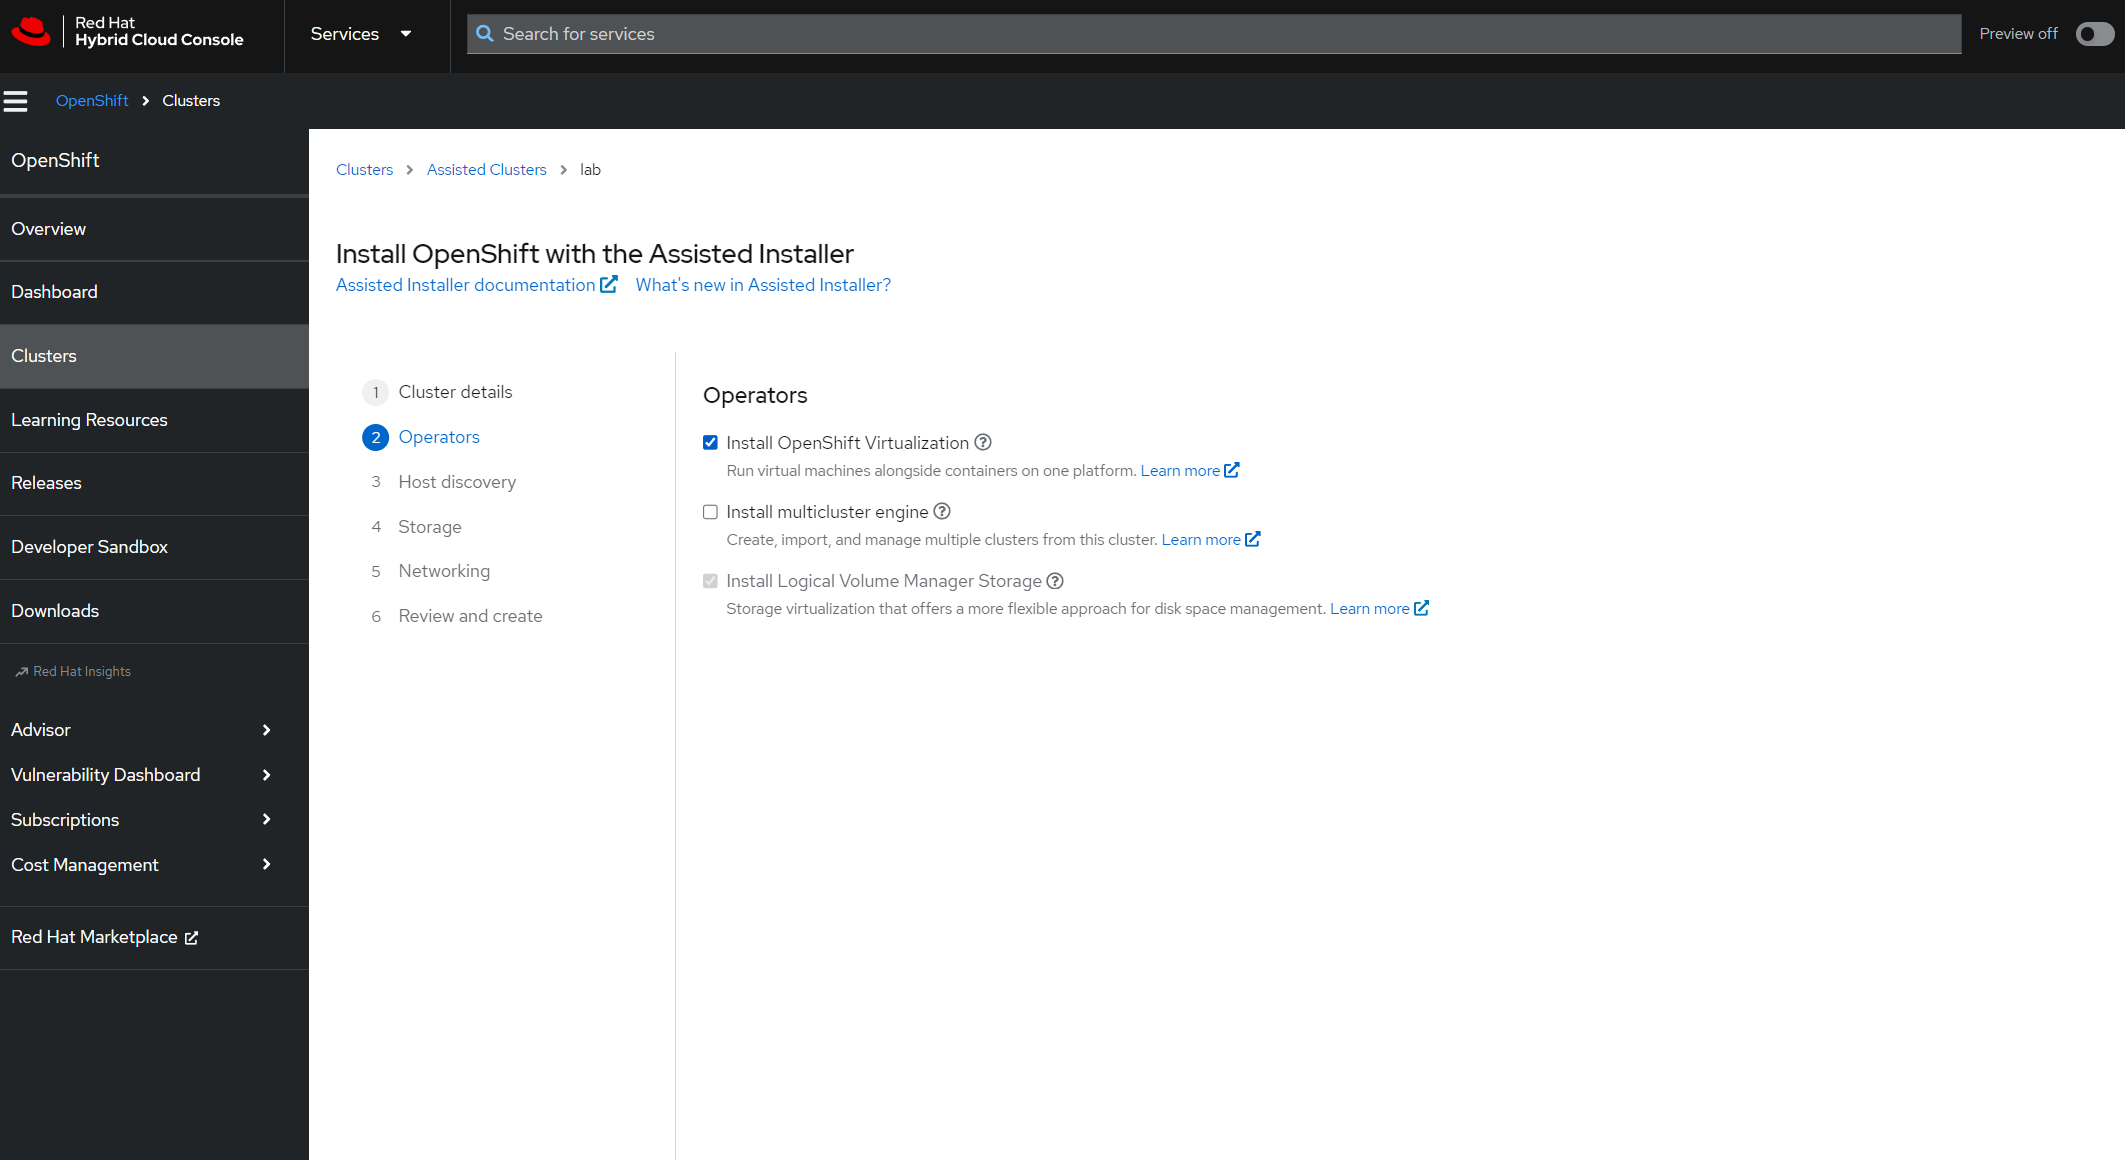
OpenShift Virtualization was installed alongside my cluster on my R620 in the last article, via the Assisted Installer. This was the option I enabled during the cluster installation, in the Assisted Installer.

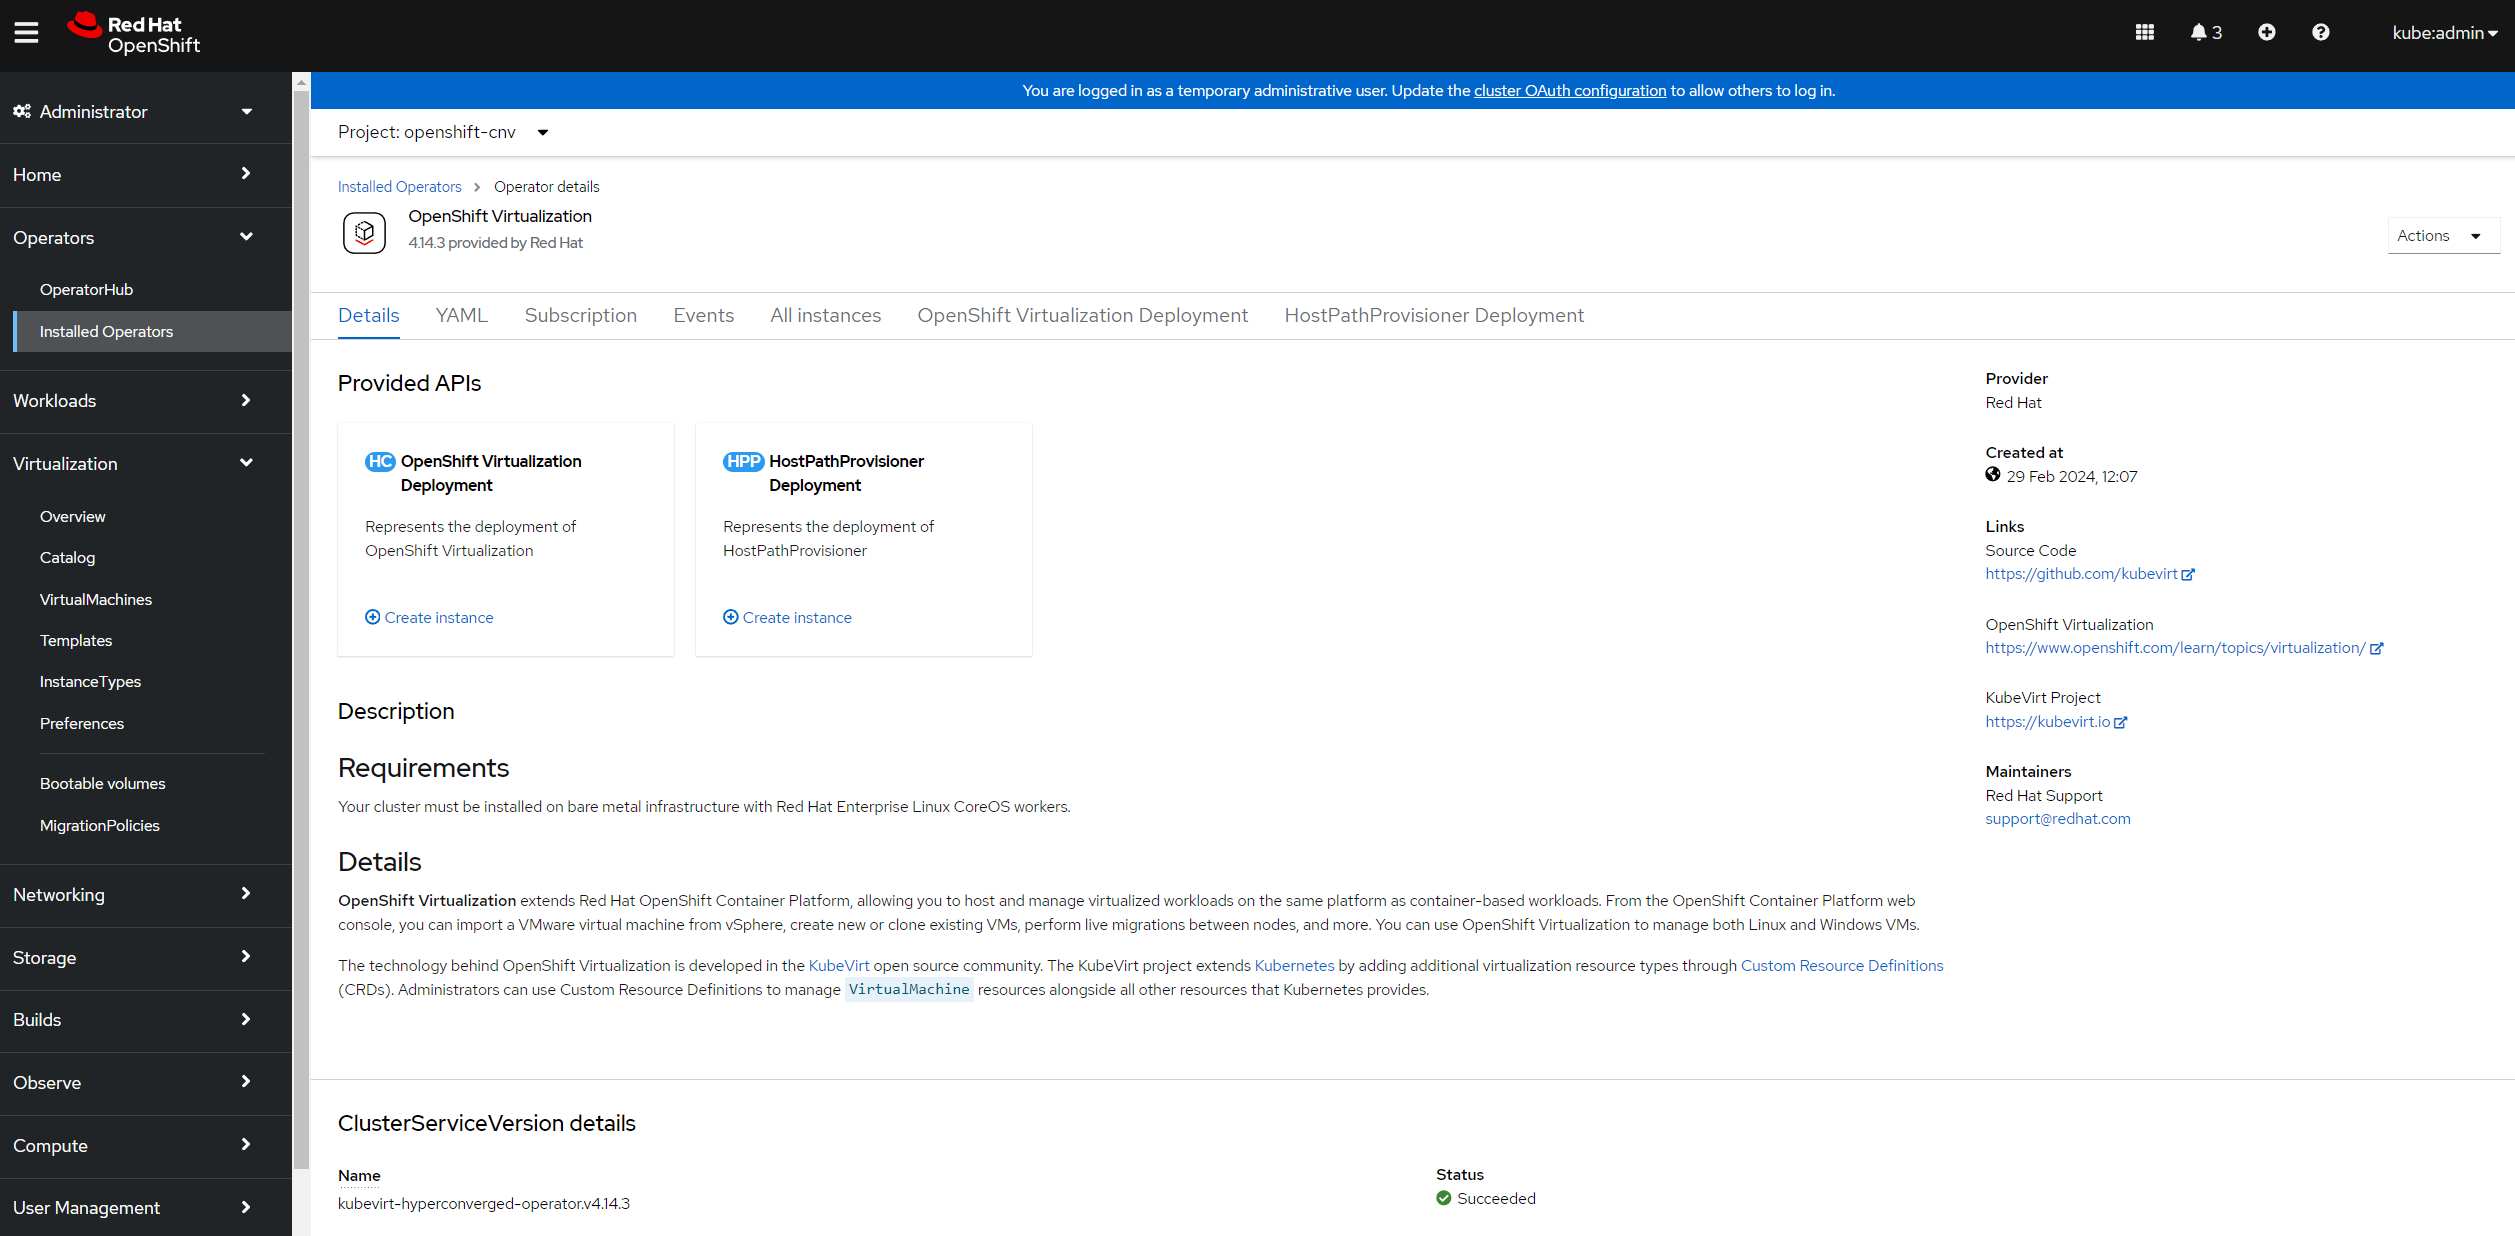
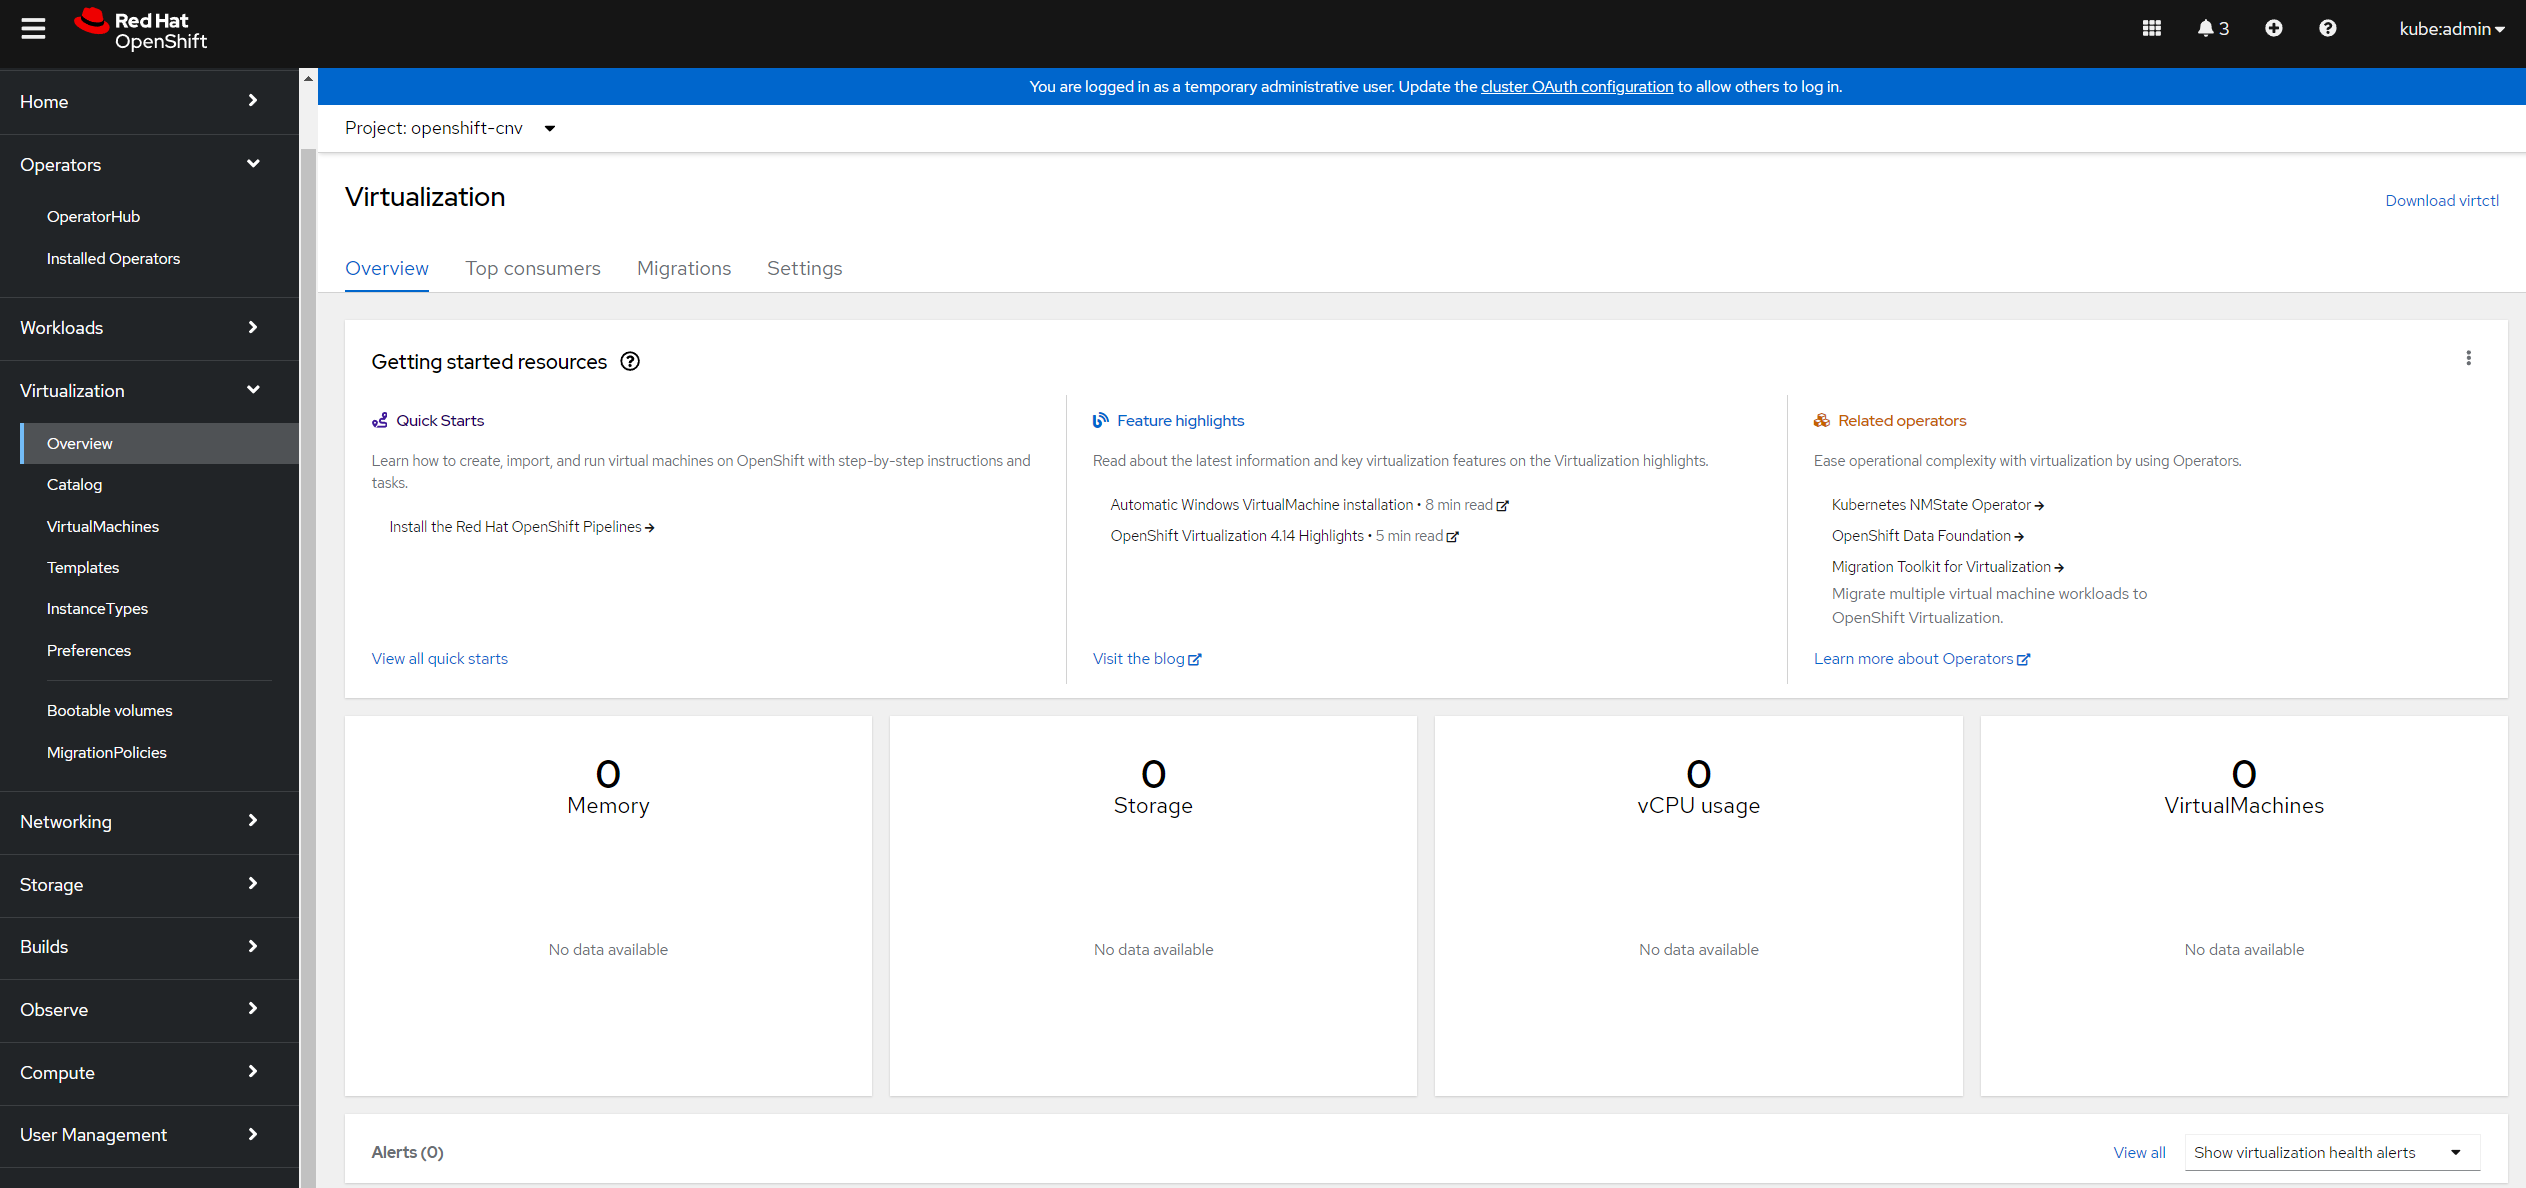
If I take a look at the OpenShift console I can see that the OpenShift Virtualization operator is installed, and the 'Virtualization' menu appears on the left.


A few years ago now I was building OpenStack clusters. OpenStack was (and is) complex - there were a lot of APIs that needed to be functioning correctly to provision and run virtual workloads, and validating these was an important task.
This is where CirrOS comes in. As you might have guessed, CirrOS is named for the light, wispy 'cirrus' clouds that form high in the atmosphere. CirrOS is a lightweight operating system designed to test cloud infrastructure. It provides fast startup times (so we can 'fail fast'), small image sizes, and includes tools commonly found in cloud environments (like cloud-init). You shouldn't really run any production workloads inside a CirrOS image, but if I can deploy the image and connect to a virtual machine, I know that all of the APIs I need to provision more complex workloads are available. You can find the CirrOS source on GitHub
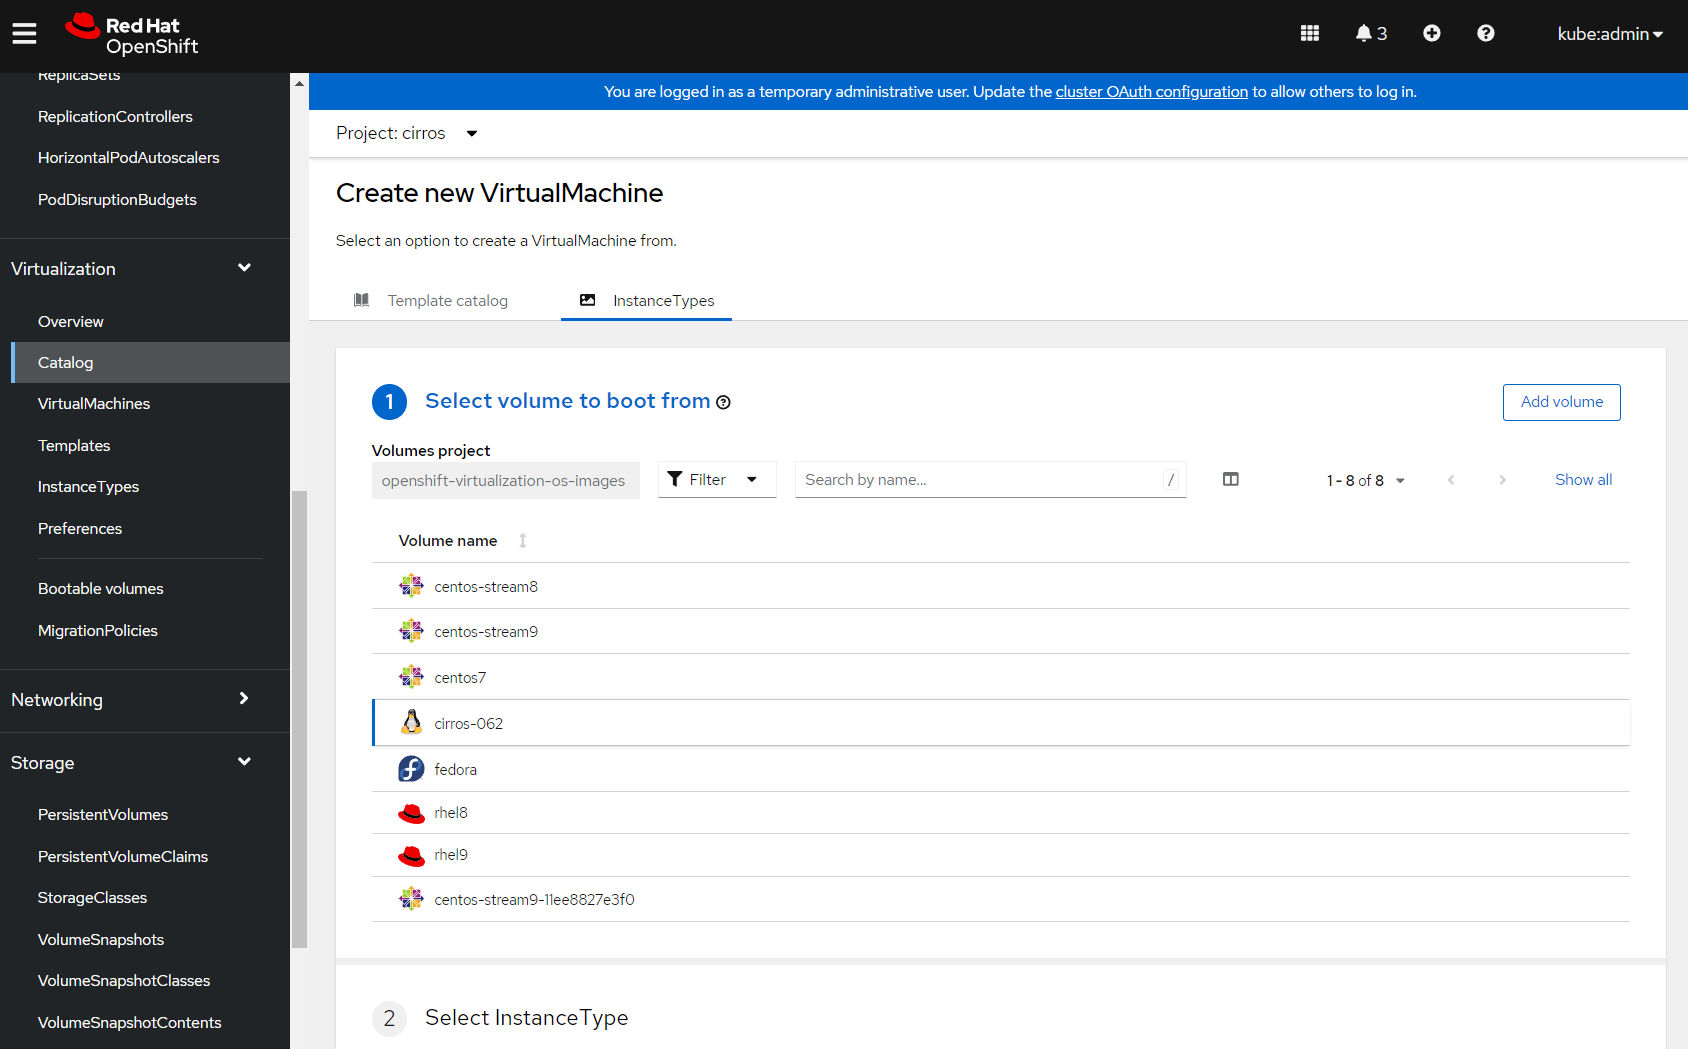
I'm going to provision a CirrOS workload to validate the OpenShift Virtualization is working correctly. The first step here is to create a new boot source for CirrOS.
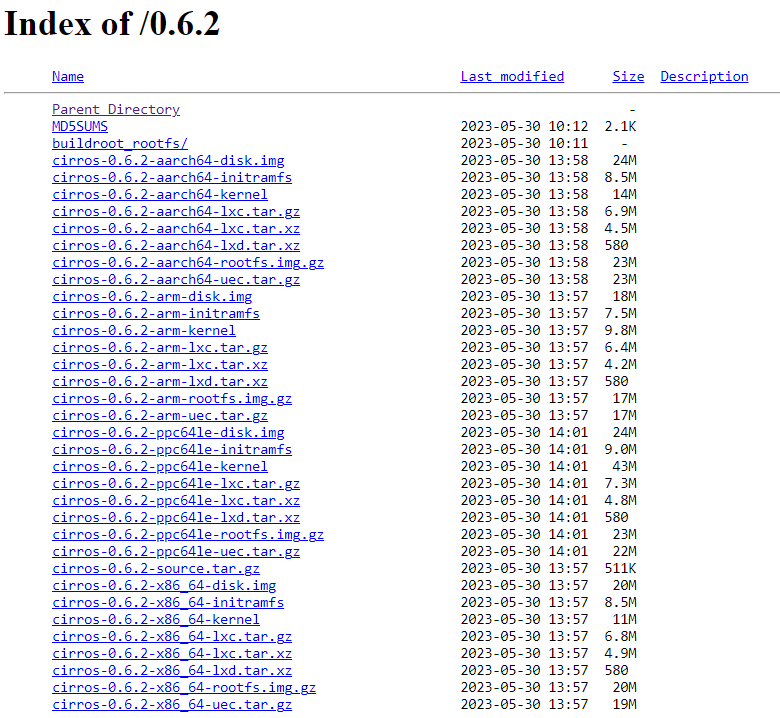
CirrOS images are hosted at https://download.cirros-cloud.net/ and the latest version is 0.6.2. My R620 is using two Intel Xeon E5 processors, so I need the x86 image.

Once I have the image I can create a data volume. Data Volumes(DV) are simply an abstraction on top of a Persistent Volume Claims(PVC). The DV will monitor and orchestrate the import/upload/clone of the data into the PVC. I'm going to use the virtctl CLI to upload the image and create a volume. You can find the virtctl download link in the OpenShift Virtualization dashboard within the platform:


I can then use the virtctl image-upload dv sub-command to upload the CirrOS image...
$ oc project openshift-virtualization-os-images
$ virtctl image-upload dv cirros --force-bind \
 --insecure --size=200Mi --image-path=./cirros-0.6.2-x86_64-disk.img
And see the image uploading:
PVC openshift-virtualization-os-images/cirros not found
DataVolume openshift-virtualization-os-images/cirros created
Waiting for PVC cirros upload pod to be ready...
Pod now ready
Uploading data to https://cdi-uploadproxy-openshift-cnv.apps.lab.openshift.blueradish.net

 20.44 MiB / 20.44 MiB [==============================================================================] 100.00% 0s

Uploading data completed successfully, waiting for processing to complete, you can hit ctrl-c without interrupting the progress
Processing completed successfully
Uploading /mnt/c/Users/shane/Downloads/cirros-0.6.2-x86_64-disk.img completed successfully
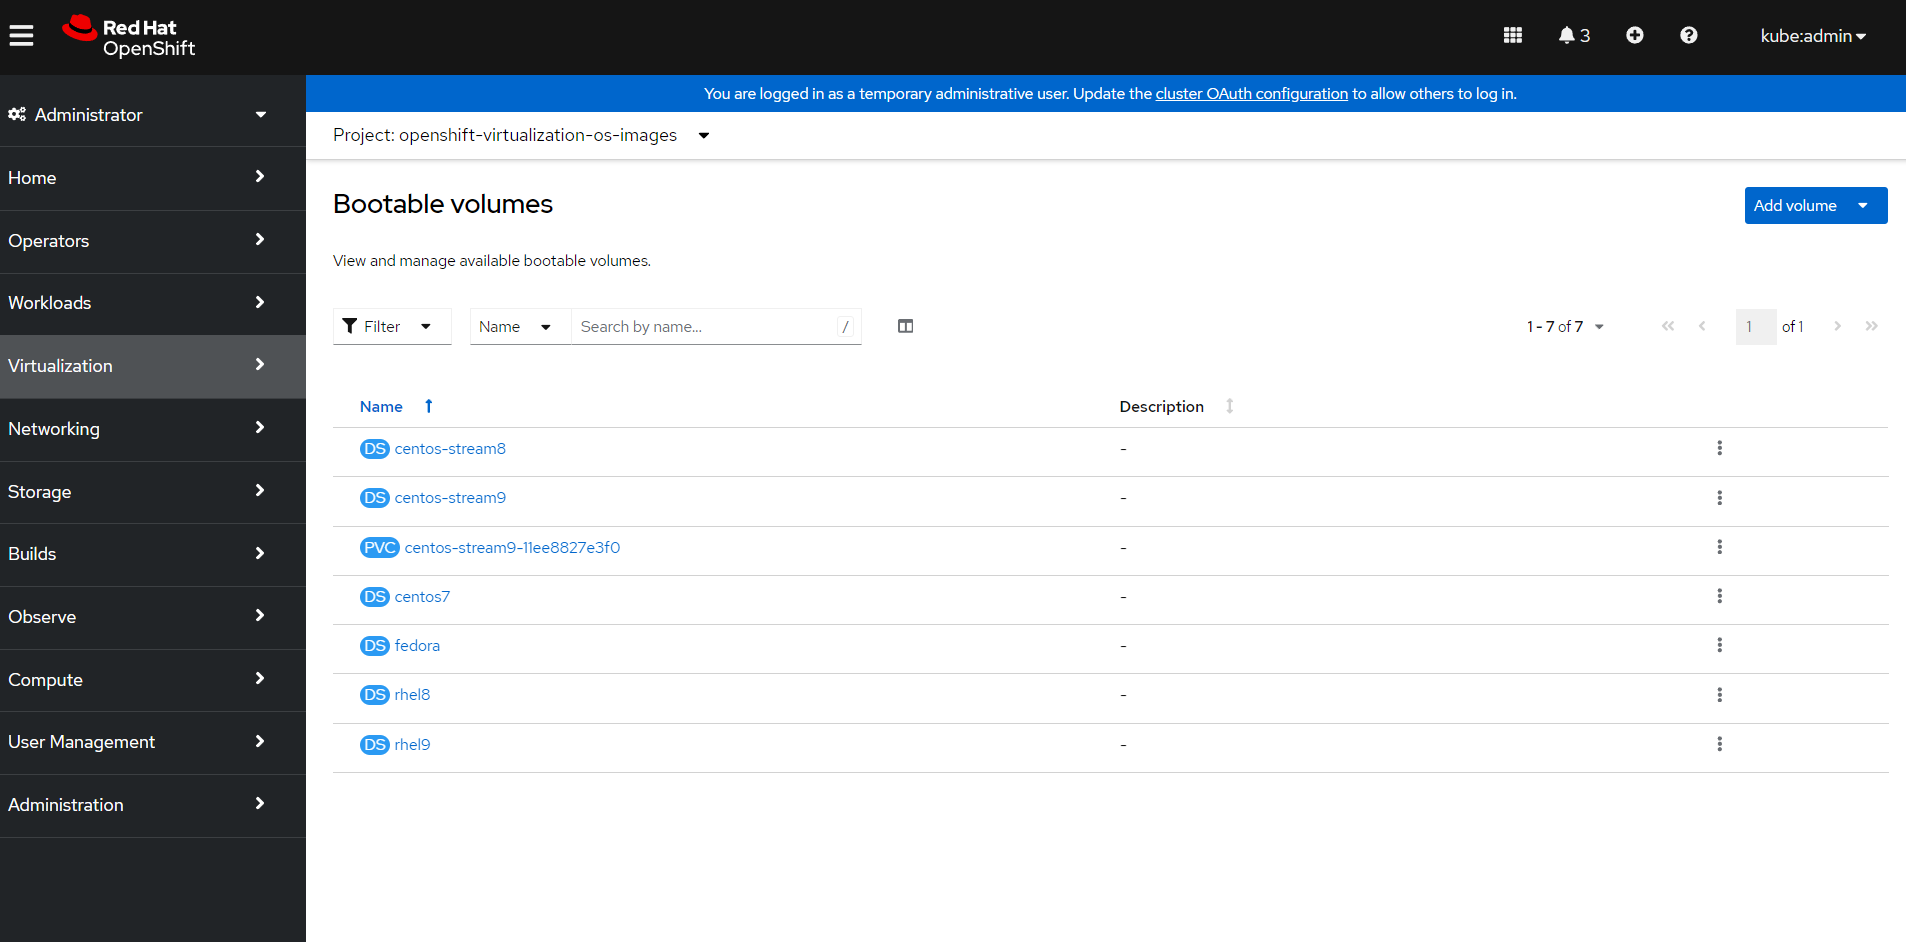
Now that the image is uploaded I can create a bootable volume from the data volume (PVC). First take a look at the bootable volumes in the openshift-virtualization-os-images project. In my case, the OpenShift Virtualization operator has already created a number of out-of-the-box volumes I can use.

Select 'Add Volume' and 'Use existing volume' for the source type. Select the PVC that we just uploaded (cirros), and the existing StorageClass. The CirrOS image is only 20 MB, so I've set the disk size to 200 MiB just to be sure it will provision.

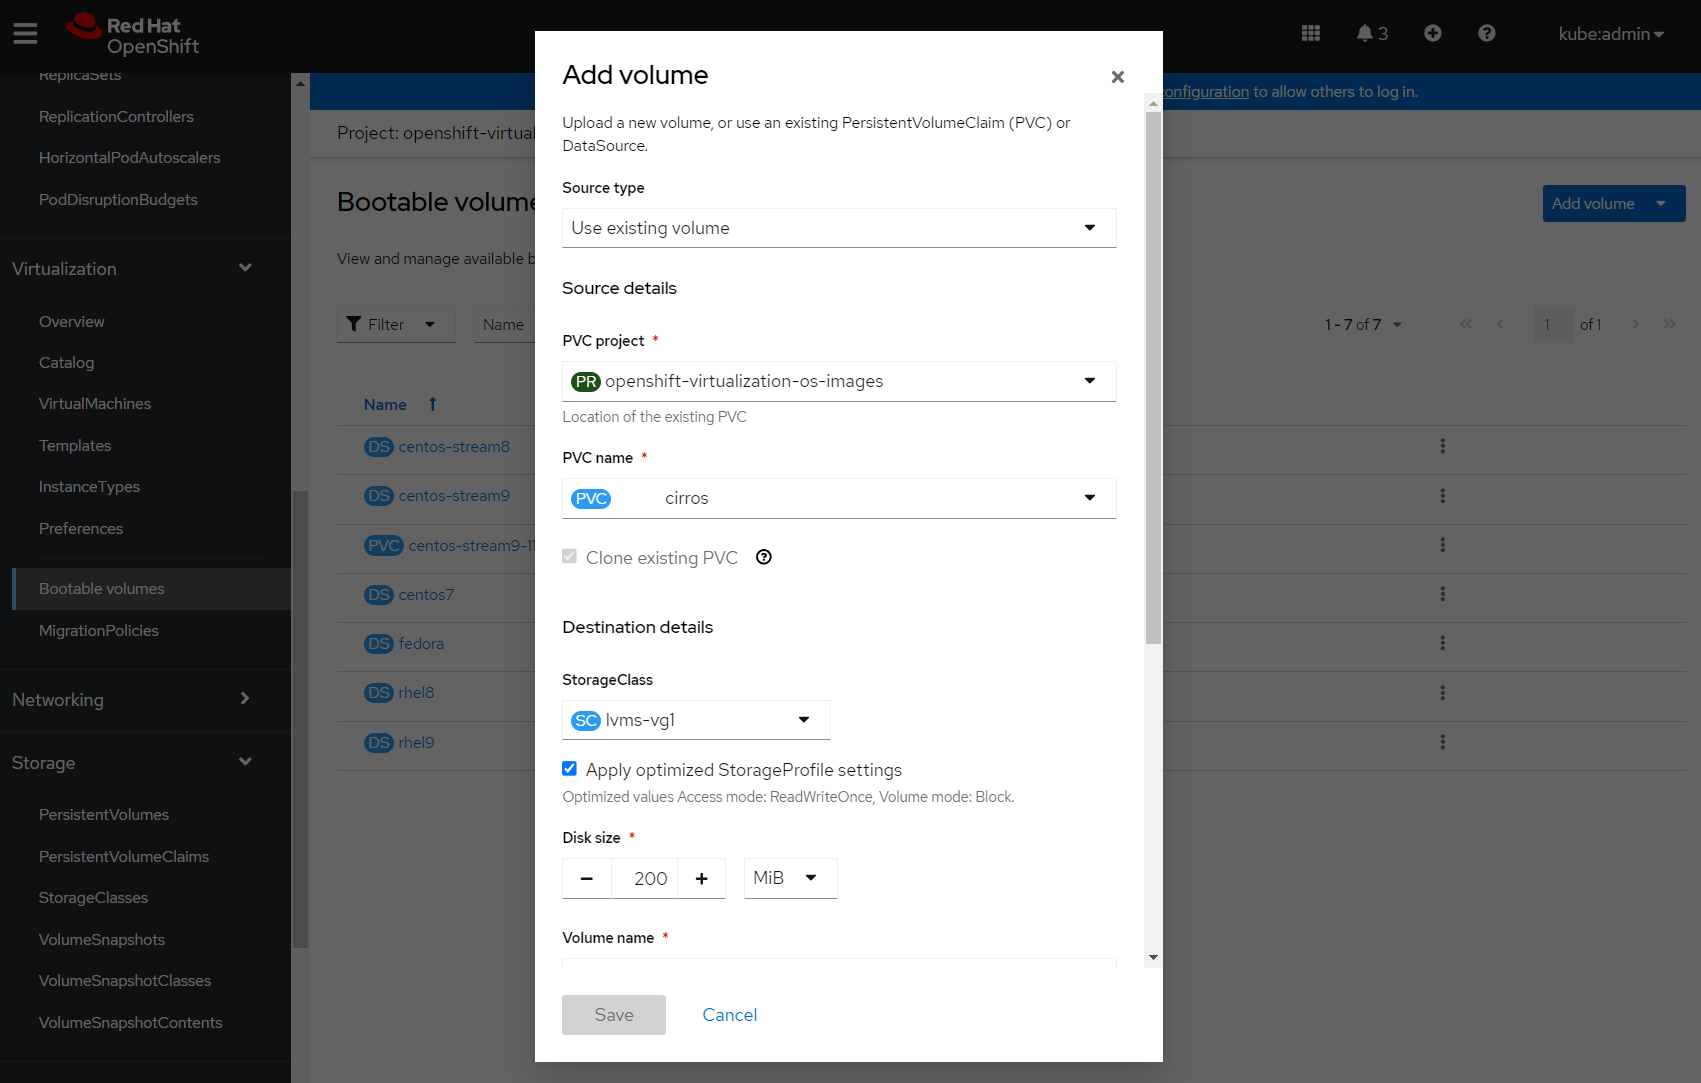
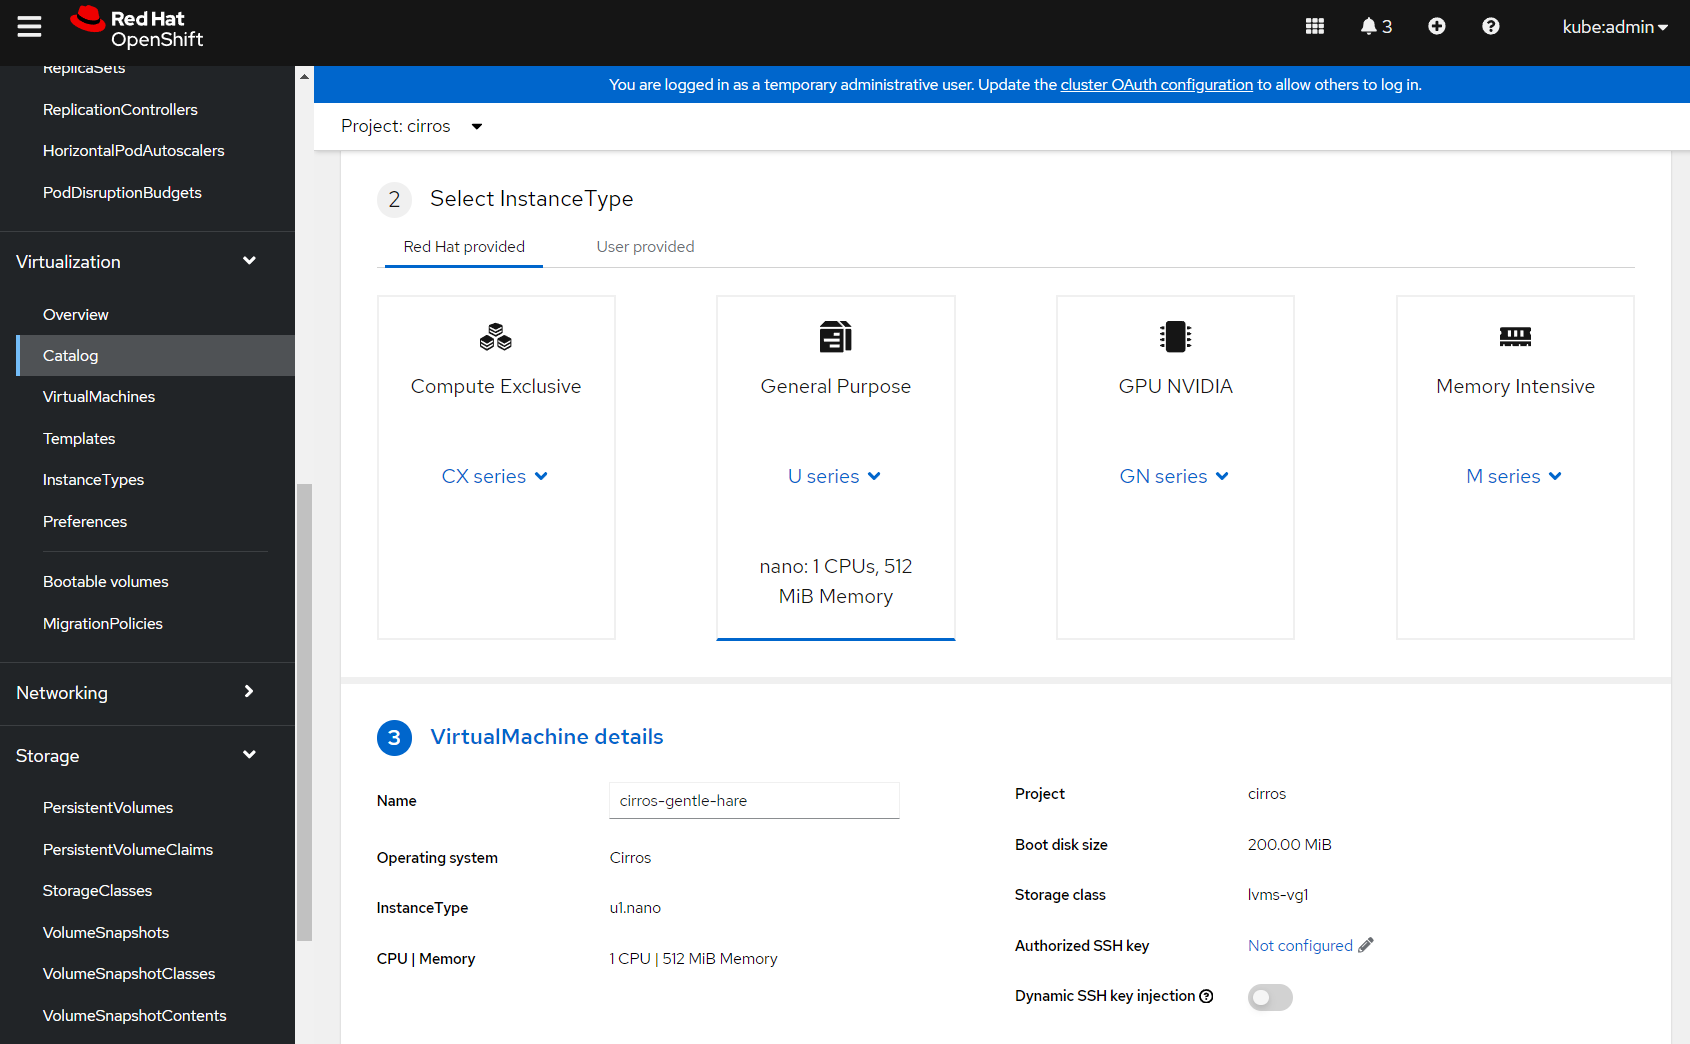
You'll find an existing 'Volume metadata' preference for cirros, and can then specify a default instance type. I've chosen the Red Hat Provided -> U series -> u1.nano type.

Select 'Save' and the bootable volume will be created.
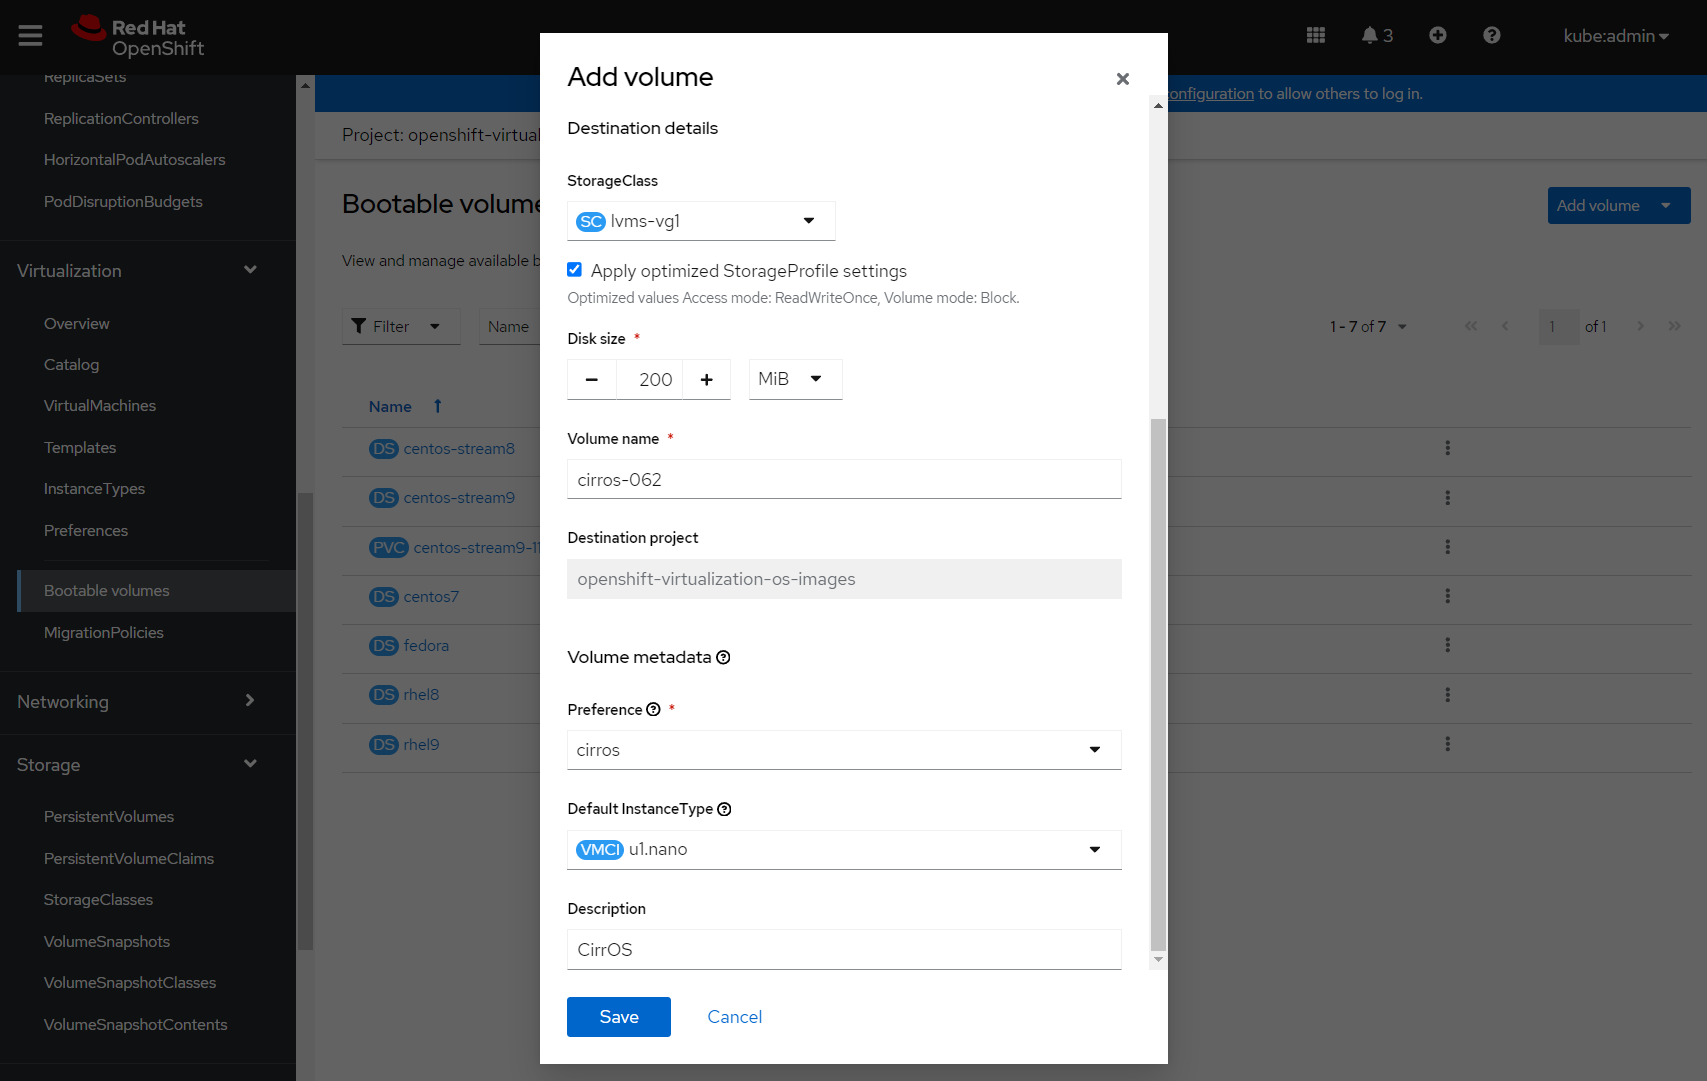
Now that I have a bootable volume I can start creating a CirrOS VM. I'm going to select 'Virtual Machines', 'Create Virtual Machine' and select 'From volume'. Note I'm doing everything in the cirros project now.

For the volume I'm going to select the CirrOS bootable volume I just created.

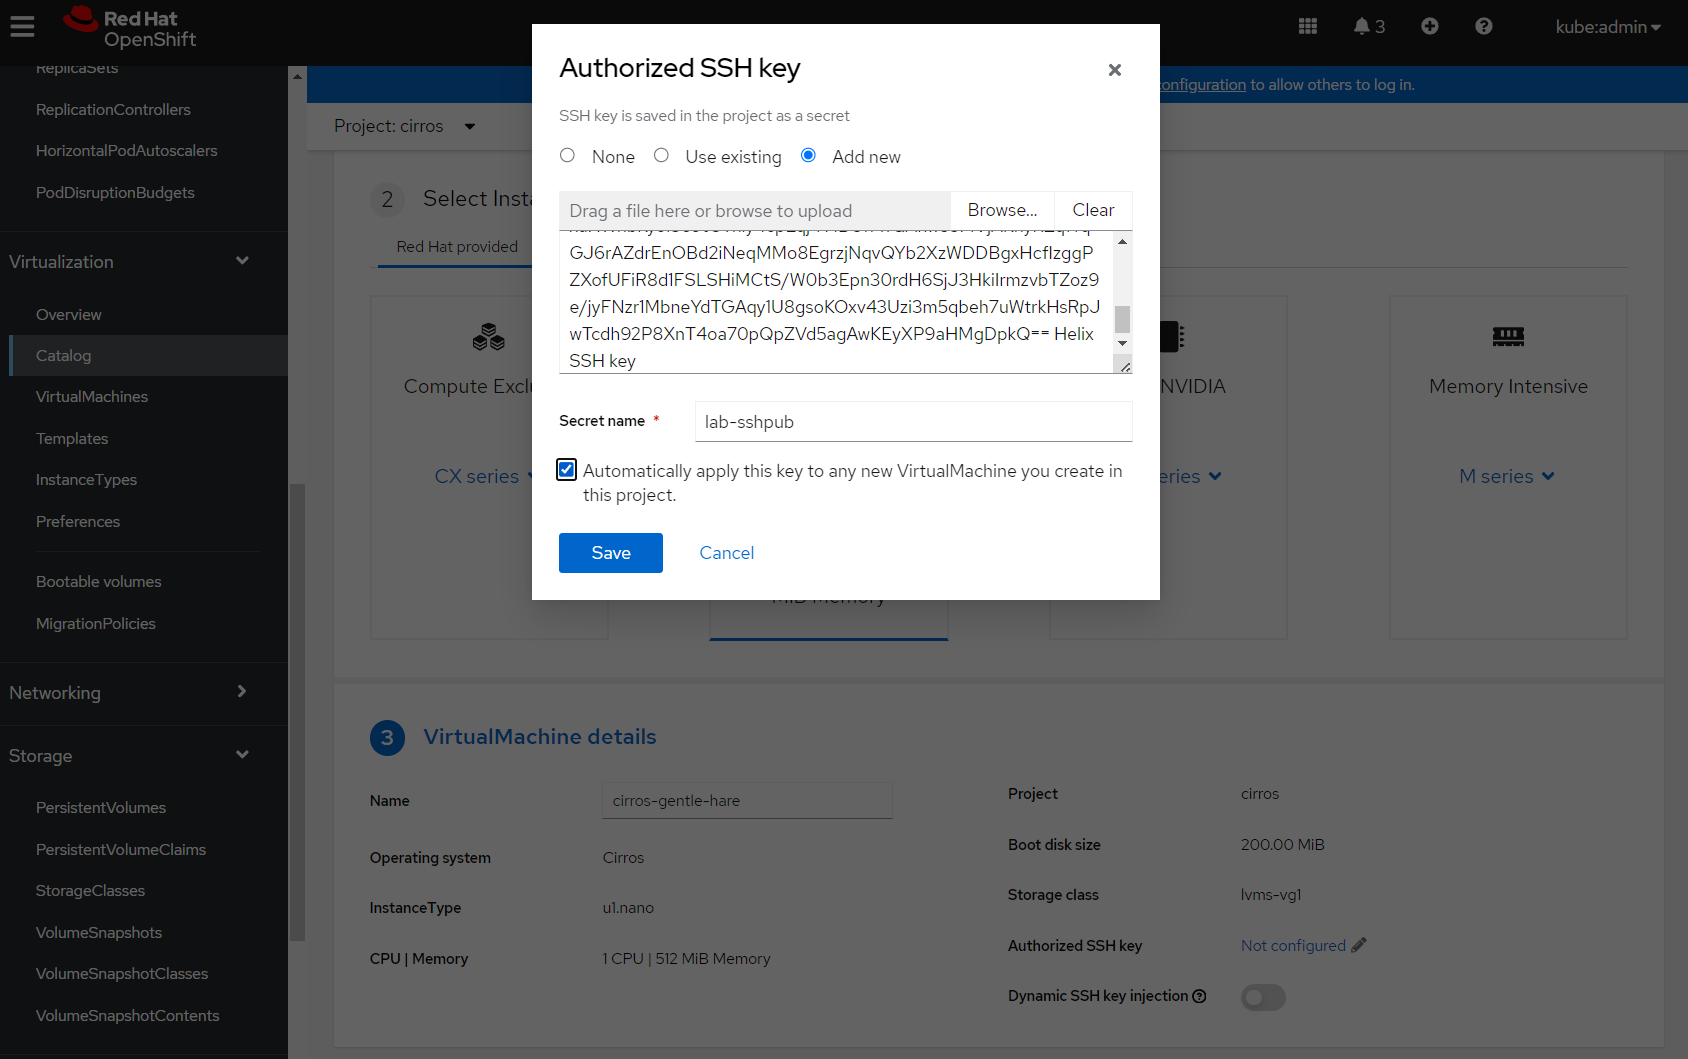
The instance type is already select for me ('U' series), and the VM has been given a name and a storage class. The last thing for me to do is configure an SSH key for access.


When I select 'Create virtual machine' my VM will boot, and I will see it go through the provisioning and then starting and running phases.

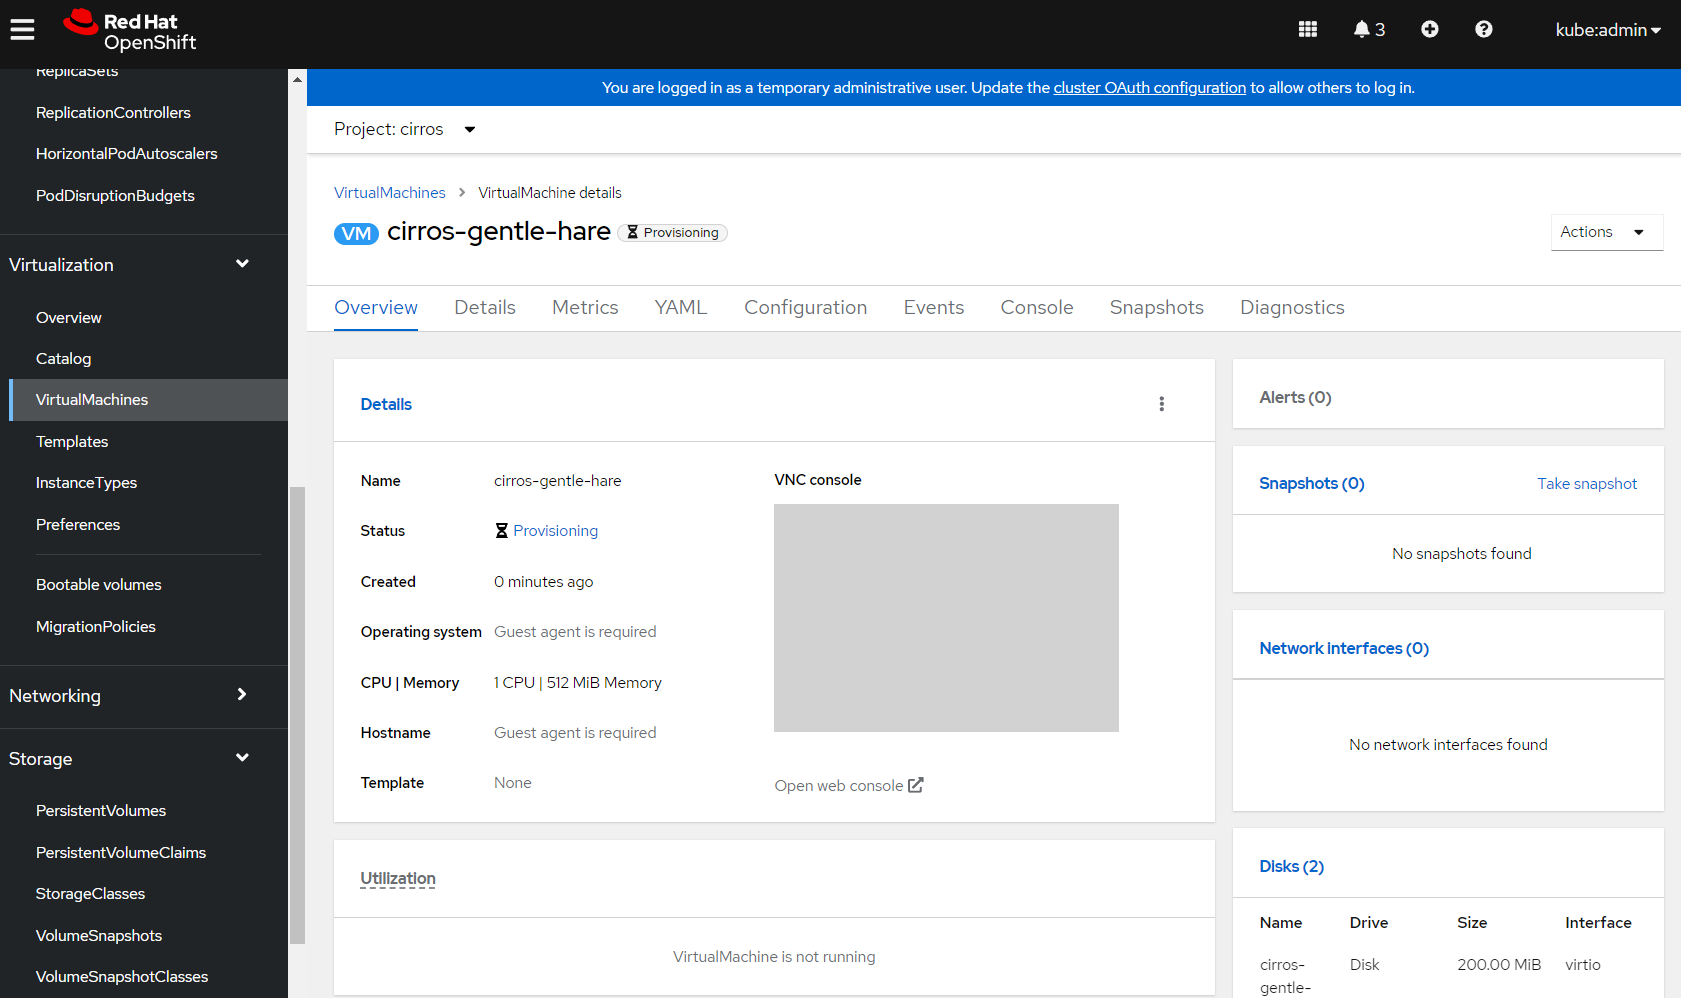

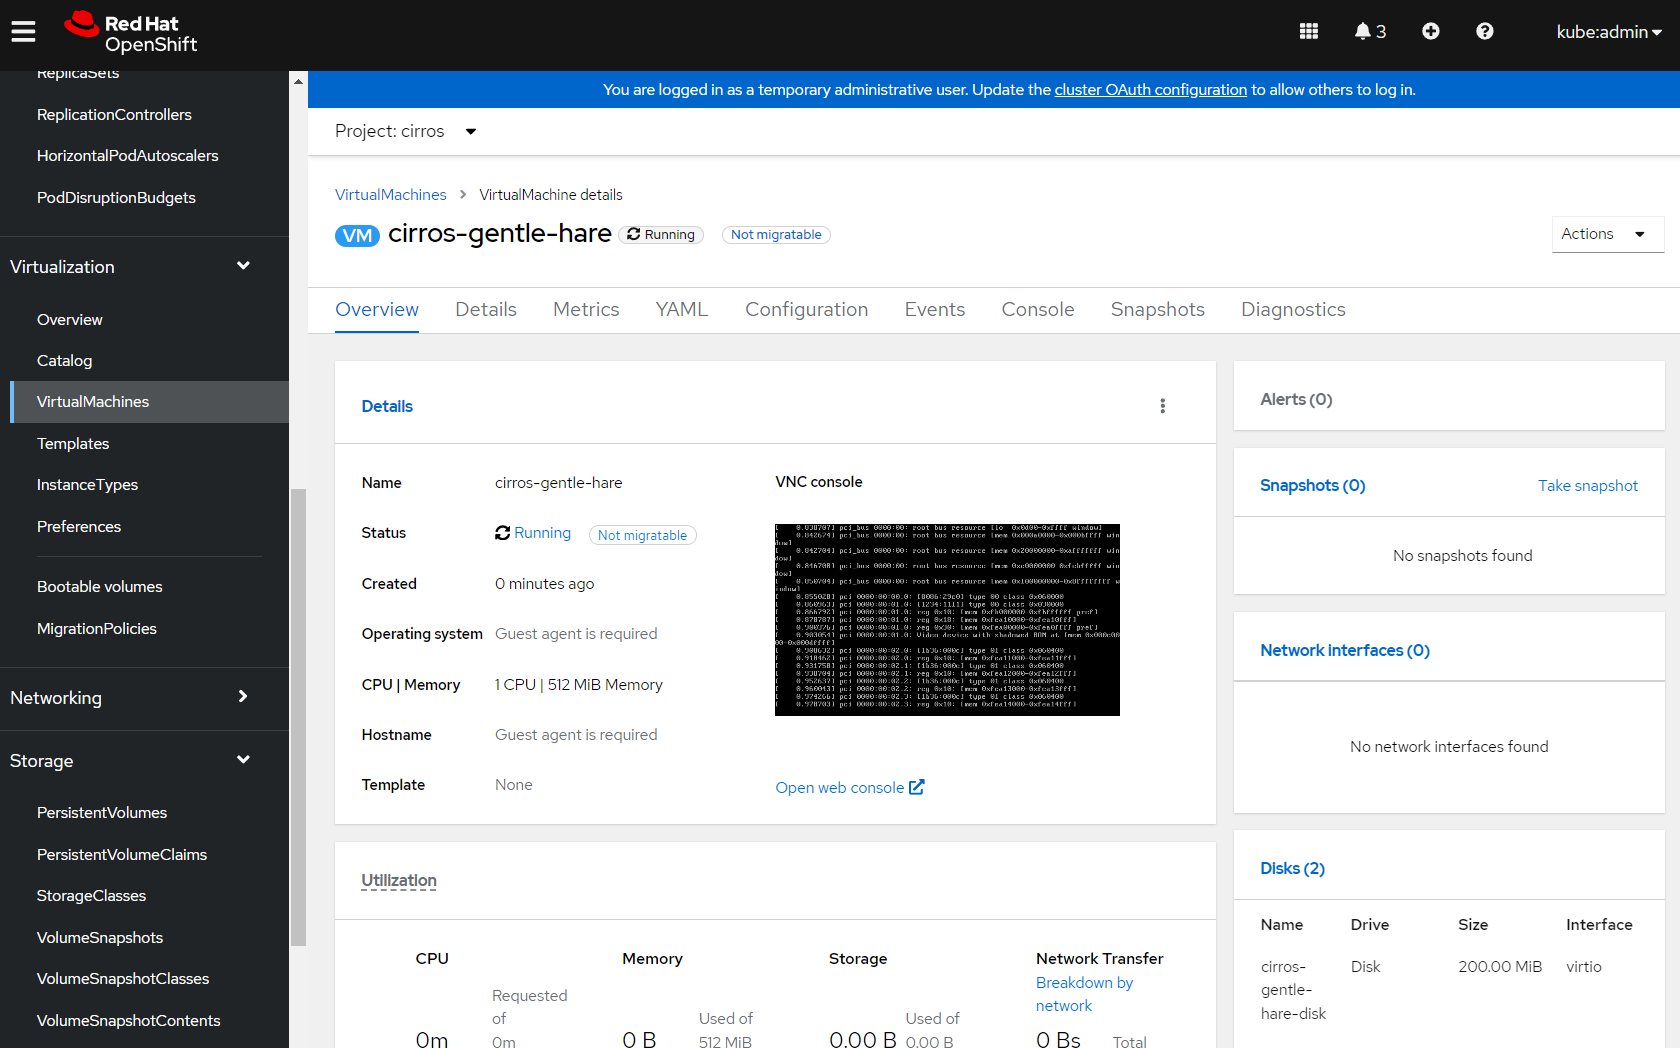
If I select the 'Open web console' link I can see the VM running, and can test login works. Because this is just a test image (and not designed for production), CirrOS simply prints the login credentials in the console:


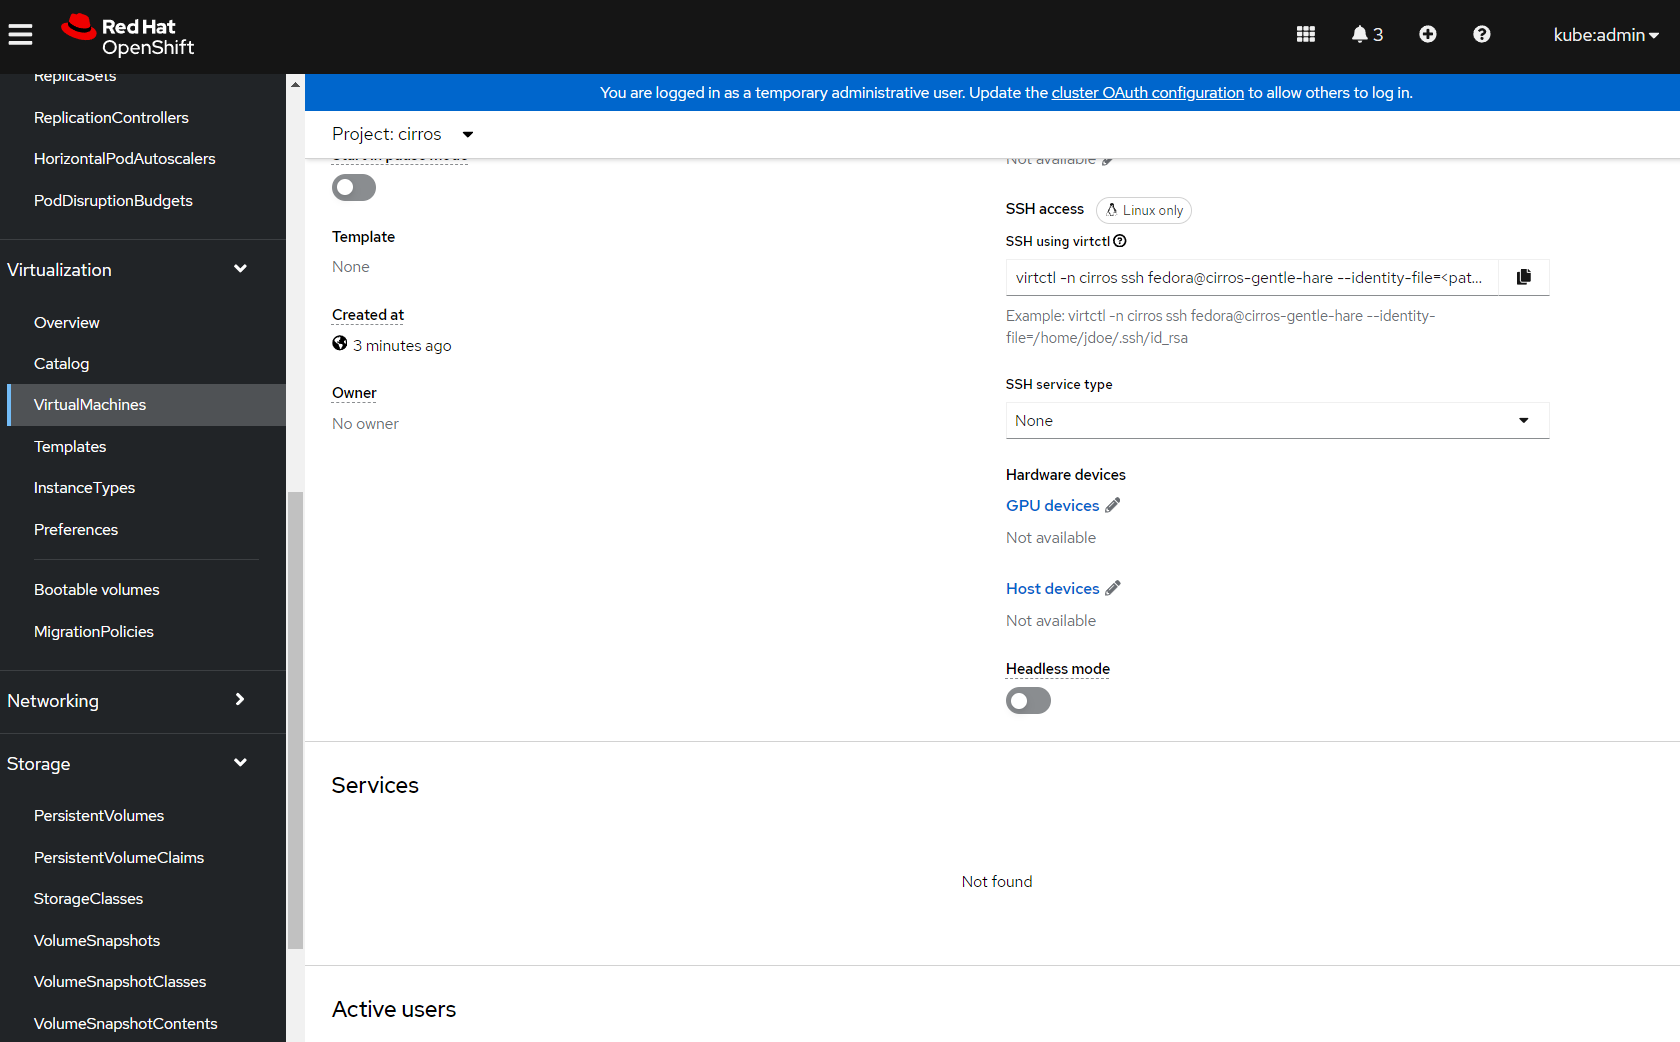
I can also test that SSH key injection has worked using the virtctl CLI. If I navigate back to the VM overview, select the 'Details' tab and scroll down I can see the virtctl command to login to the workstation:

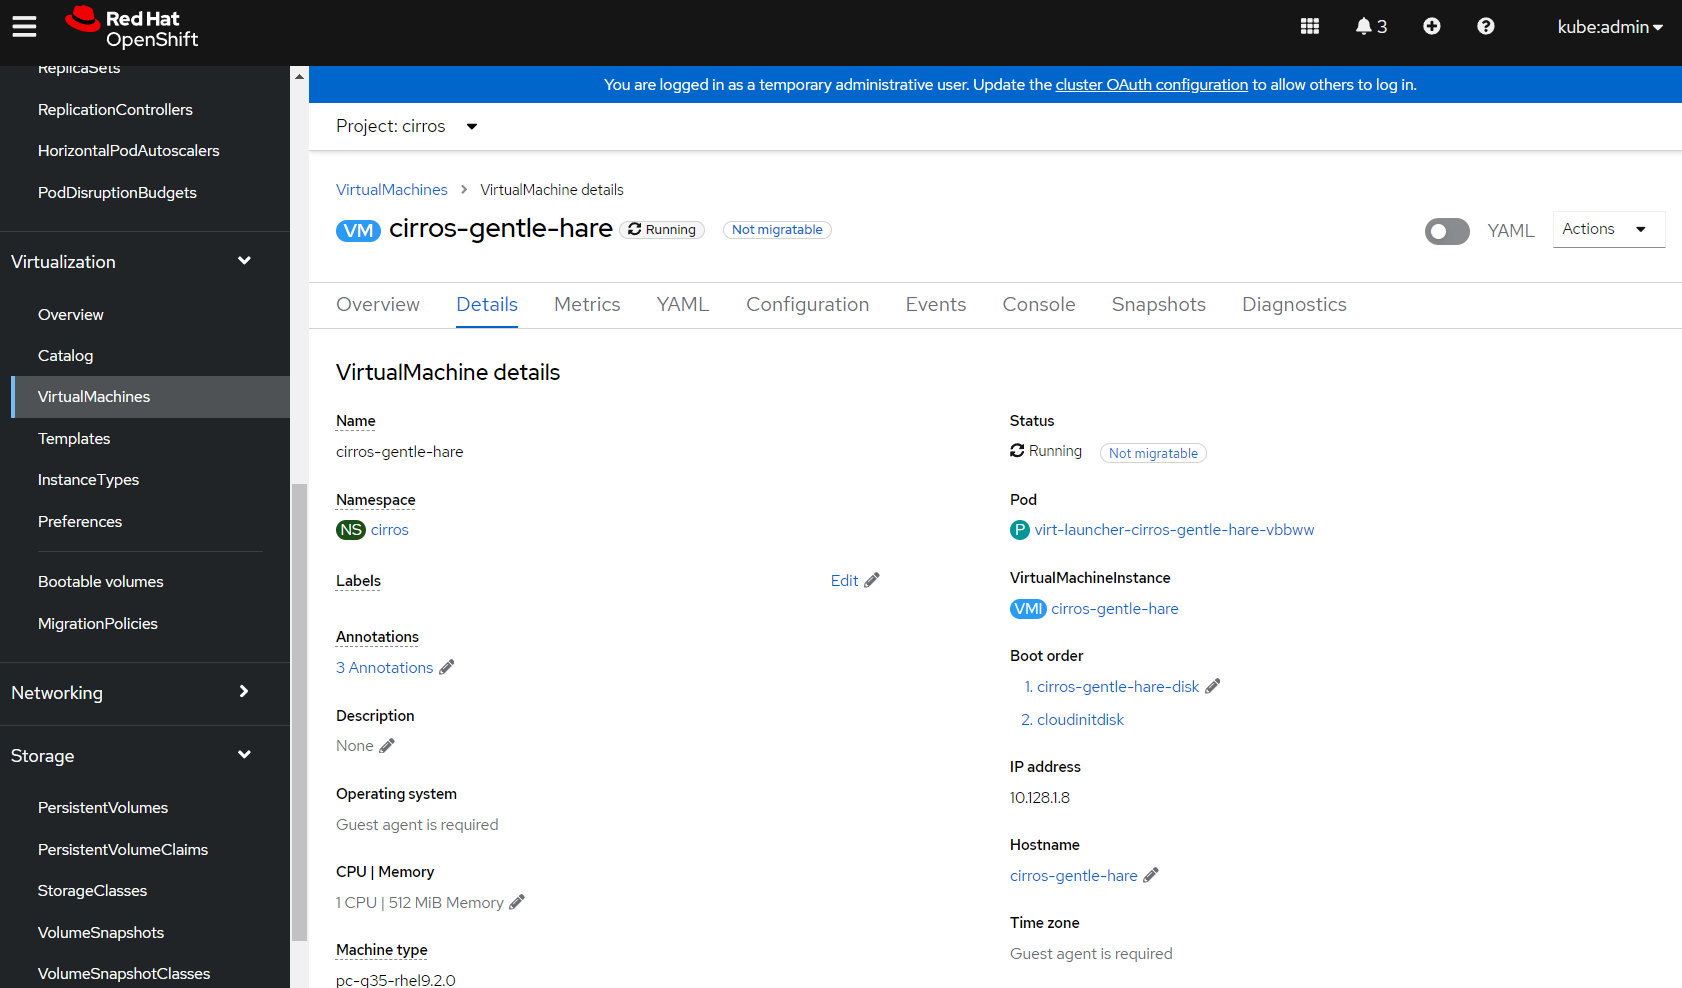

Note that I need to change the user from fedora to cirros:
$ virtctl -n cirros ssh cirros@cirros-relative-sloth
$ whoami
cirros
Awesome! I've just used the CirrOS image to functionally verify that OpenShift Virtualization has been successfully installed on my R620. Specifically:
- I created a new data volume, verifying that image upload works
- I created a boot volume for the CirrOS image, verifying that I can create custom image volumes
- I created a VM from the boot volume and tested that it provisions successfully, runs, and I can login to it via SSH using
virtctl. I also showed that the VM is running on the OVN-Kubernetes network.
Provisioning a workload
Now that I've verified my OpenShift Virtualization install using CirrOS I can provision something more meaningful. I'm going to provision a PostgreSQL database in a Red Hat Enterprise Linux (RHEL) 9 server, running on OpenShift Virtualization, and then connect to it from a container workload.
This is a diagram of what my application will look like.

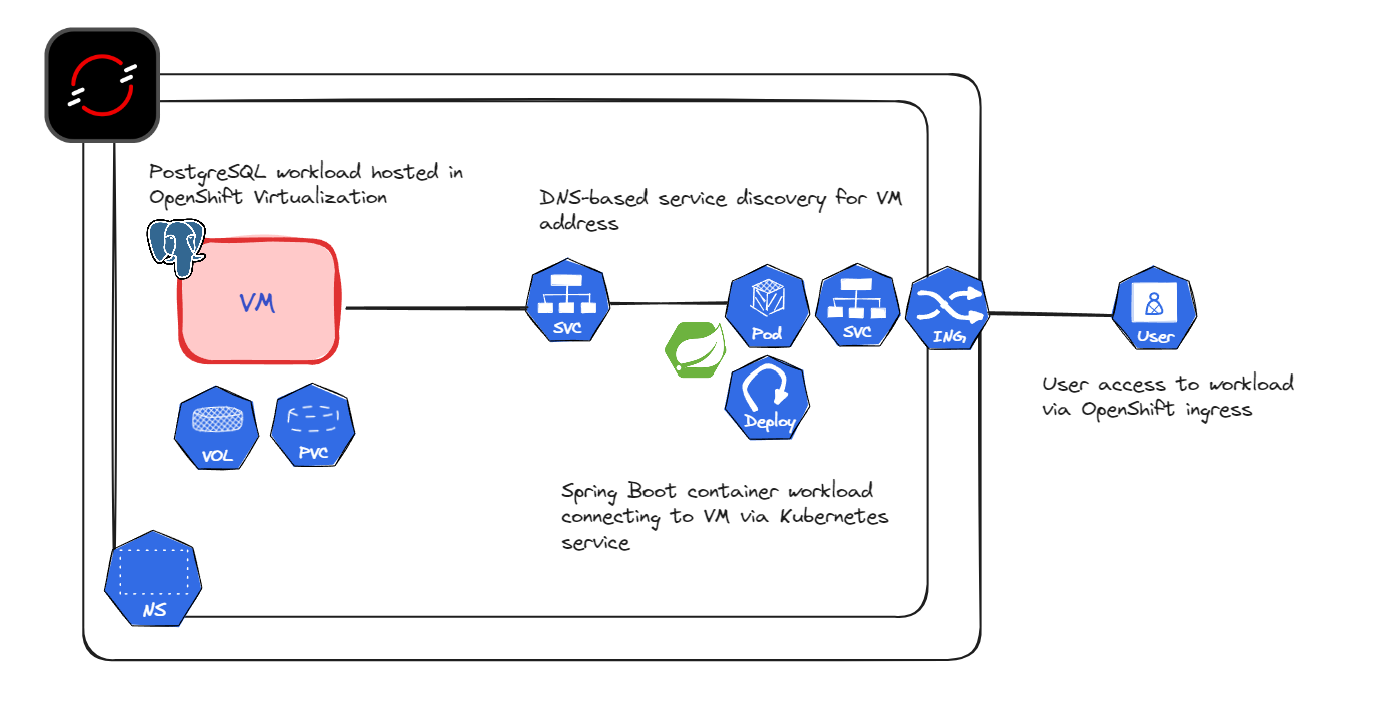
Why would I want to run the database in a virtual machine, and the workload in a container?
One reason is governance. If you work in a highly-regulated industry, you might have backup / compliance tools that will only work in a virtual machine. Regulation wheels turn slowly, and it might not be worth the risk of re-accrediting this solution if it's working and compliant. But, you still want the benefits of declarative, container-based deployments of the application code, and managing everything through a single control plane.
Provisioning a RHEL 9 PostgreSQL database on OpenShift Virtualization
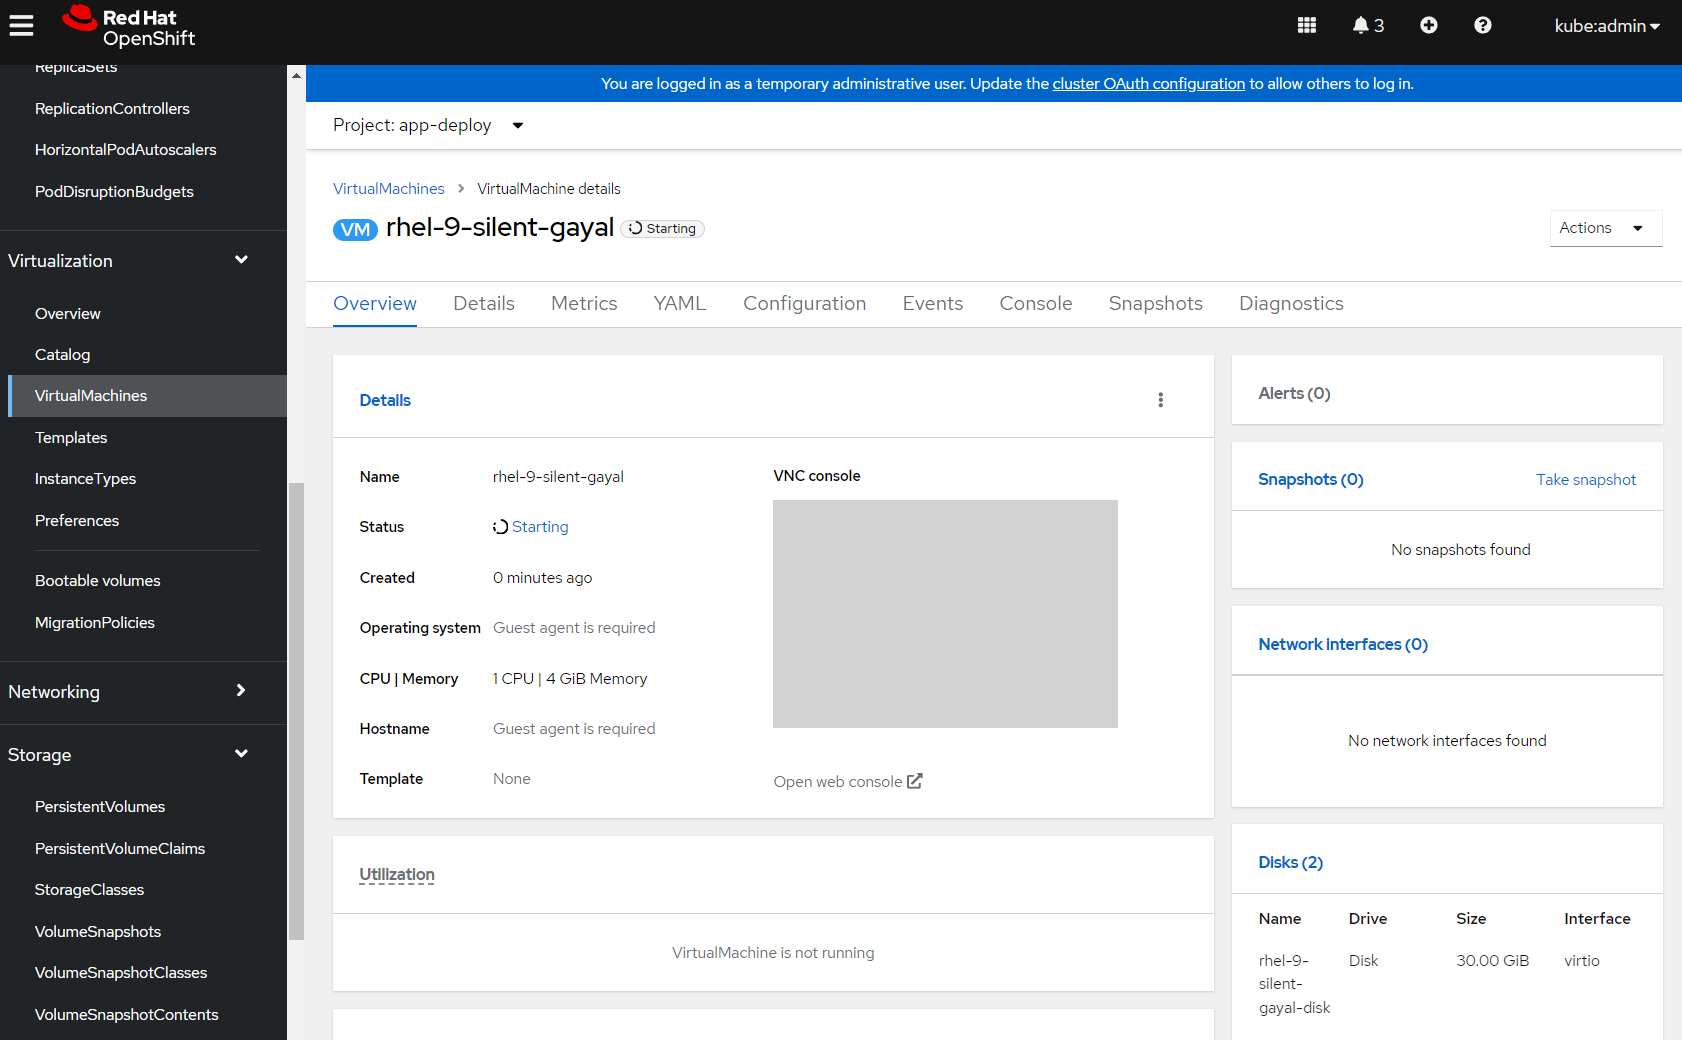
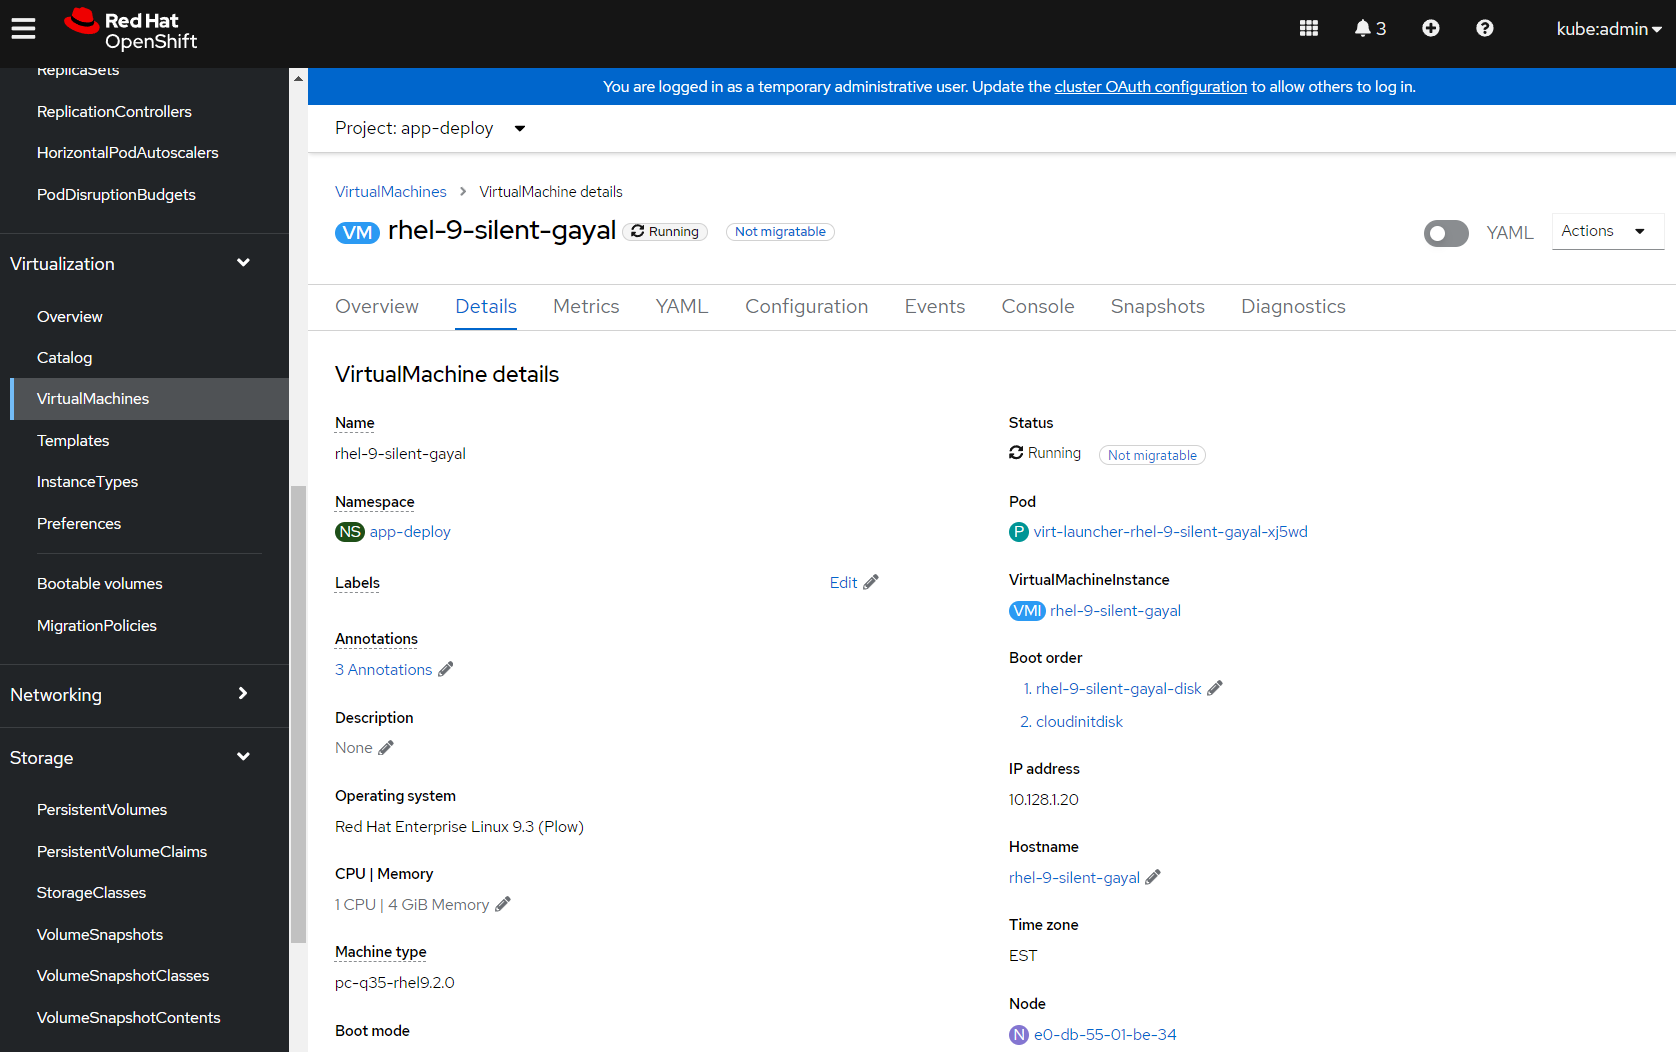
I'm going to step through the same provisioning process for CirrOS to create the database VM, but select a RHEL 9 bootable volume instead. Once the VM is up and running I'm going to copy the virtctl command like I did for the CirrOS test workload.


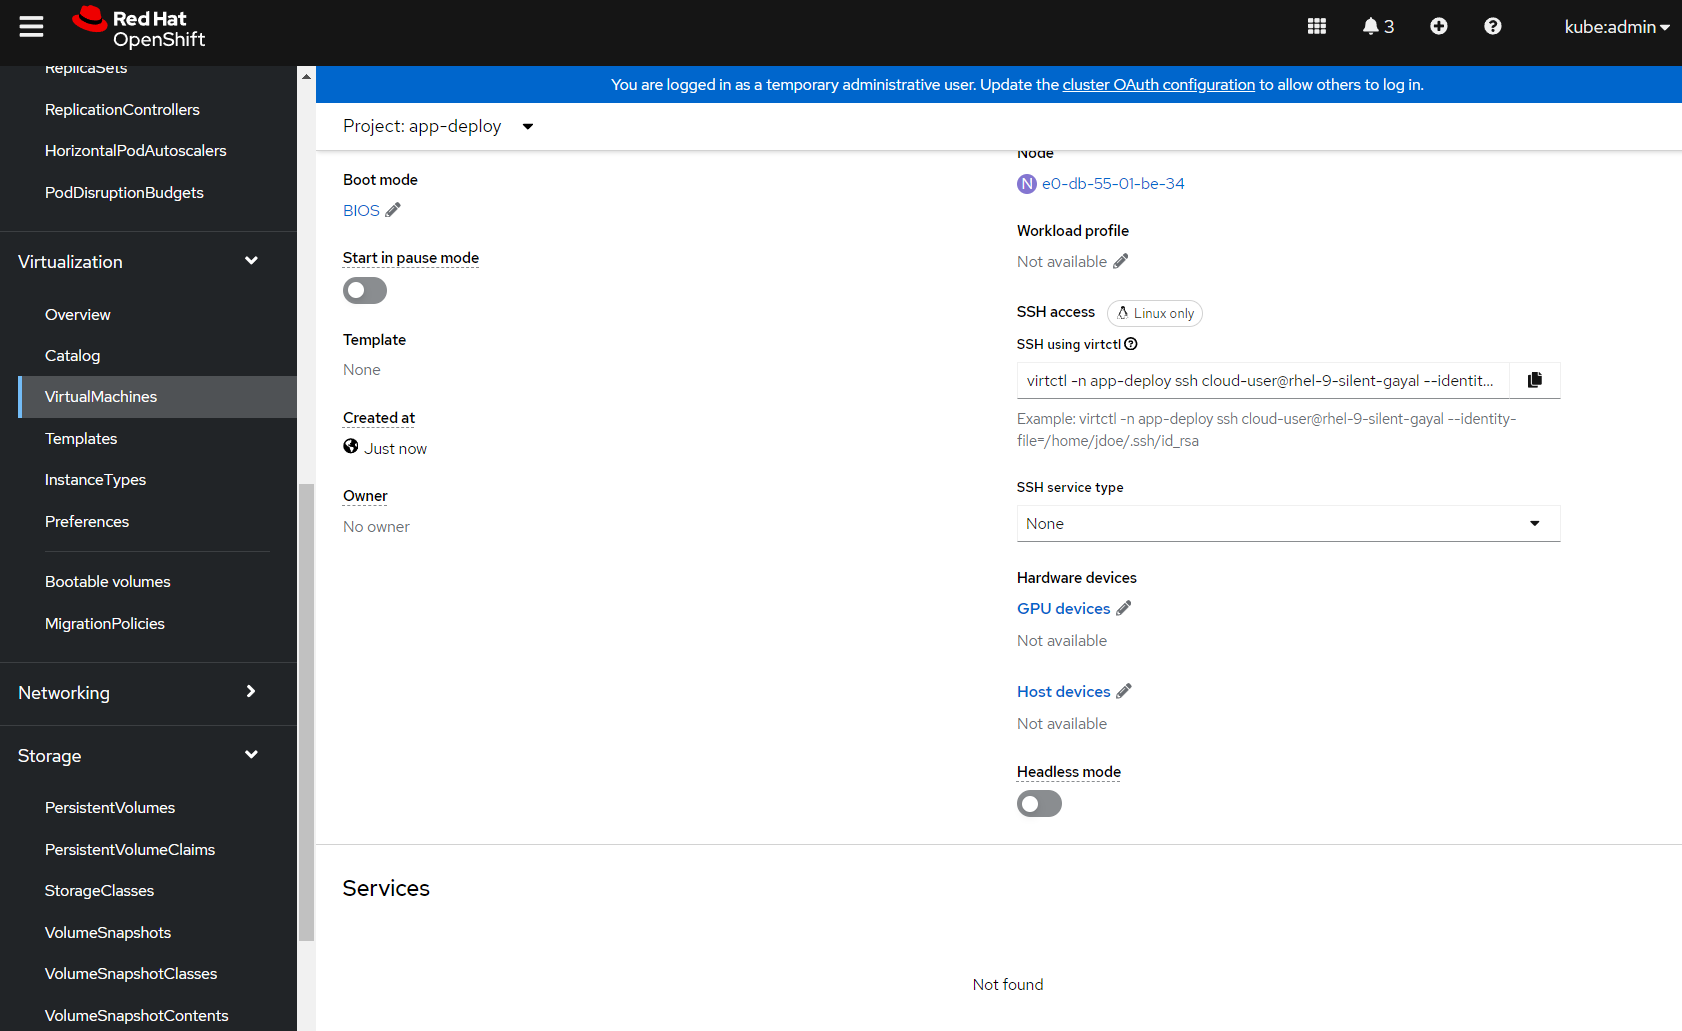
$ virtctl -n app-deploy ssh cloud-user@rhel-9-silent-gayal
Register this system with Red Hat Insights: insights-client --register
Create an account or view all your systems at https://red.ht/insights-dashboard
[cloud-user@rhel-9-silent-gayal ~]$
I can then register my server and start the PostgreSQL install:
sudo -i
# subscription-manager register
Registering to: subscription.rhsm.redhat.com:443/subscription
...
The system has been registered with ID: a71519af-5134-49eb-a5e8-3cf4b8f2be8b
The registered system name is: rhel-9-silent-gayal
Install PostgreSQL via the dnf module.
dnf module install -y postgresql:15/server
Initialise PostgreSQL.
postgresql-setup --initdb
Update /var/lib/pgsql/data/postgres.conf:
password_encryption = scram-sha-256
listen_addresses = '*'
Update /var/lib/pgsql/data/pg_hba.conf:
host    all             all             127.0.0.1/32            scram-sha-256
host    all             all             0.0.0.0/0               scram-sha-256
Start and enable postgresql
systemctl enable postgresql --now
Login
su - postgres
psql
Create the database user
postgres=# CREATE USER user1 WITH PASSWORD 'pass123' CREATEROLE CREATEDB;
Create the mydb database:
psql -U user1 -h 127.0.0.1 -d postgres
postgres=> CREATE DATABASE mydb;
\q
Test the connection
# psql -U user1 -h 127.0.0.1 -d mydb
mydb=>
Exposing the VM internally
I also need to create a service exposing the PostgreSQL ports from the VM running in OpenShift Virtualization. The easiest way to do this is simply using the VM name, though you might like to label multiple VMs and use the Kubernetes service to reverse-proxy them:
$  oc create -n app-deploy -f - << EOF
apiVersion: v1
kind: Service
metadata:
  name: postgres-vmi
spec:
  selector:
    vm.kubevirt.io/name: rhel-9-silent-gayal
  type: ClusterIP
  ports:
    - protocol: TCP
      port: 5432
      targetPort: 5432
EOF
Provisioning a container workload (that connects to the VM database)
Great! Now we have a PostgreSQL database running in a VM on OpenShift (via OpenShift Virtualization). The next step is creating a workload to connect into the database.
Before we deploy the workload I need to bust a few myths. Many people think that clouds run on Linux.


But, the real truth is that clouds run on coffee. Lots, and lots, of coffee. So much coffee that when I was supporting a team building OpenStack-based clouds we needed a way to track everyone's coffee consumption, and track payments. And Coffee Pickles was born!


Coffee Pickles is a (pretty old) Spring Boot app containerised in the Red Hat Universal Base Image (UBI). It stores state about how many coffees a user has consumed and payments made in a PostgreSQL database.
Our team also wanted some business rules around coffee consumption. We were using our own Nespresso machine, and decided that we wanted every X coffee to be free. But, we should be able to update this business logic easily. It turns out that this was pretty easy to implement with Drools:
package drools

import com.rock.coffeepickles.domain.Customer
import com.rock.coffeepickles.domain.Coffee
import java.math.BigDecimal

rule "Normally coffee costs $1.50"

    when
        $user: Customer()
        eval((($user.getNumCoffees()+1) % 5 )!=0)
    then
        insertLogical(new Coffee(new BigDecimal("1.50"),$user));
end

rule "Every fifth coffee is free"

    when
        $user: Customer ()
        eval((($user.getNumCoffees()+1) % 5 )==0)
    then
        insertLogical(new Coffee(new BigDecimal("0.00"),$user));
end

query "getCoffeeObjects"
    $result: Coffee()
end
Using Drools meant that we had a simple, domain-specific language to describe business rules around coffee consumption, and the changes were recorded in the application code-base. Great!
Deploying Coffee Pickles
The first thing I need to deploy Coffee Pickle is a secret hosting credentials for the PostgreSQL database.
oc create secret -n app-deploy generic --from-literal=psql-user=user1 --from-literal=psql-pass=pass123 psql-credentials
Now we can create a configmap holding the hostname (service) and database name:
$ oc create -n app-deploy -f - << EOF
apiVersion: v1
kind: ConfigMap
metadata:
    name: postgres-configmap
data:
    postgres-host: postgres-vmi
    postgres-dbname: mydb
EOF
And now I can create the deployment:
apiVersion: apps/v1
kind: Deployment
metadata:
  name: coffee-pickles
  namespace: app-deploy
  labels:
    app: coffee-pickles
spec:
  replicas: 1
  selector:
    matchLabels:
      app: coffee-pickles
  template:
    metadata:
      labels:
        app: coffee-pickles
    spec:
      containers:
      - name: coffee-pickles
        image: quay.io/smileyfritz/coffee-pickles:v0.10
        ports:
        - containerPort: 8080
        env:
        - name: PSQL_USER
          valueFrom:
            secretKeyRef:
              name: psql-credentials
              key: psql-user
        - name: PSQL_PASS
          valueFrom:
            secretKeyRef:
              name: psql-credentials
              key: psql-pass
        - name: PSQL_HOST
          valueFrom:
            configMapKeyRef:
              name: postgres-configmap
              key: postgres-host
        - name: PSQL_DATABASE
          valueFrom:
            configMapKeyRef:
              name: postgres-configmap
              key: postgres-dbname
Once the application is up and running I'm going to expose it via an OpenShift service and route.
$ oc expose deploy/coffee-pickles --name coffee-svc --port 8080
$ oc expose svc/coffee-svc

$ oc get routes
NAME         HOST/PORT                                                 PATH   SERVICES     PORT   TERMINATION   WILDCARD
coffee-svc   coffee-svc-app-deploy.apps.lab.openshift.blueradish.net          coffee-svc   8080                 None
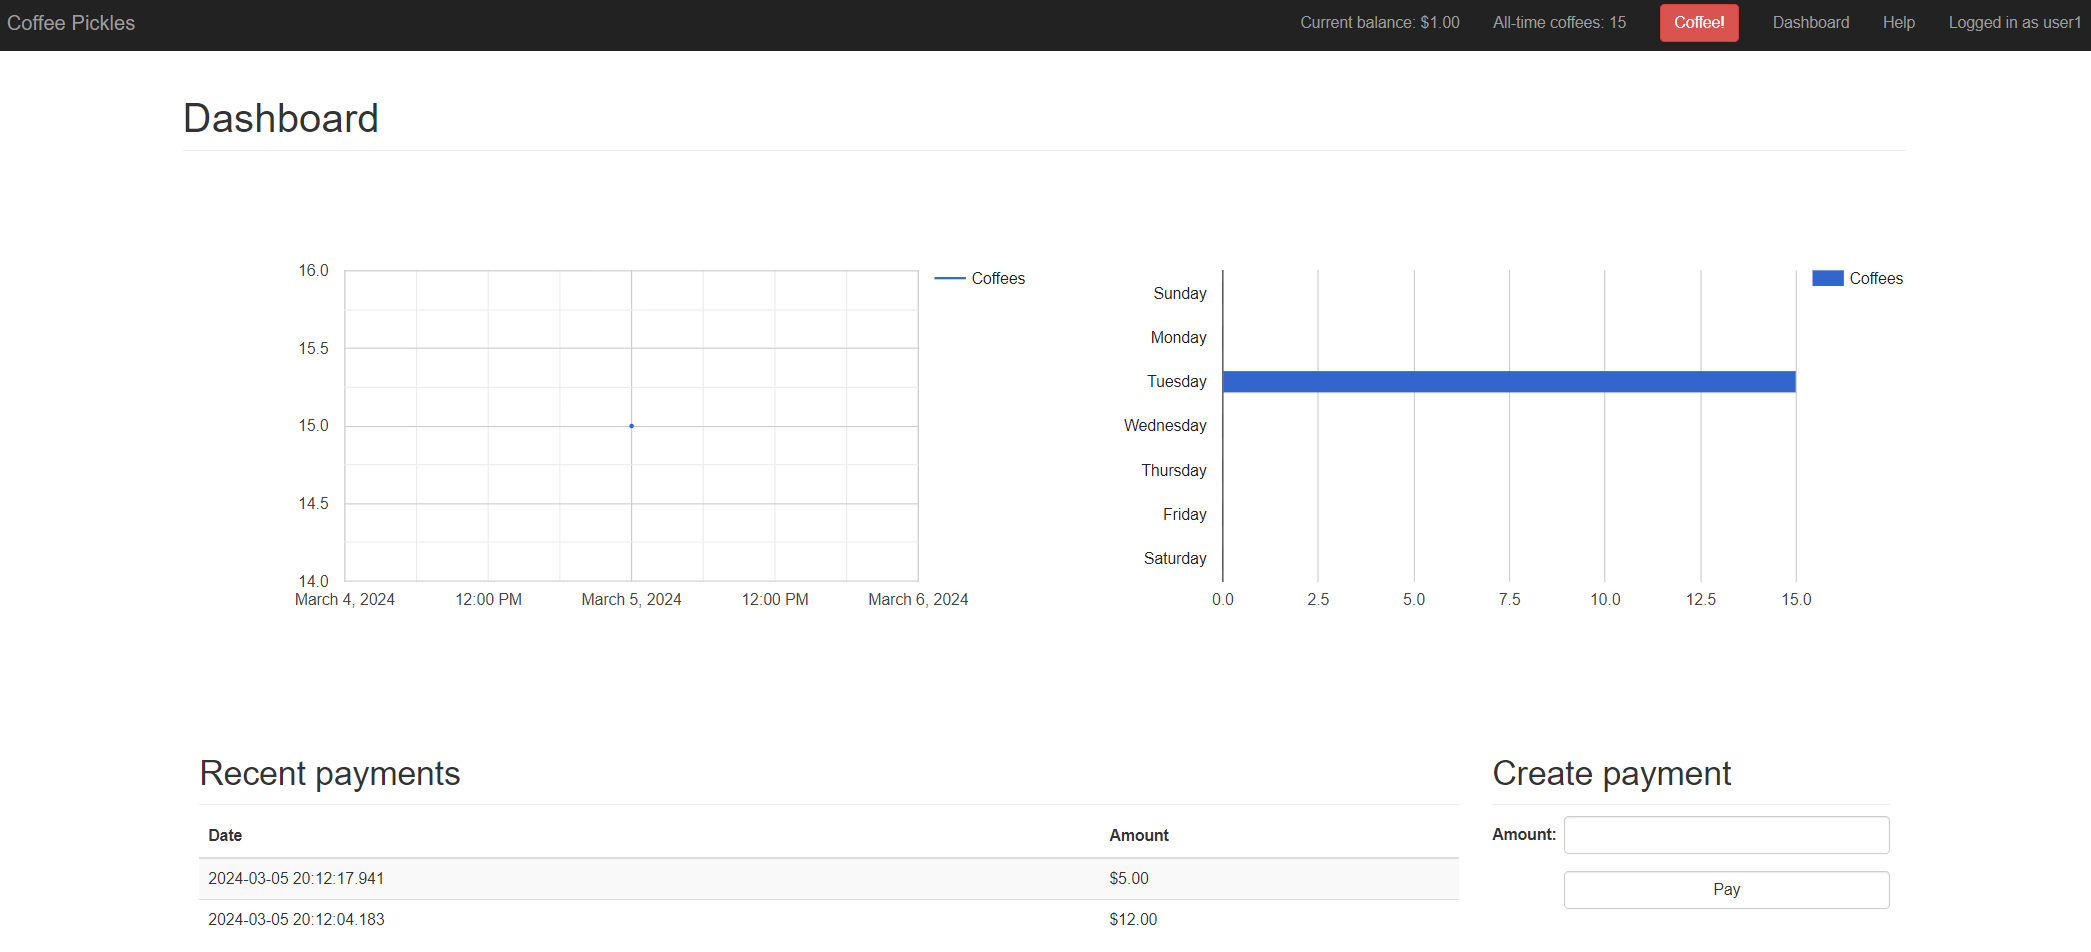
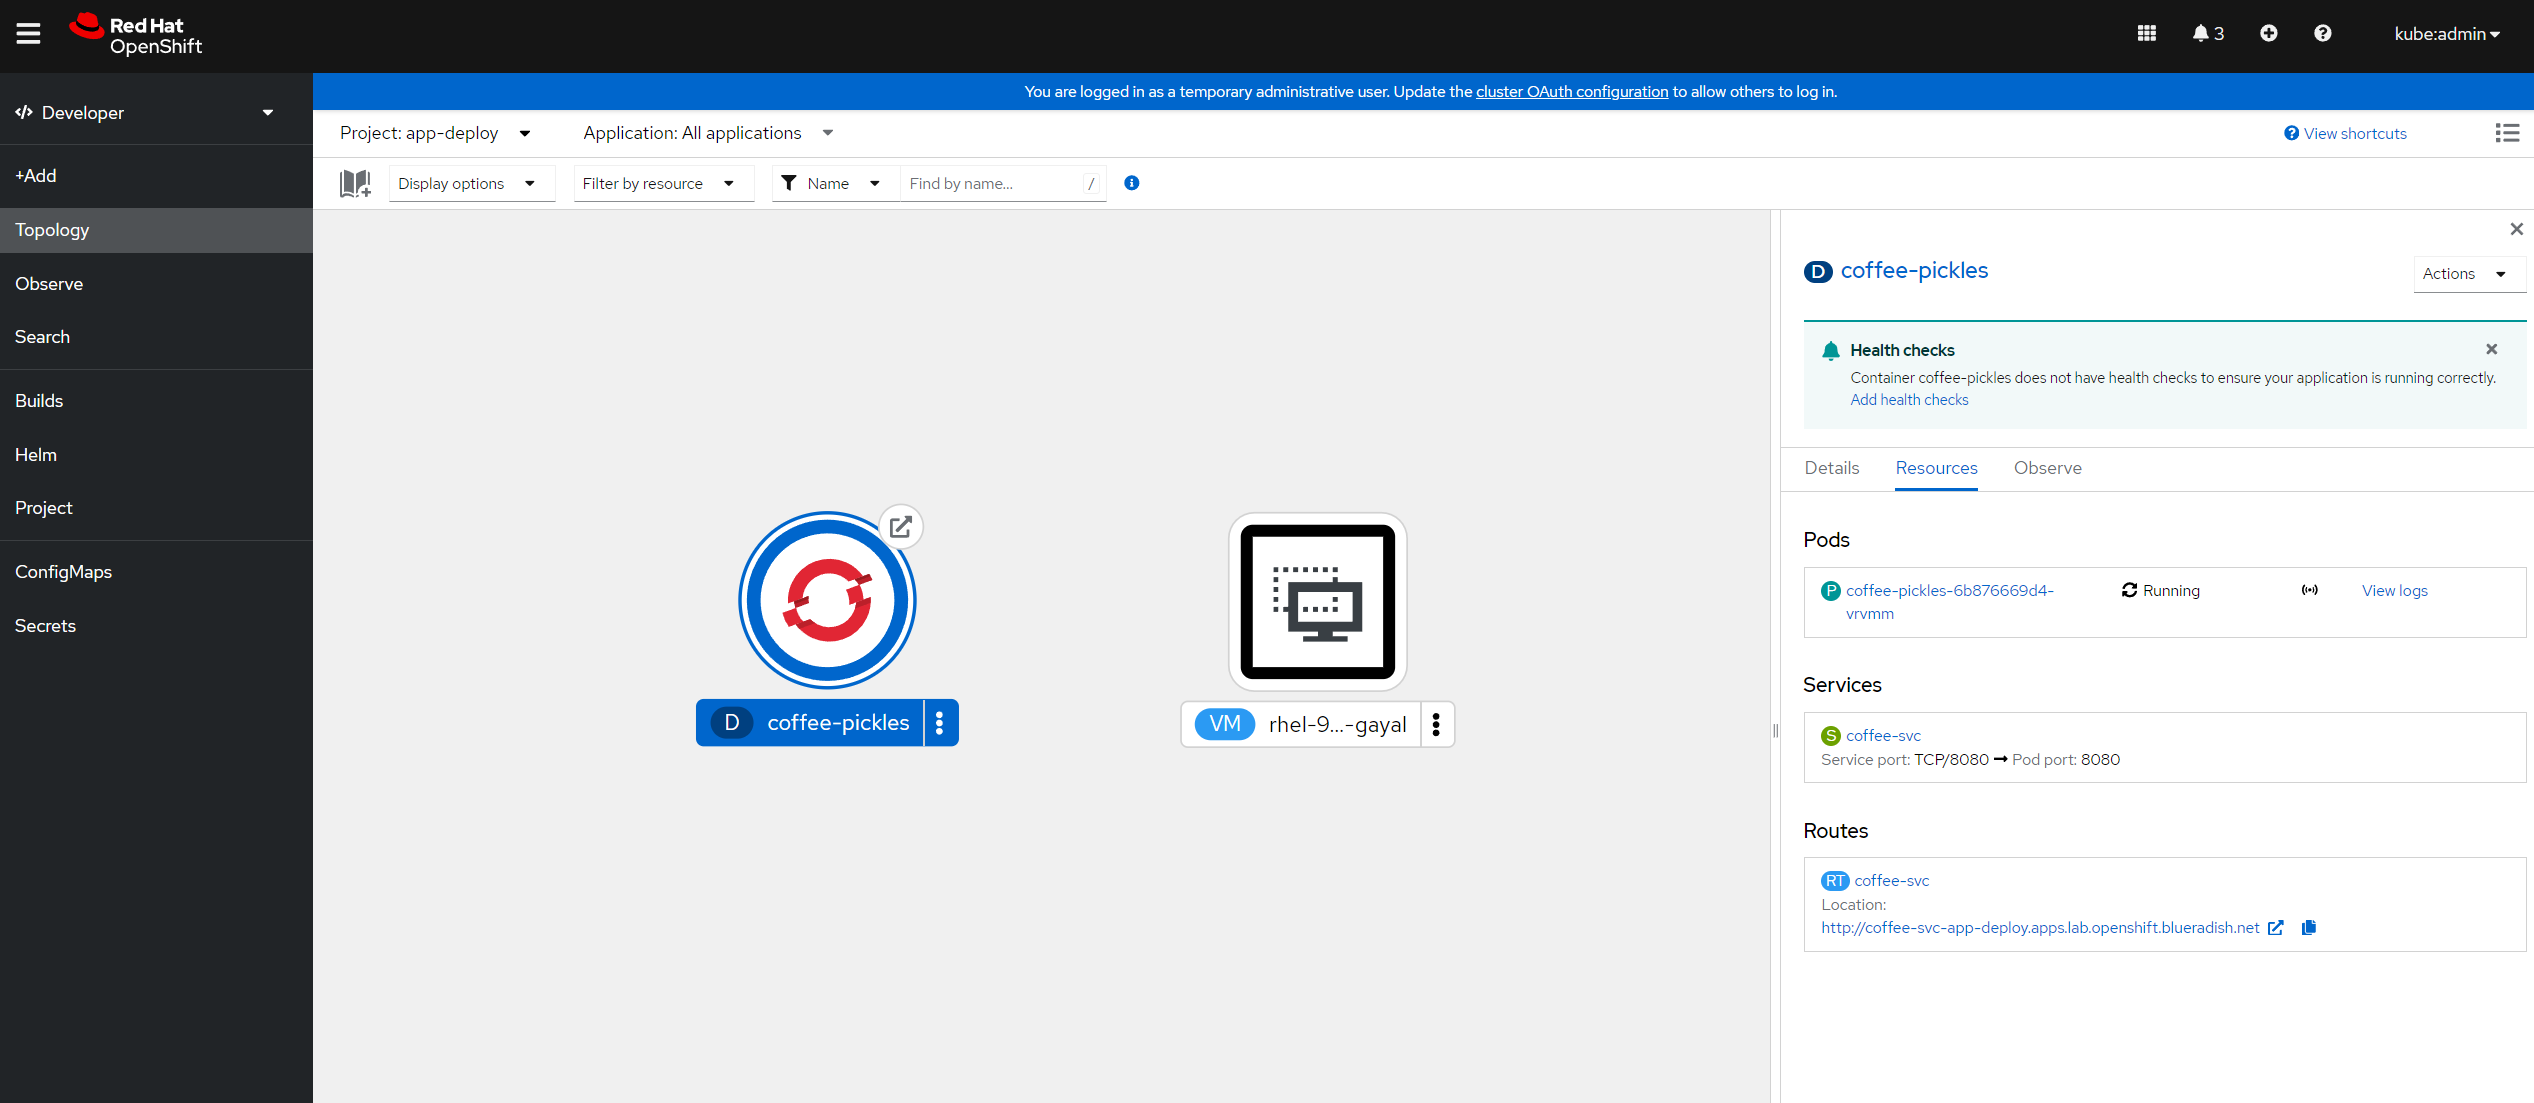
If I navigate to the route I can see that my Coffee Pickles application is up and running, and happily connected to the PostgreSQL database via the Kubernetes service.

I can check that everything is connected in the application logs in OpenShift:
  .   ____          _            __ _ _
 /\\ / ___'_ __ _ _(_)_ __  __ _ \ \ \ \
( ( )\___ | '_ | '_| | '_ \/ _` | \ \ \ \
 \\/  ___)| |_)| | | | | || (_| |  ) ) ) )
  '  |____| .__|_| |_|_| |_\__, | / / / /
 =========|_|==============|___/=/_/_/_/
 :: Spring Boot ::        (v1.5.4.RELEASE)

2024-03-05 20:25:00.708  INFO 1 --- [           main] c.r.c.web.CoffeepicklesApplication       : Starting CoffeepicklesApplication v0.0.1-SNAPSHOT on coffee-pickles-6b876669d4-vrvmm with PID 1 (/opt/app.jar started by 1000770000 in /home/default)
...
2024-03-05 20:25:16.467  INFO 1 --- [           main] j.LocalContainerEntityManagerFactoryBean : Building JPA container EntityManagerFactory for persistence unit 'default'
...
2024-03-05 20:25:17.462  INFO 1 --- [           main] org.hibernate.dialect.Dialect            : HHH000400: Using dialect: org.hibernate.dialect.PostgreSQLDialect
...
2024-03-05 20:25:29.023  INFO 1 --- [           main] s.b.c.e.t.TomcatEmbeddedServletContainer : Tomcat started on port(s): 8080 (http)
2024-03-05 20:25:29.032  INFO 1 --- [           main] c.r.c.web.CoffeepicklesApplication       : Started CoffeepicklesApplication in 29.617 seconds (JVM running for 38.27)
And if I SSH to the PostgreSQL database (running in OpenShift Virtualization) I can see that data is being persisted:
$ virtctl -n app-deploy ssh cloud-user@rhel-9-silent-gayal
[cloud-user@rhel-9-silent-gayal ~]$ sudo -i
[root@rhel-9-silent-gayal ~]# su - postgres
[postgres@rhel-9-silent-gayal ~]$ psql -U user1 -h 127.0.0.1 -d mydb

psql (15.6)
Type "help" for help.

mydb=> select * from coffee;
 id |          date           | price | user_id
----+-------------------------+-------+---------
  2 | 2024-03-05 19:59:25.398 |  1.50 |       1
  3 | 2024-03-05 19:59:27.088 |  1.50 |       1
  4 | 2024-03-05 19:59:28.355 |  1.50 |       1
  5 | 2024-03-05 19:59:29.187 |  1.50 |       1
  6 | 2024-03-05 19:59:29.881 |  0.00 |       1
...
(15 rows)

mydb=> select * from payment;
 id | amount |          date           | user_id
----+--------+-------------------------+---------
 12 |  12.00 | 2024-03-05 20:12:04.183 |       1
 16 |   5.00 | 2024-03-05 20:12:17.941 |       1
(2 rows)
I can also see that the Drools business logic is being reflected in the database - every fifth coffee for a user is free!
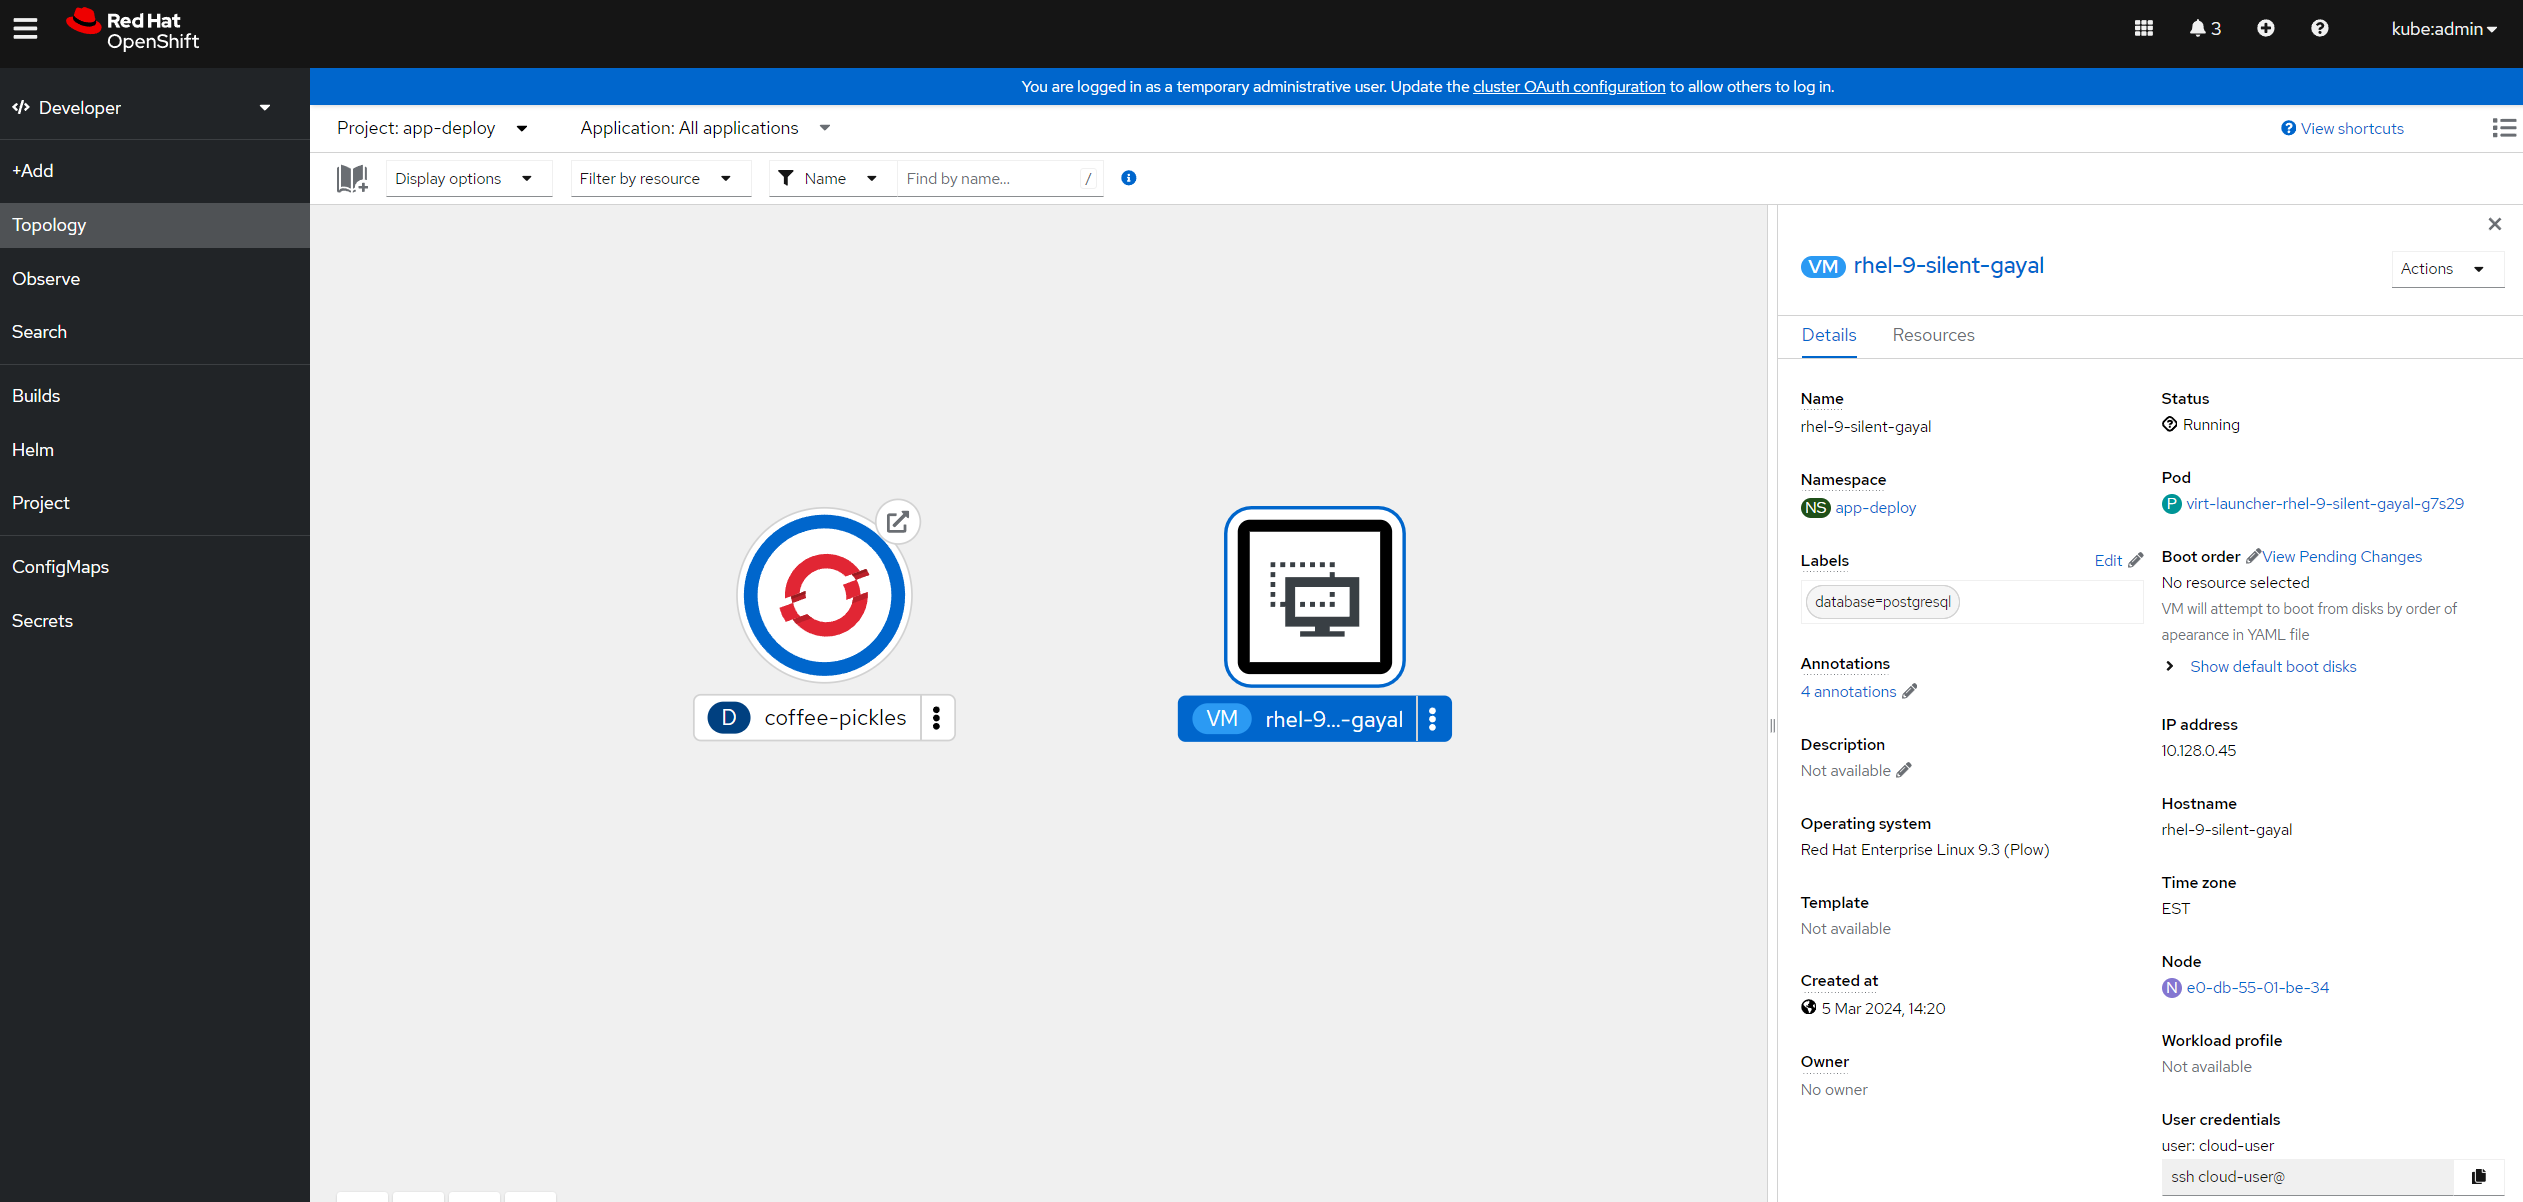
If I open the OpenShift topology I can see the application architecture reflected.


Wrapping up
In this article I looked at how I've configured OpenShift Virtualization in my home lab. This allows me to deploy and manage containers and virtual machines on a single server, using the Kubernetes API, and bringing the benefits of declarative resource management to VMs.
If you missed the previous article on how I installed OpenShift and OpenShift Virtualization on bare metal, you can find it here.
In this next few articles I'll explore:
- Getting started with Red Hat Advanced Cluster Security for Kubernetes (RHACS)
- Configuring Keycloak and phishing-resistant multi-factor authentication for my OpenShift lab
Stay tuned!