- Published on
- // 9 min read
OpenShift on an R620
- Authors
- Name
- Shane Boulden
- @shaneboulden


I think that the home lab is the cornerstone of a technology professional. It's where we hone our skills learning new technologies, try out new ways of working, and importantly, it provides an amazing training ground for network security and change management.


I've run OpenShift in a lot of virtualised environments now. Recently though, I wanted to deep-dive into OpenShift Virtualization, and nested virt wasn't going to cut it. I needed metal!
As always, a few AI-generated memes related to this article. The prompt for these was "Can you create a a meme for me based on the fact 'I need metal' in my home lab, contrasting heavy metal bands and my bare-metal server?". I think they're getting better?


I considered a few options for OpenShift Virtualization. Initially I looked into a CPU upgrade for my workstation, and OpenShift Local. I figured I needed at least 24 virtual CPU (12 hyper-threaded cores) for OpenShift and OpenShift Virtualization, and my current workstation has a single socket. This really limited my options - I could start looking at the Ryzen 9 5900X or 7900X, though these CPUs are $500-900 alone in Australia, and I'd likely need a cooling / motherboard upgrade also.
Then I found the "op shop bargain" equivalent for data centres - second-hand R620s! An IT firm in Melbourne (Australia) was selling Dell Poweredge R620s from 2012, for less than $300 (AUD). So, I could get a single CPU for $500, or:
- A complete server with 2 x redundant 750W power supplies
- Two 8-core hyperthreaded Intel E5-2650 CPUs, meaning 32 usable virtual CPUs for OpenShift
- Truckloads of RAM - you can get a Poweredge R620 with 192GB RAM for $299 AUD!
- Four NICs
- HDDs included
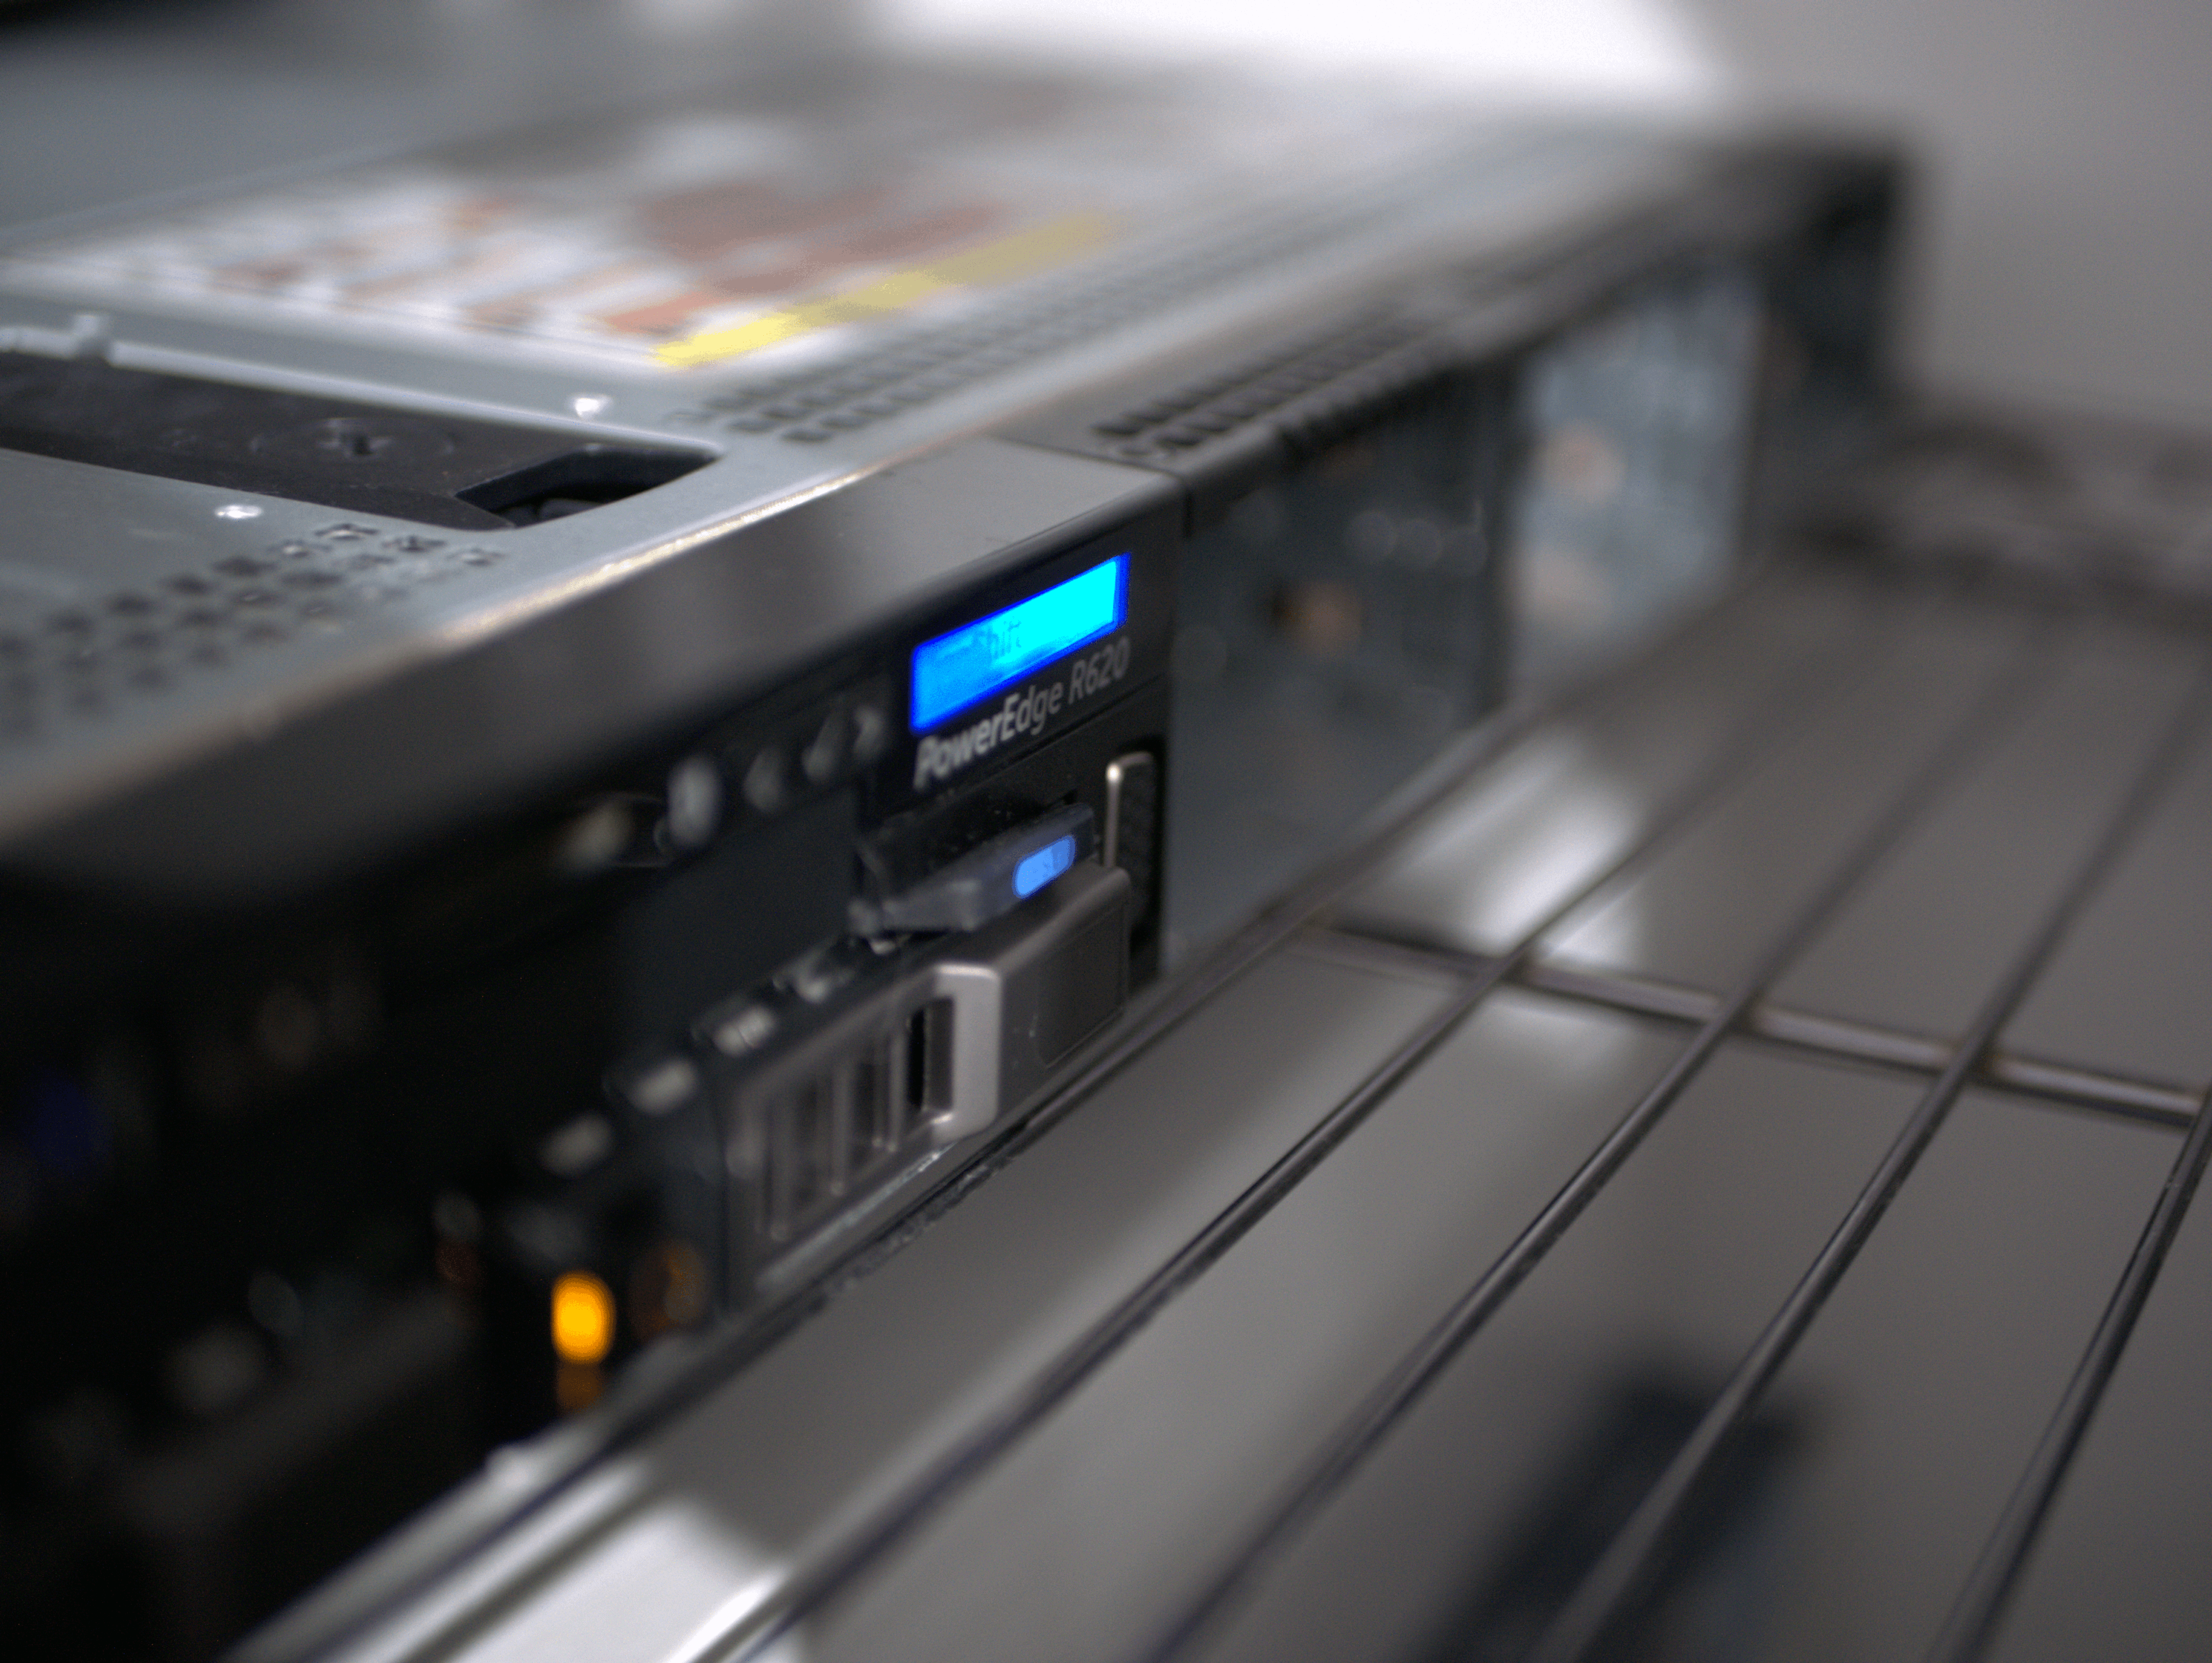
This was a no-brainer - I ordered it immediately! Here it is sitting on the Bunnings shelf in my 'car hole'.

In this article I'll look a bit closer at the R620 as a home-lab OpenShift server and how I've provisioned single-node OpenShift via the assisted installer.
A bit more about the R620
The Dell Poweredge R620 was first released in 2012. It's a densely-packed 1U, two-socket rack server that is ideal for virtualised workloads. For me there's a few aspects of the R620 that make it ideal for a home lab OpenShift deployment:
Minimal power consumption. With single-node OpenShift deployed, my environment consumes 100-150W. Power averages 30c/kwH in Australia, so the cost to run this server is about 70c/day for 24/7 workloads.
Small profile. I don't really want a server consuming my entire garage, and the R620 takes up minimal space on a hardware shelf.
Packed with cores. 32 vCPU is more than enough for single node OpenShift and a few workloads. Currently my cluster consumes 7 vCPU (of 32), despite running OpenShift Virtualization and Red Hat Advanced Cluster Security for Kubernetes (RHACS) (both Central and Secured Cluster Services)
Simple to provision. This particular R620 came with a PERC 710 RAID controller, making it simple to provision disks and expose them to the OpenShift assisted installer.
The R620 isn't certified for OpenShift, meaning you really shouldn't run production workloads on it. But, it makes for a fantastic home lab device to dive into OpenShift, and explore supporting capabilities like Red Hat Advanced Cluster Security for Kubernetes (RHACS).
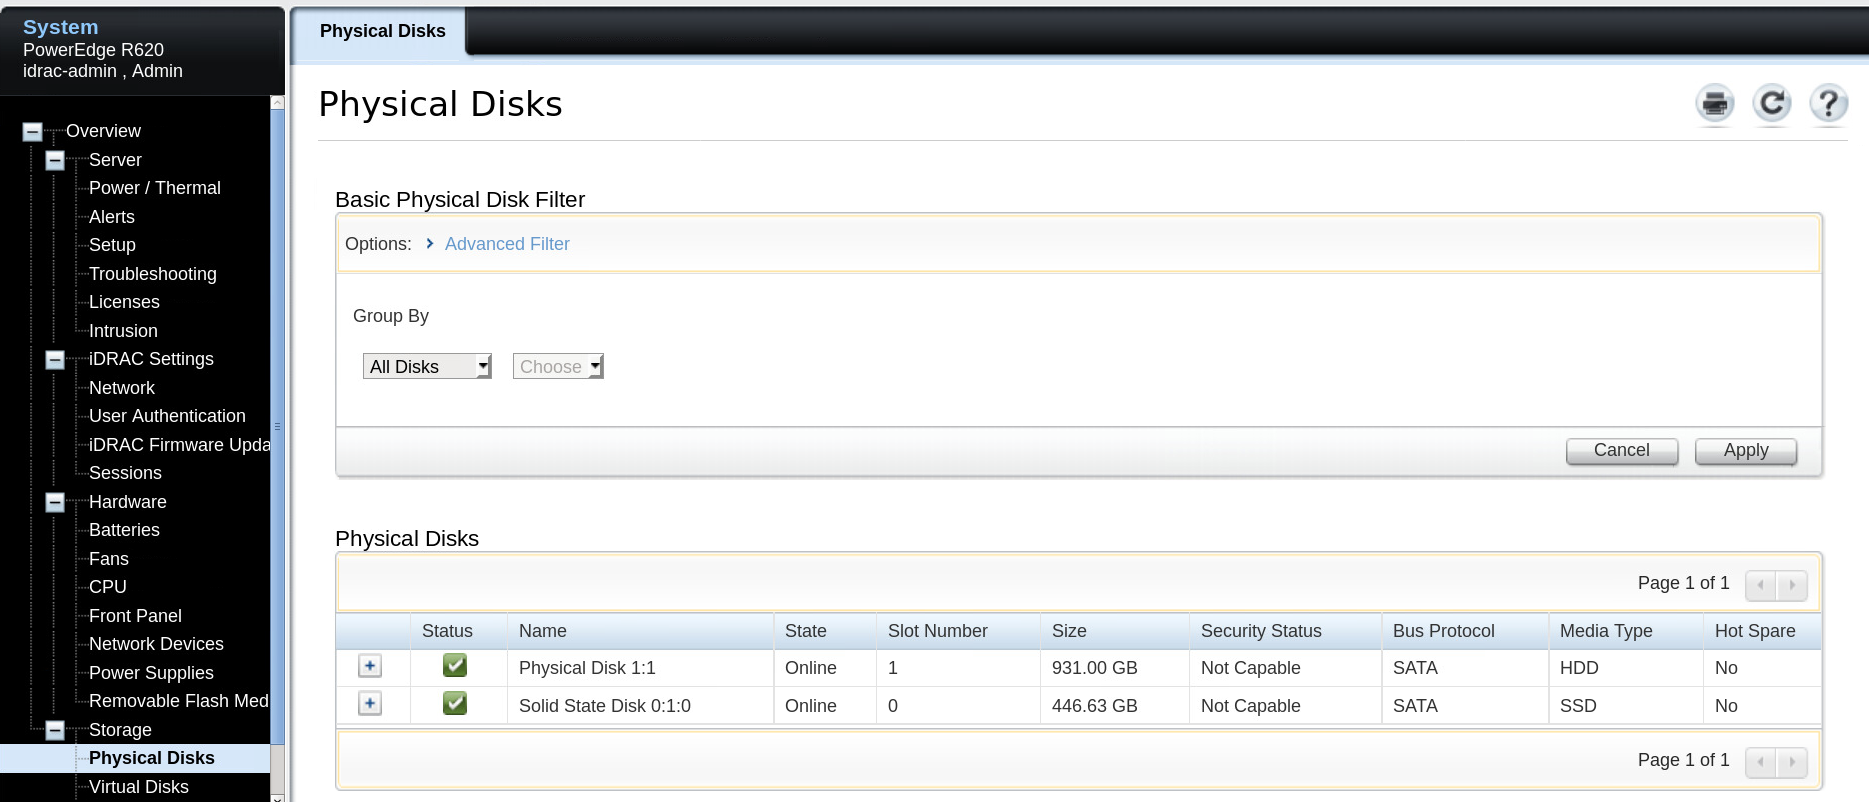
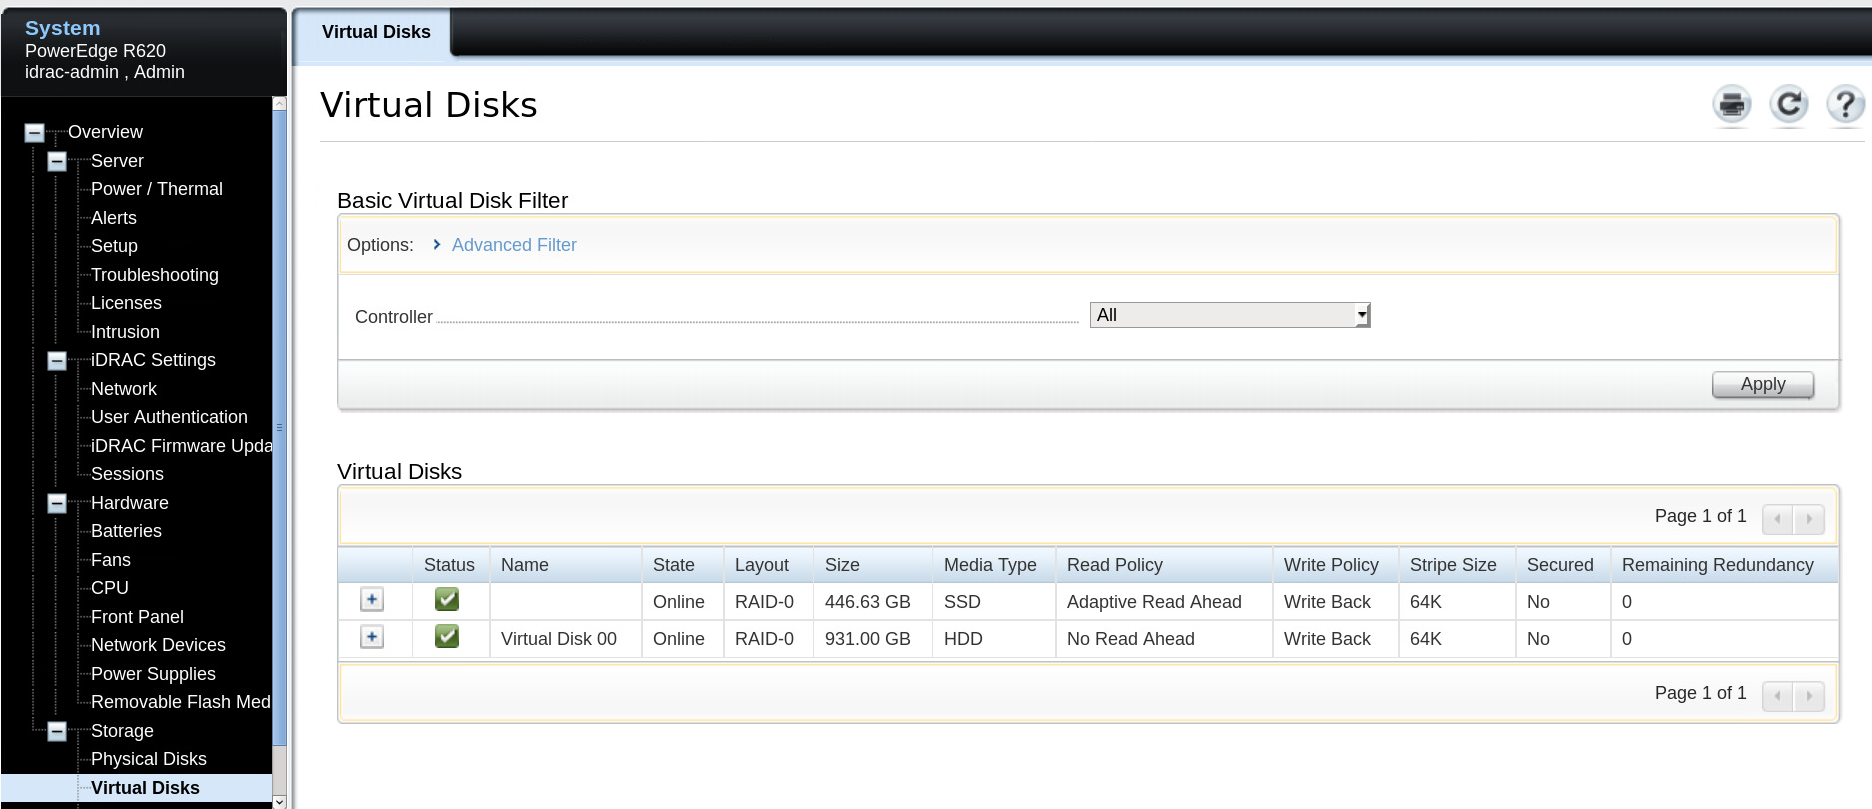
Disk configuration
For OpenShift you'll need at least one SSD. This is mainly for etcd and the OpenShift API - etcd is sensitive to both disk and network latency, and we need at least an SSD to keep up. Ideally we would use NVMe - but it doesn't look like the R620 supports NVMe (it didn't exist when this server was manufactured).
I've added another disk, which means I can support dynamically provisioned storage via LVM. During installation OpenShift will install the LVM Storage Operator, ensuring that whenever I create a PersistentVolumeClaim (PVC) a new PersistentVolume is immediately provisioned to the host via a LVM volume group, and cleaned up when the PVC is deleted.
Here's the disk config:


Network configuration
I'm not doing anything fancy for this deployment. I'm simply going to create a VLAN, expose it as native on the switch port, and configure the DHCP options for a network boot. Fortunately Unifi OS makes this extremely simple.
Here's a diagram of the network setup I'm using for this OpenShift deployment:

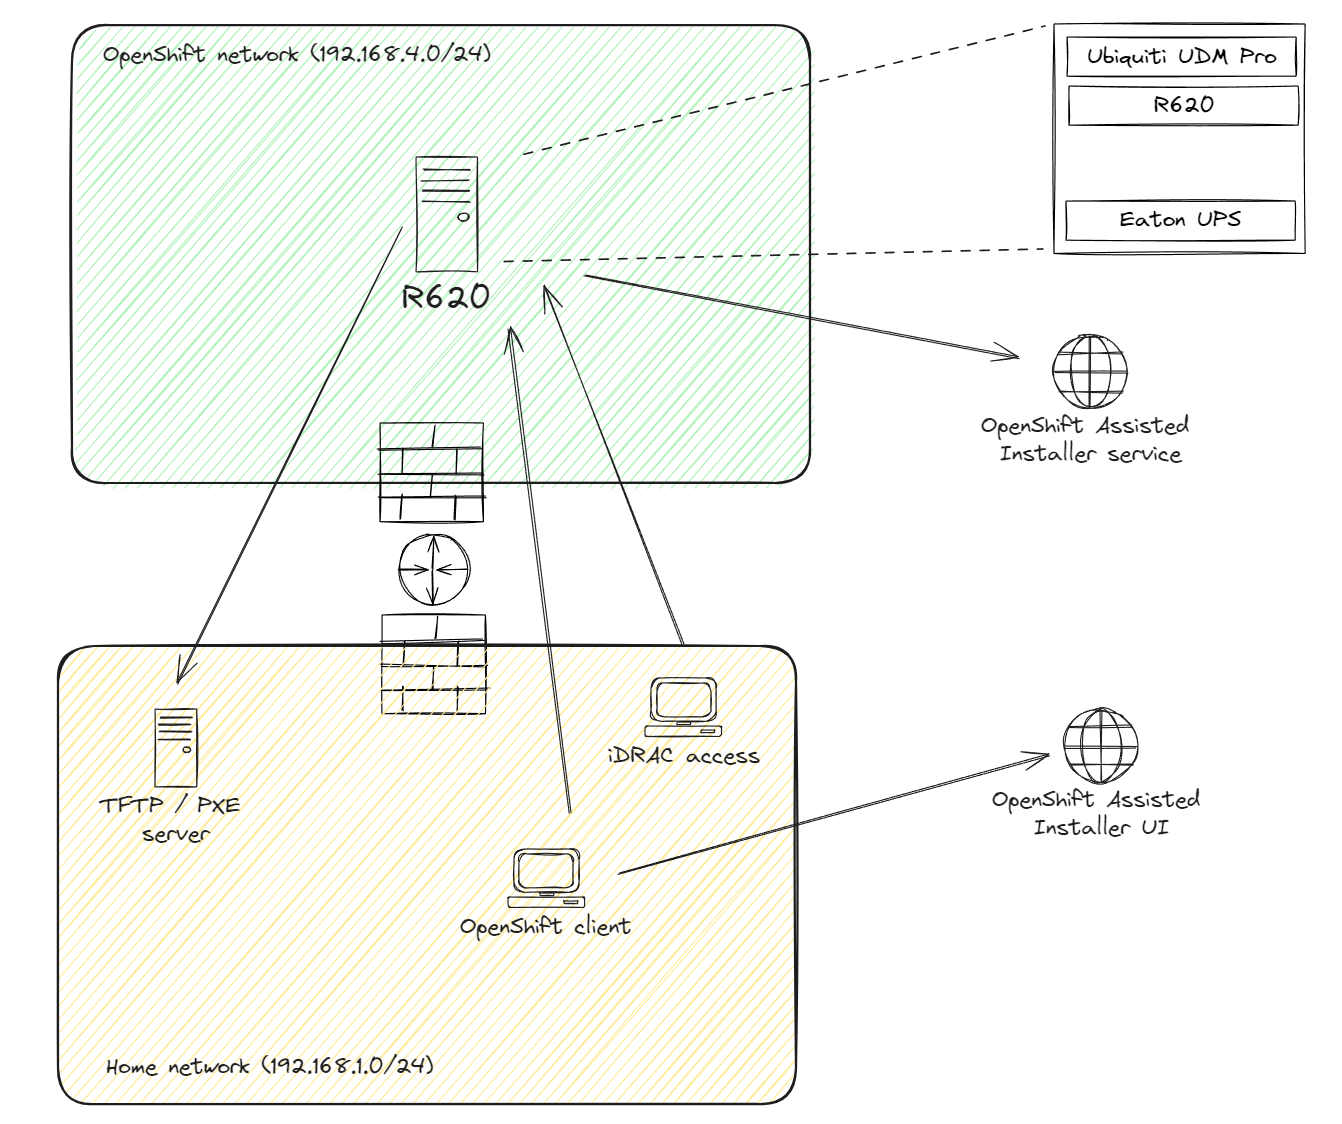
A few things to note here:
- DNS and DHCP are provided by the Ubiquiti Unifi Dream Machine (UDM) Pro.
- The UDM Pro will also configure DHCP boot options to PXE boot the OpenShift Assisted Installer discovery ISO (described below)
- I have a separate VLAN configured via the UDM Pro for use by OpenShift. This is presented as a native VLAN to the R620 interface.
You can see the VLAN configuration here for the UDM Pro:

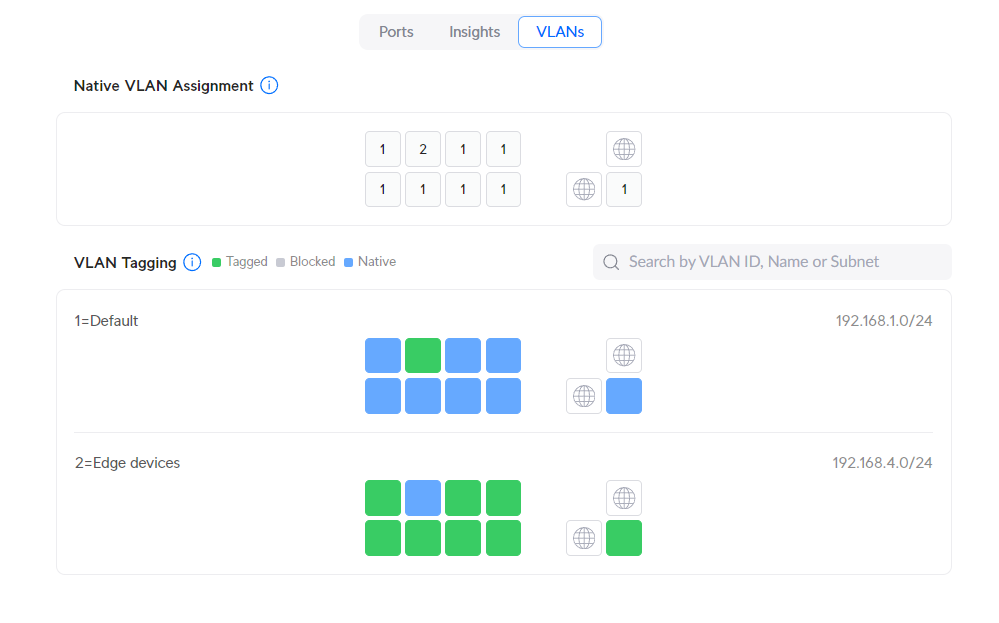

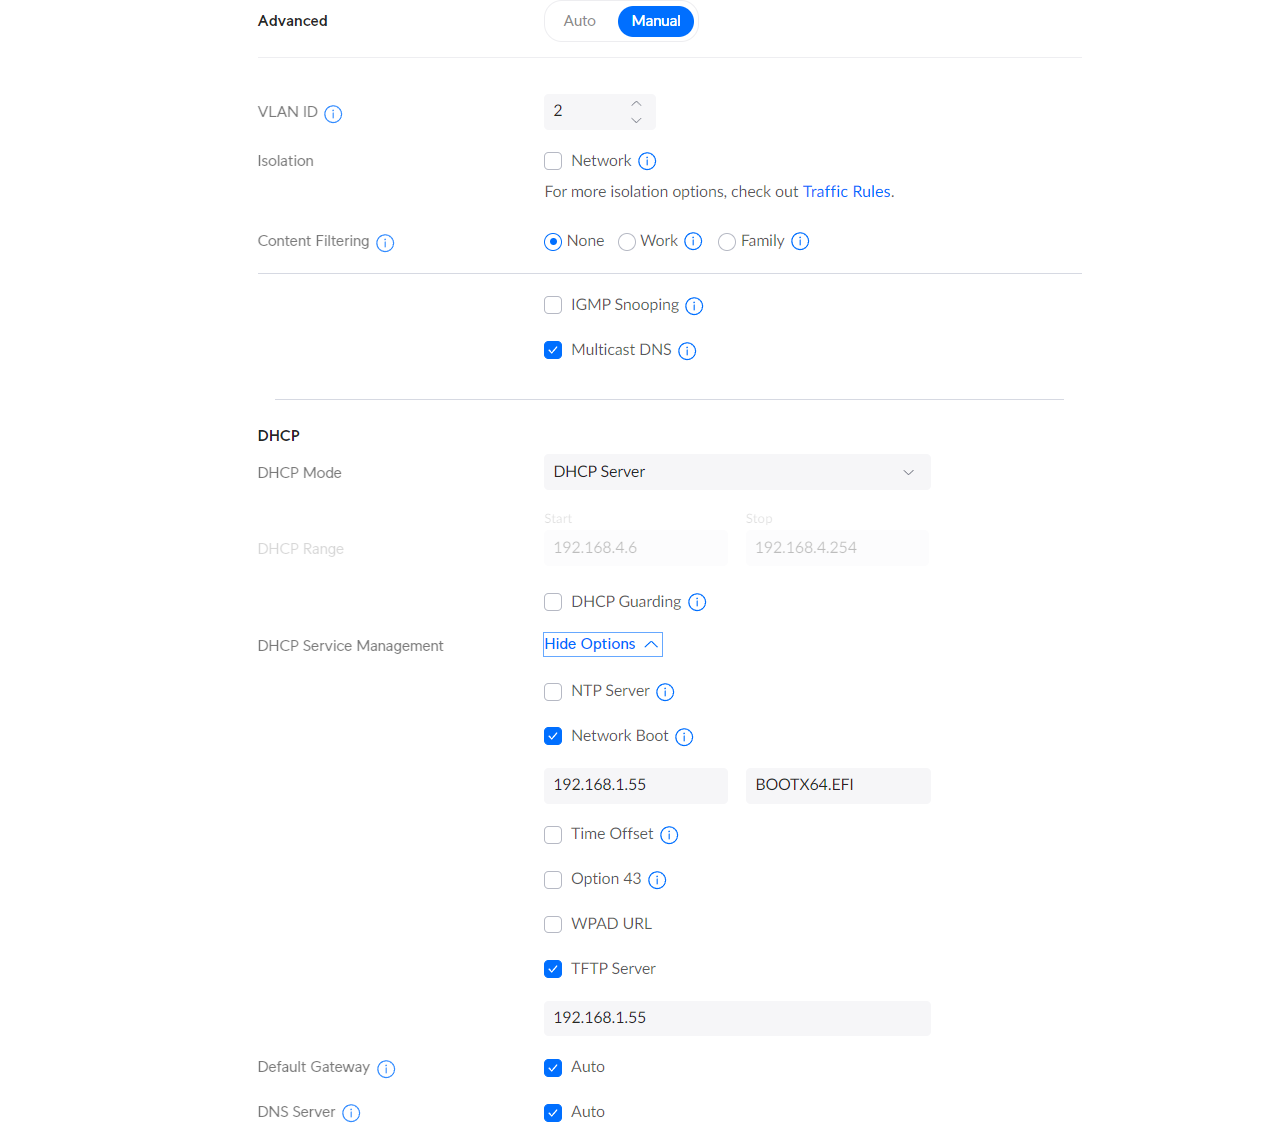
You can see in these images that I've also configured the UDM Pro 'network boot' option for this second VLAN. This configures DHCP options required to PXE boot the device, and I've specified the EFI file used during the UEFI PXE boot.
OpenShift Assisted Installer deployment
The OpenShift Assisted Installer simplifies bare-metal deployments of OpenShift. It provides pre-flight validation, as well as hosting artifacts required for the installation, such as Ignition files, installation configuration, and a discovery ISO. The Assisted Installer supports single-node OpenShift (SNO) without requiring a separate bootstrap node, which is awesome for my lab configuration - less infrastructure to deploy!
In this article I'm going to use PXE to boot the discovery ISO provided by the Assisted Installer to my R620 lab machine, and then start the OpenShift installation. The first step here is to navigate to the OpenShift Assisted Installer and create a new cluster.


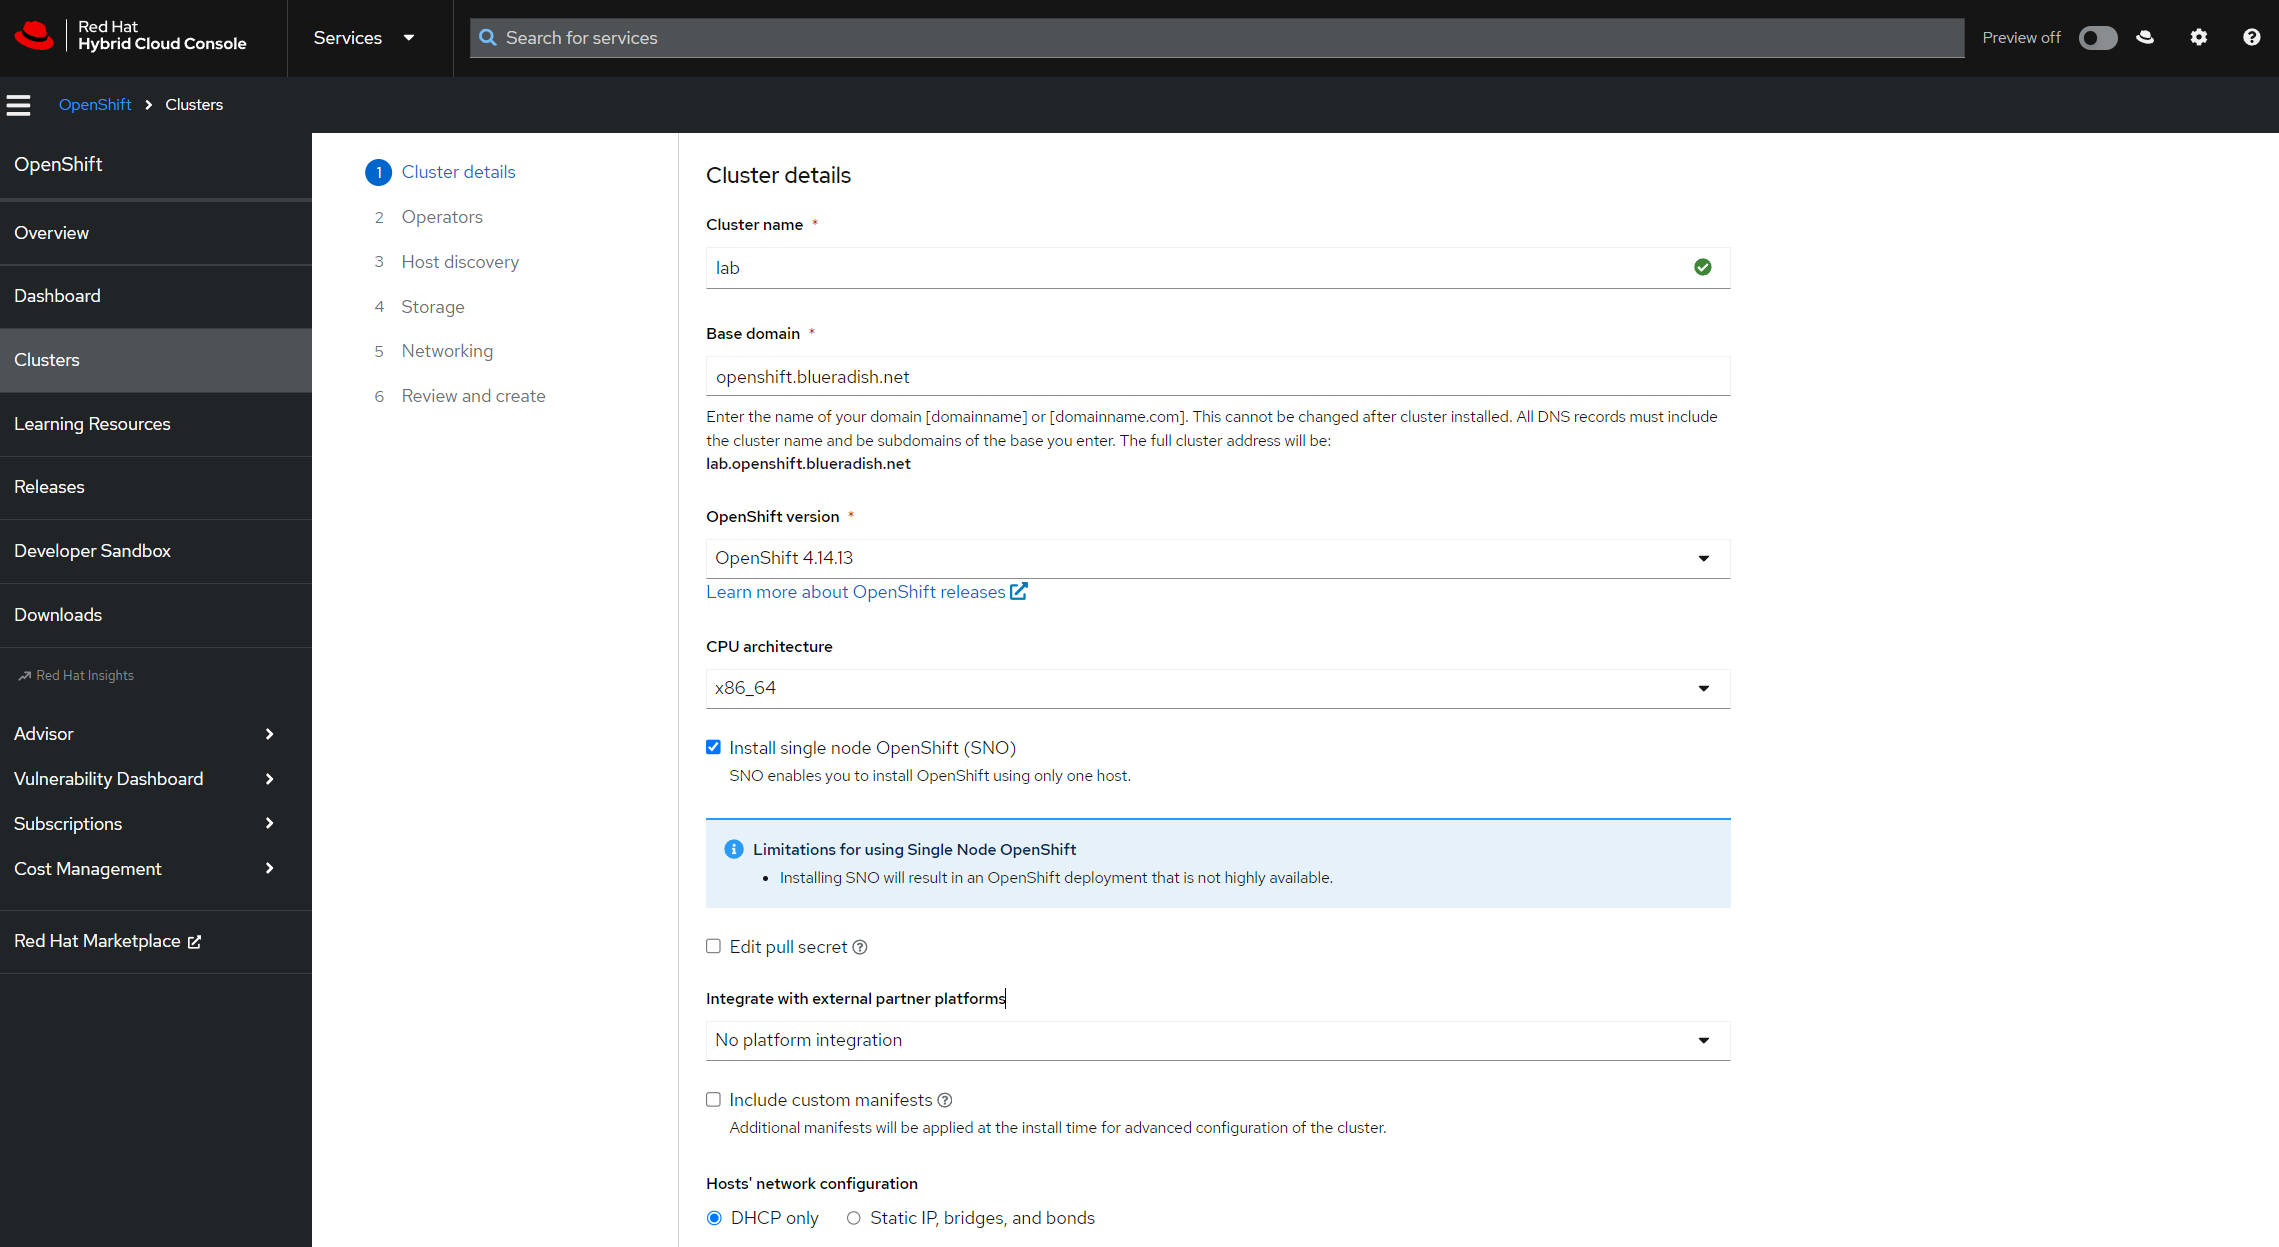
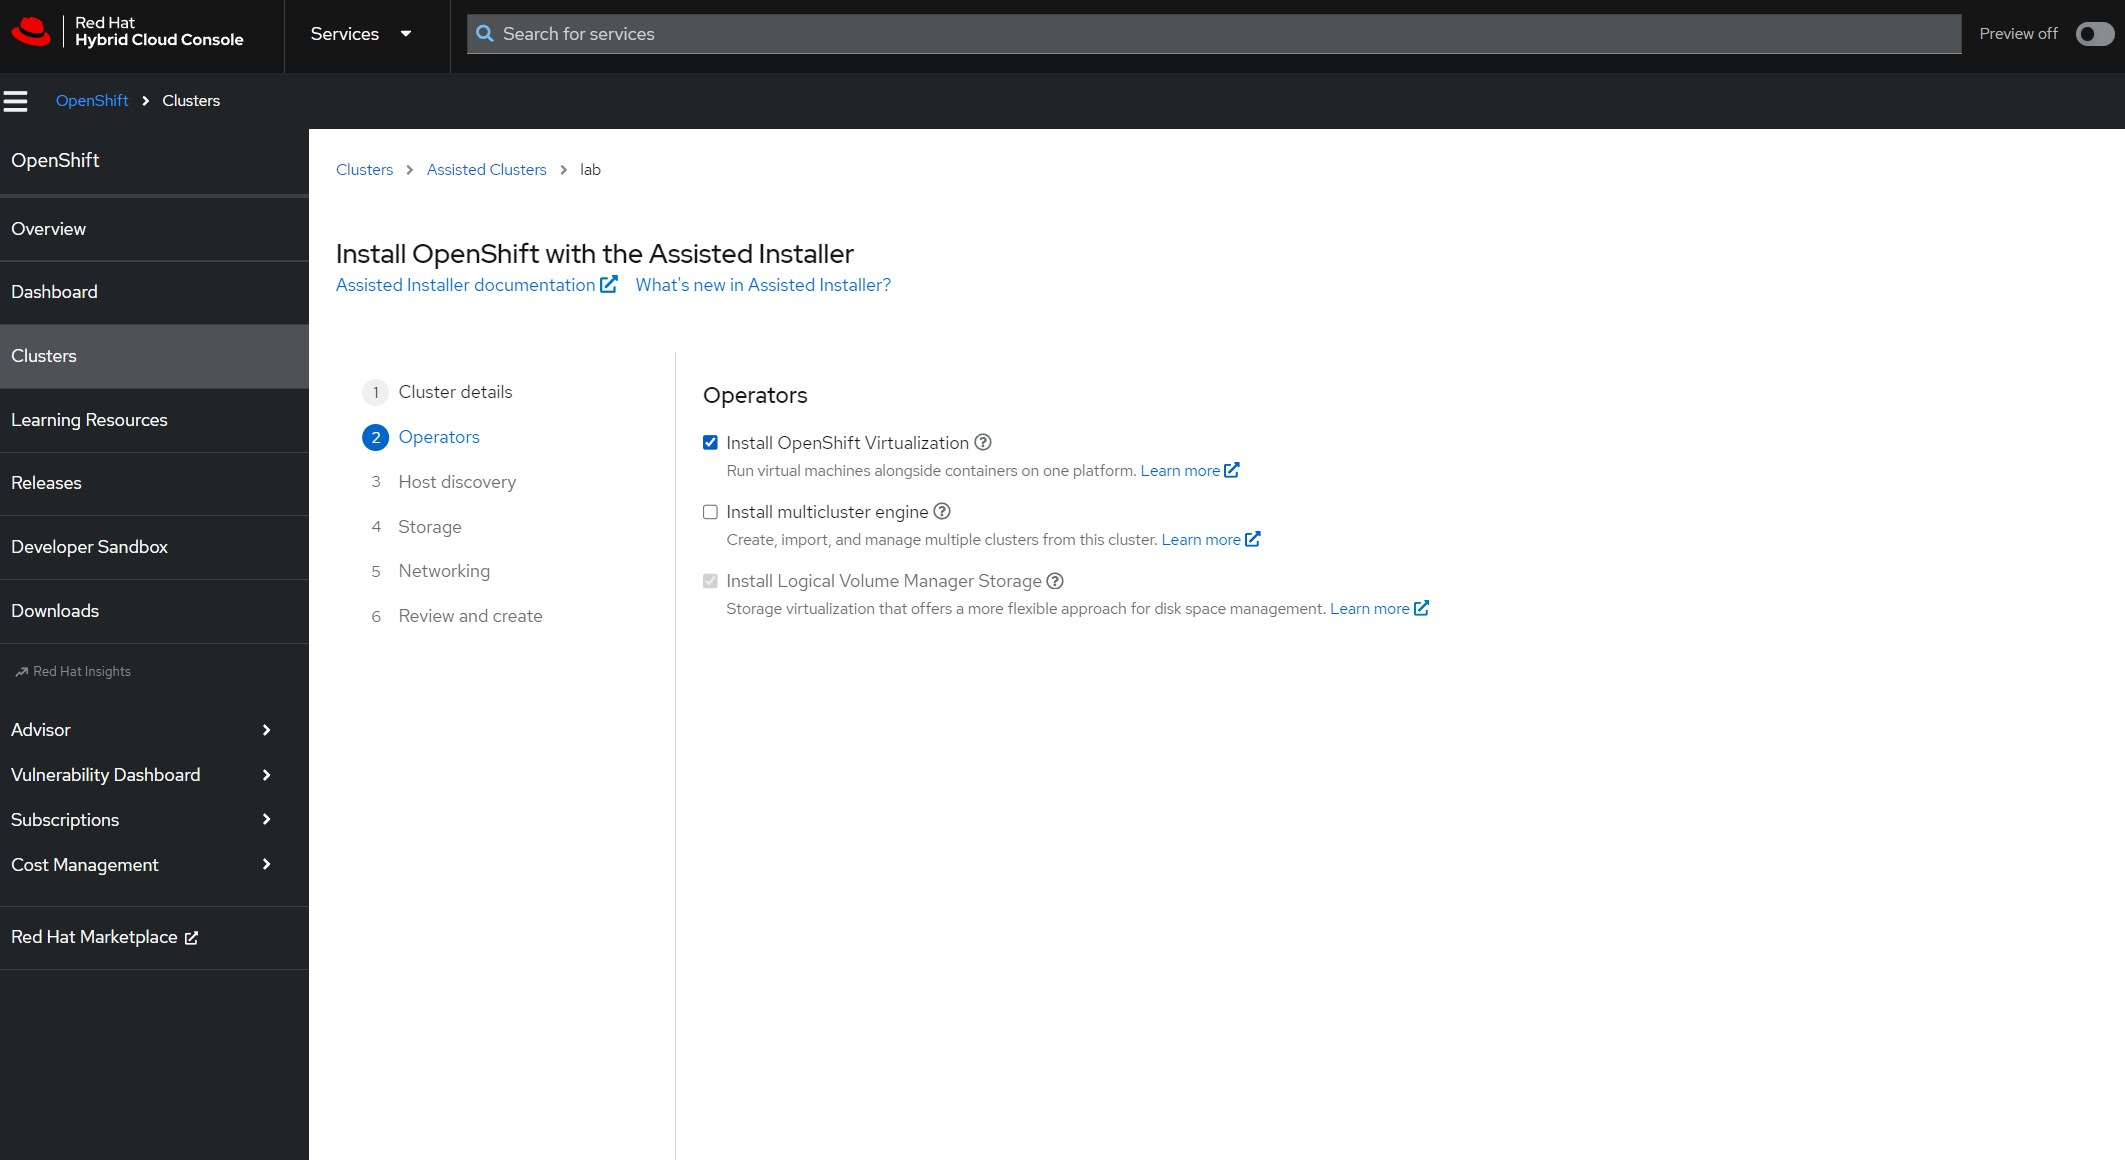
I'm going to install OpenShift Virtualization on this lab cluster. By default this will also select the "Logical Volume Storage Manager" option in the Assisted Installer UI, enabling me to provision OpenShift Persistent Volumes dynamically using underlying LVM volume groups.

At this point I can click 'Add Host' to add my R620 bare metal lab machine. For this lab environment I'm going to use the self-contained discovery ISO.

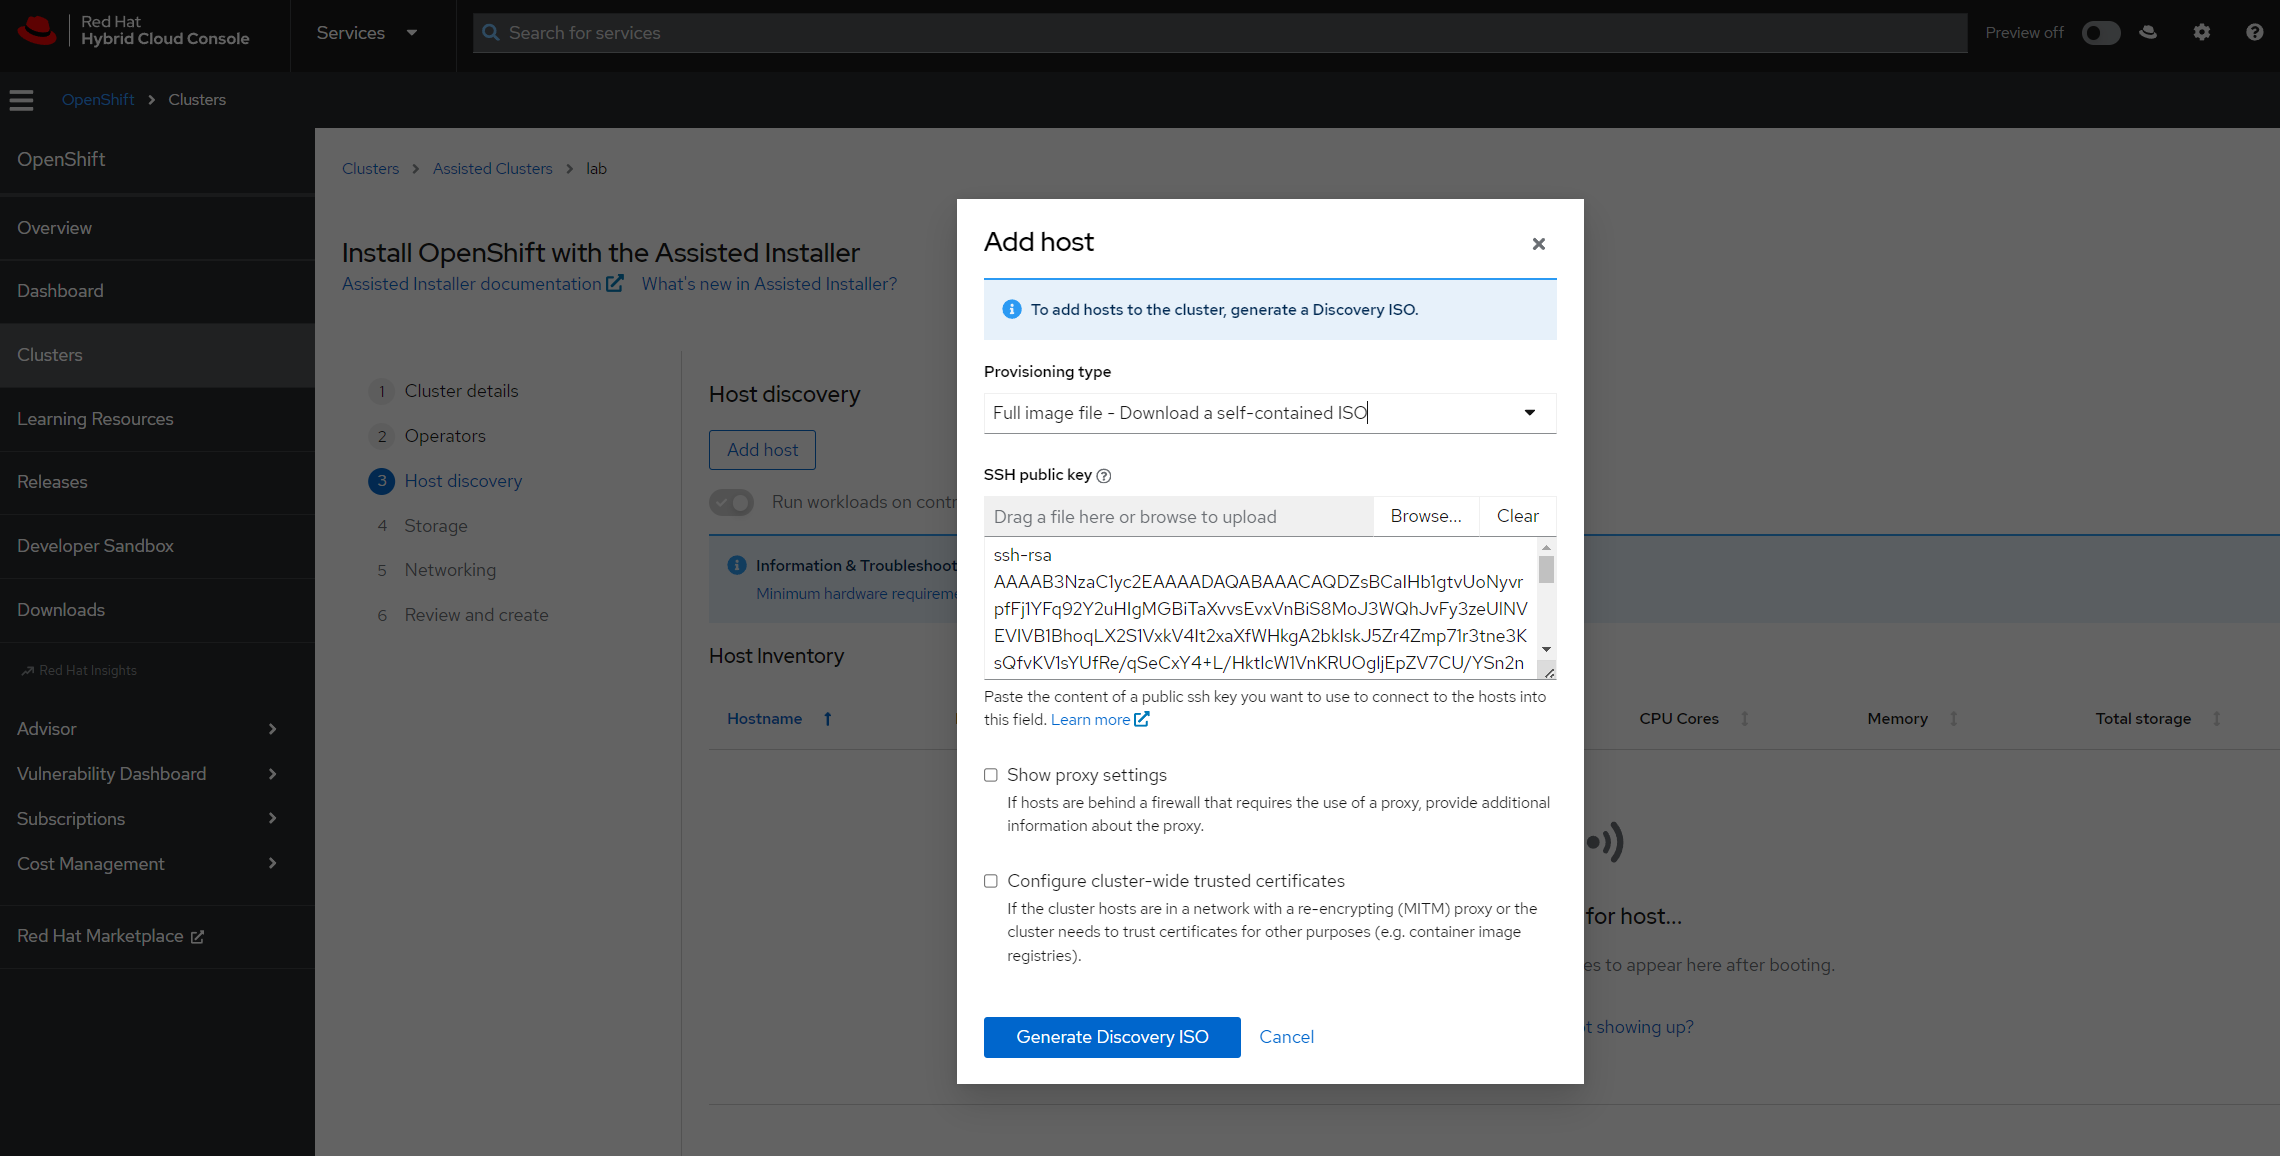
I'll copy the command to download the discovery ISO - I'm going to use it in the next step to create a PXE server.

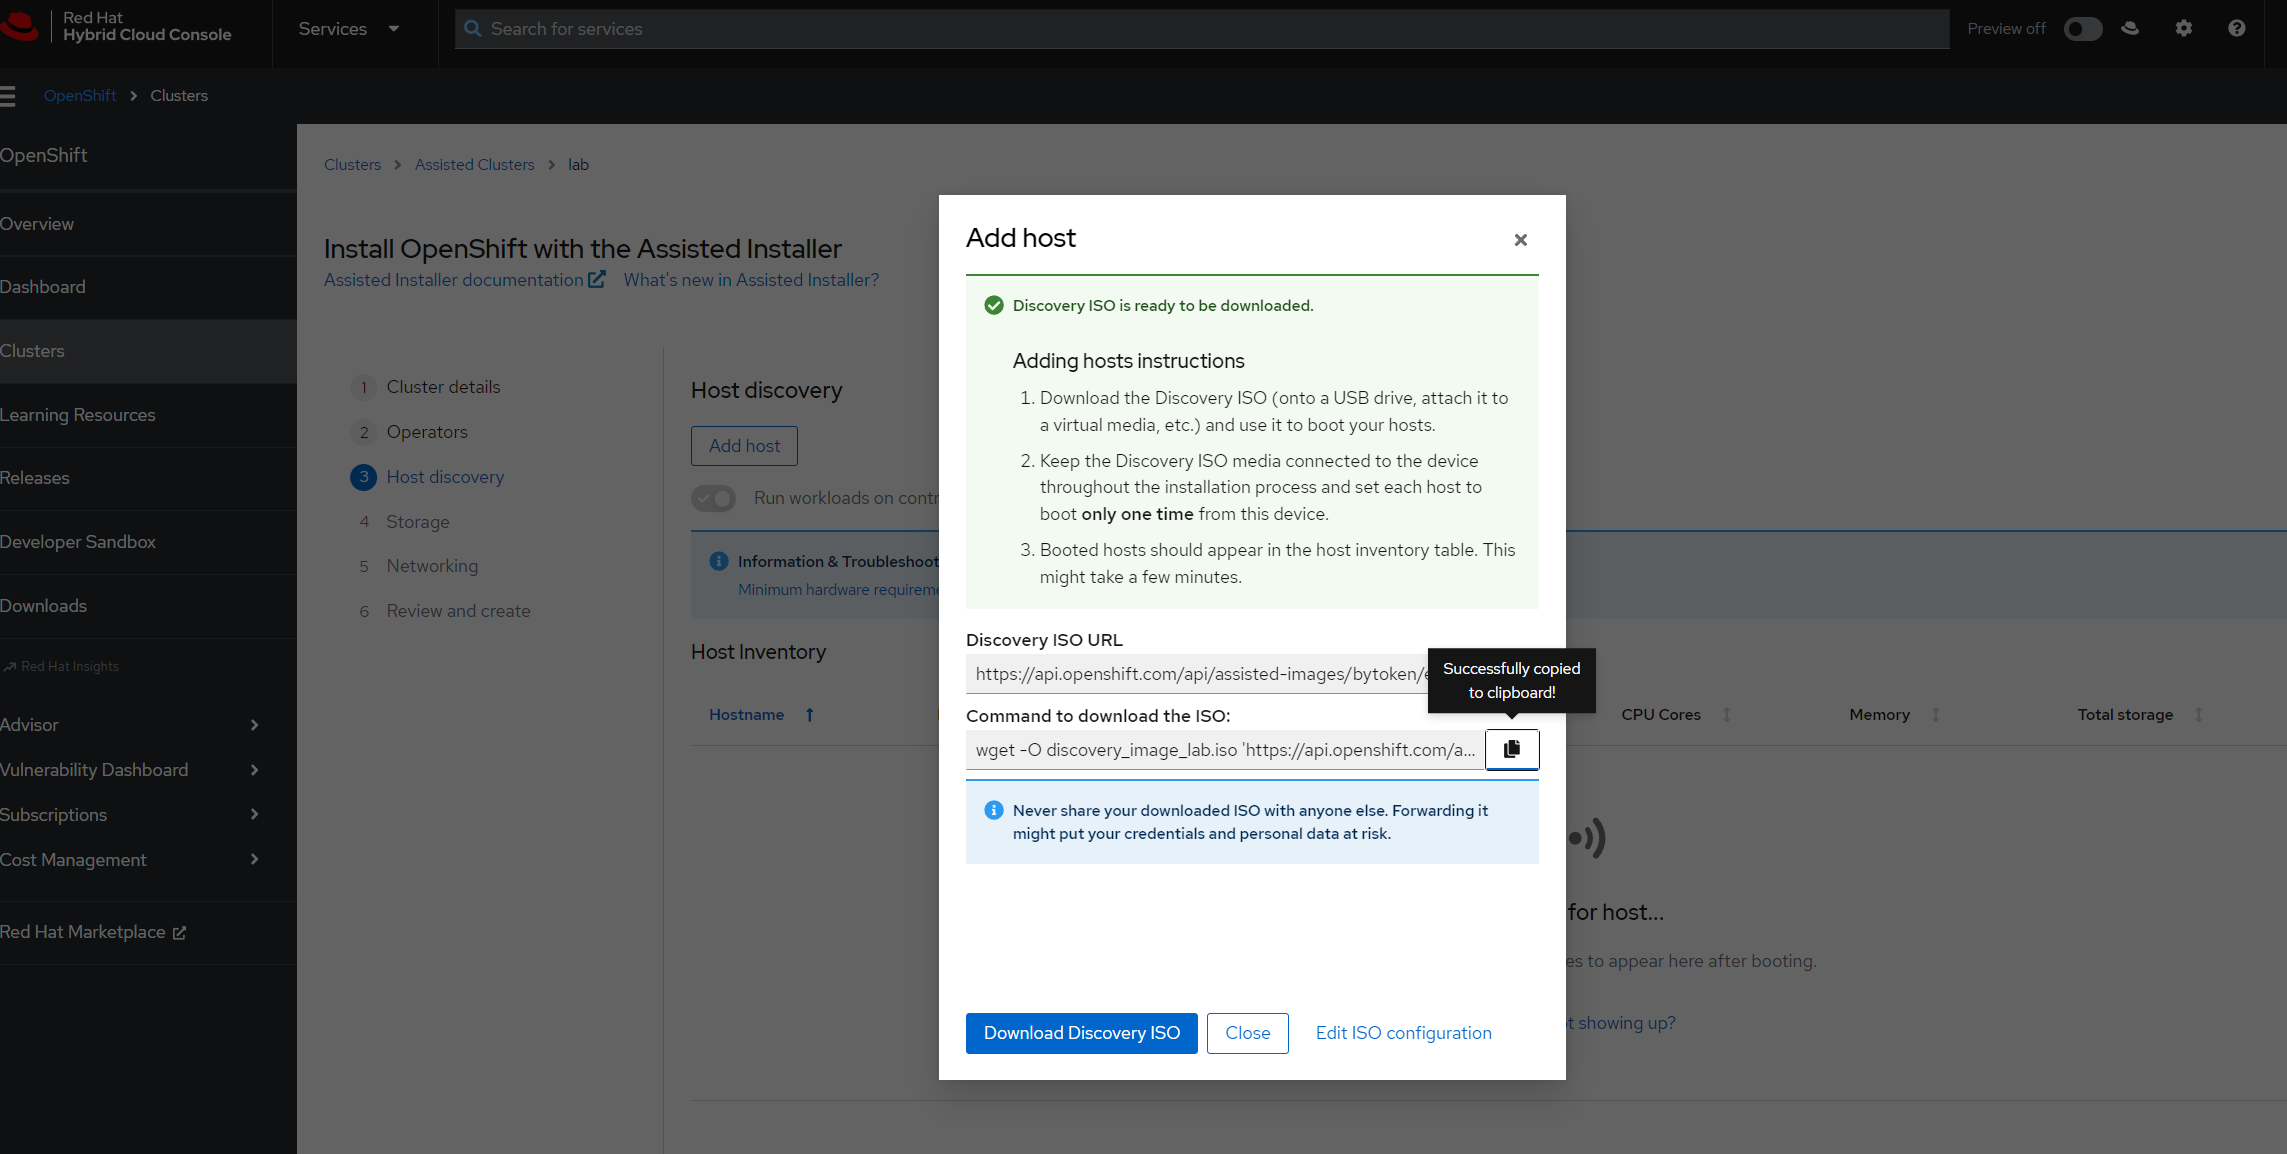
The Assisted Installer will then wait for hosts to show up.


PXE setup
There is one additional server I have deployed in this setup, which is a PXE / TFTP server hosting files required to boot the discovery ISO to the server.
I'm using UEFI instead of BIOS for my R620. UEFI is short for Unified Extensible Firmware Interface. Its purpose is to store all data about device initialization and startup in a .efi file, which is kept on a special disk partition called the EFI System Partition (ESP). The ESP also holds the bootloader responsible for booting the operating system.
UEFI requires a slightly different TFTP setup than BIOS. The first step in setting up my PXE / TFTP server is to download the discovery image from the previous step, and setup directories to host the EFI components.
mkdir -p /mnt/iso && mount -o ro,loop *iso /mnt/iso && mkdir -p /mnt/efiboot
I can then mount the discovery image and extract components to the relevant directories:
mount -o ro,loop discovery_image_lab.iso /mnt/iso
mount -o loop,ro /mnt/iso/images/efiboot.img /mnt/efiboot

/bin/cp -f /mnt/iso/images/*.img /var/lib/tftpboot/
/bin/cp -f /mnt/iso/images/pxeboot/{initrd.img,vmlinuz} /var/lib/tftpboot/
/bin/cp -f /mnt/efiboot/EFI/BOOT/* /var/lib/tftpboot/
Install tftp-server:
dnf install -y tftp-server
I've created a menu entry for GRUB, and set it to the version of OpenShift that I'm installing (in this case, 4.14):
cat <<EOF > /var/lib/tftpboot/grub.cfg
set timeout=1
menuentry 'Install Red Hat Enterprise Linux CoreOS' --class fedora --class gnu-linux --class gnu --class os {
	linuxefi vmlinuz random.trust_cpu=on ignition.firstboot ignition.platform.id=metal 'coreos.live.rootfs_url=https://mirror.openshift.com/pub/openshift-v4/dependencies/rhcos/4.14/4.14.0/rhcos-live-rootfs.x86_64.img'
	initrdefi initrd.img ignition.img
}
EOF
Start and enable tftp-server, and we're ready to start the install:
systemctl enable tftp --now
Starting the install
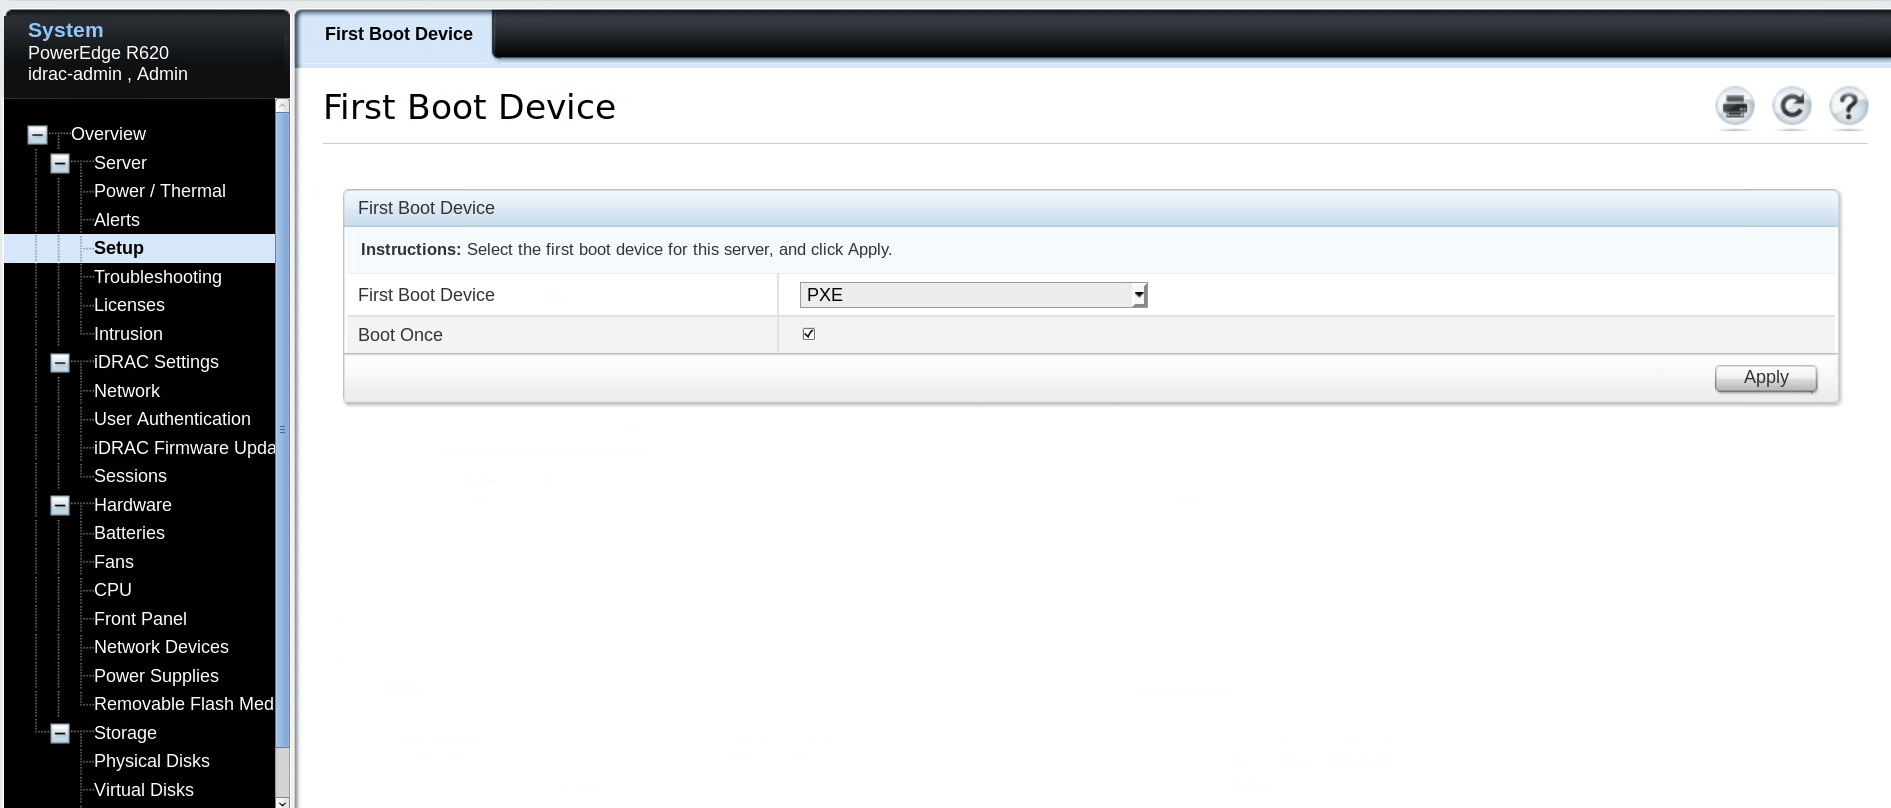
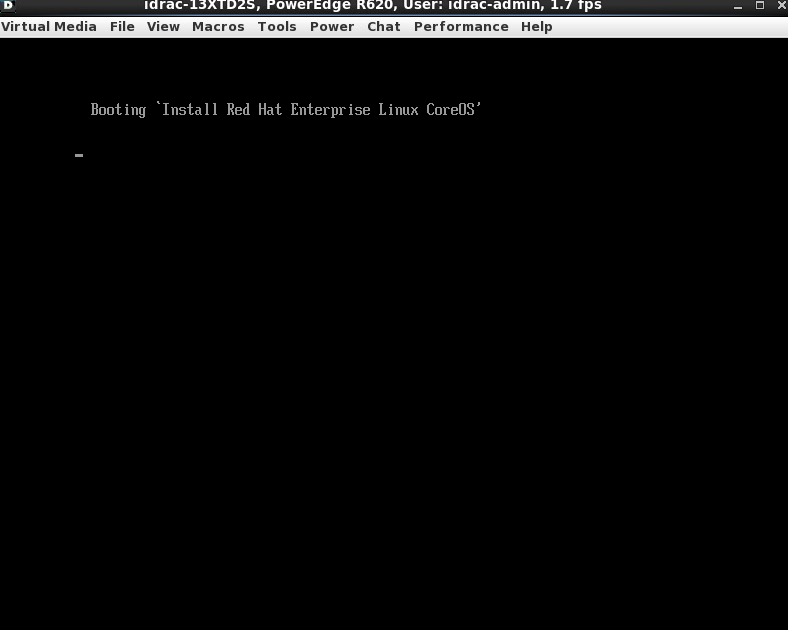
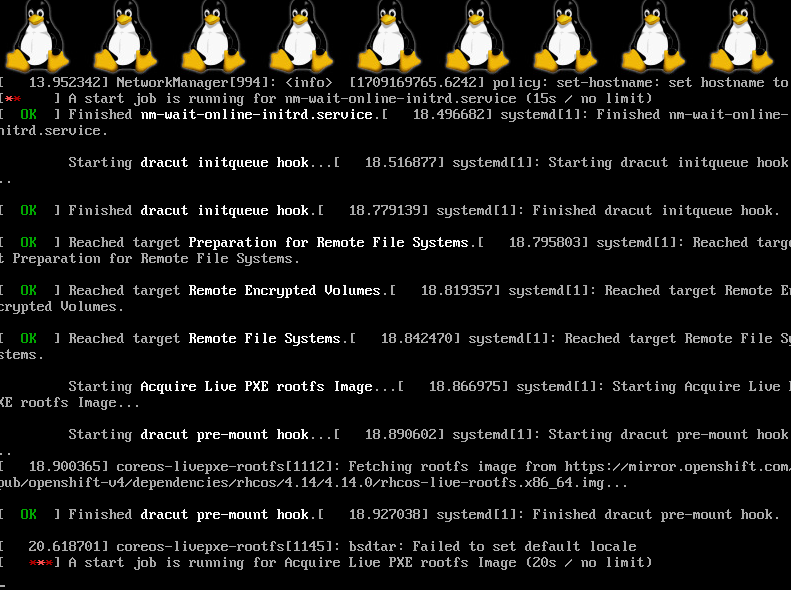
Now that I have the discovery ISO ready to be installed via PXE, it's time to start the installation. I've simply configured the server for a one-time PXE boot via the iDRAC.


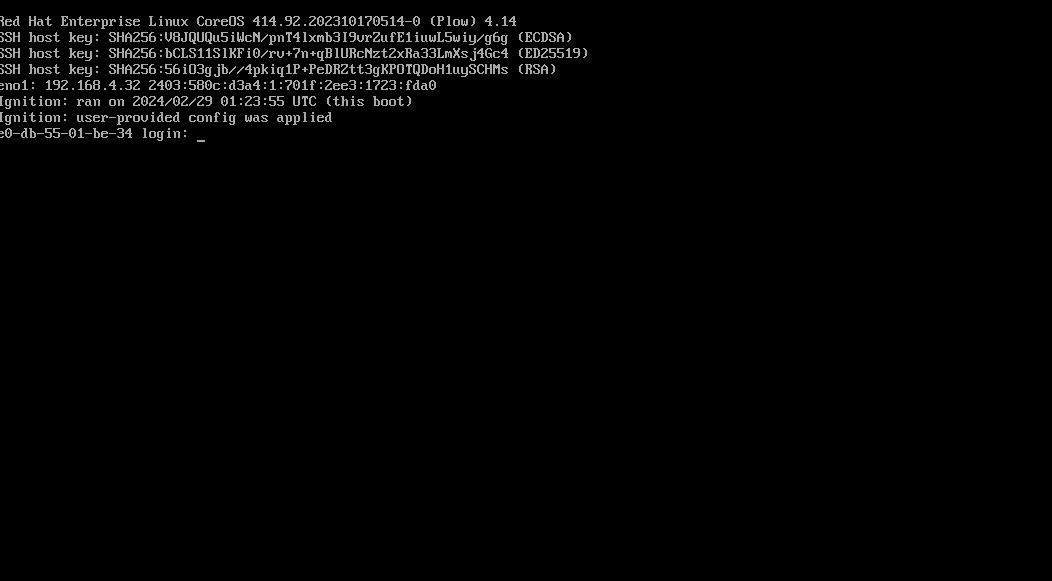
The server will show up soon in the Assisted Installer web UI:

Continuing the Assisted Installer deployment
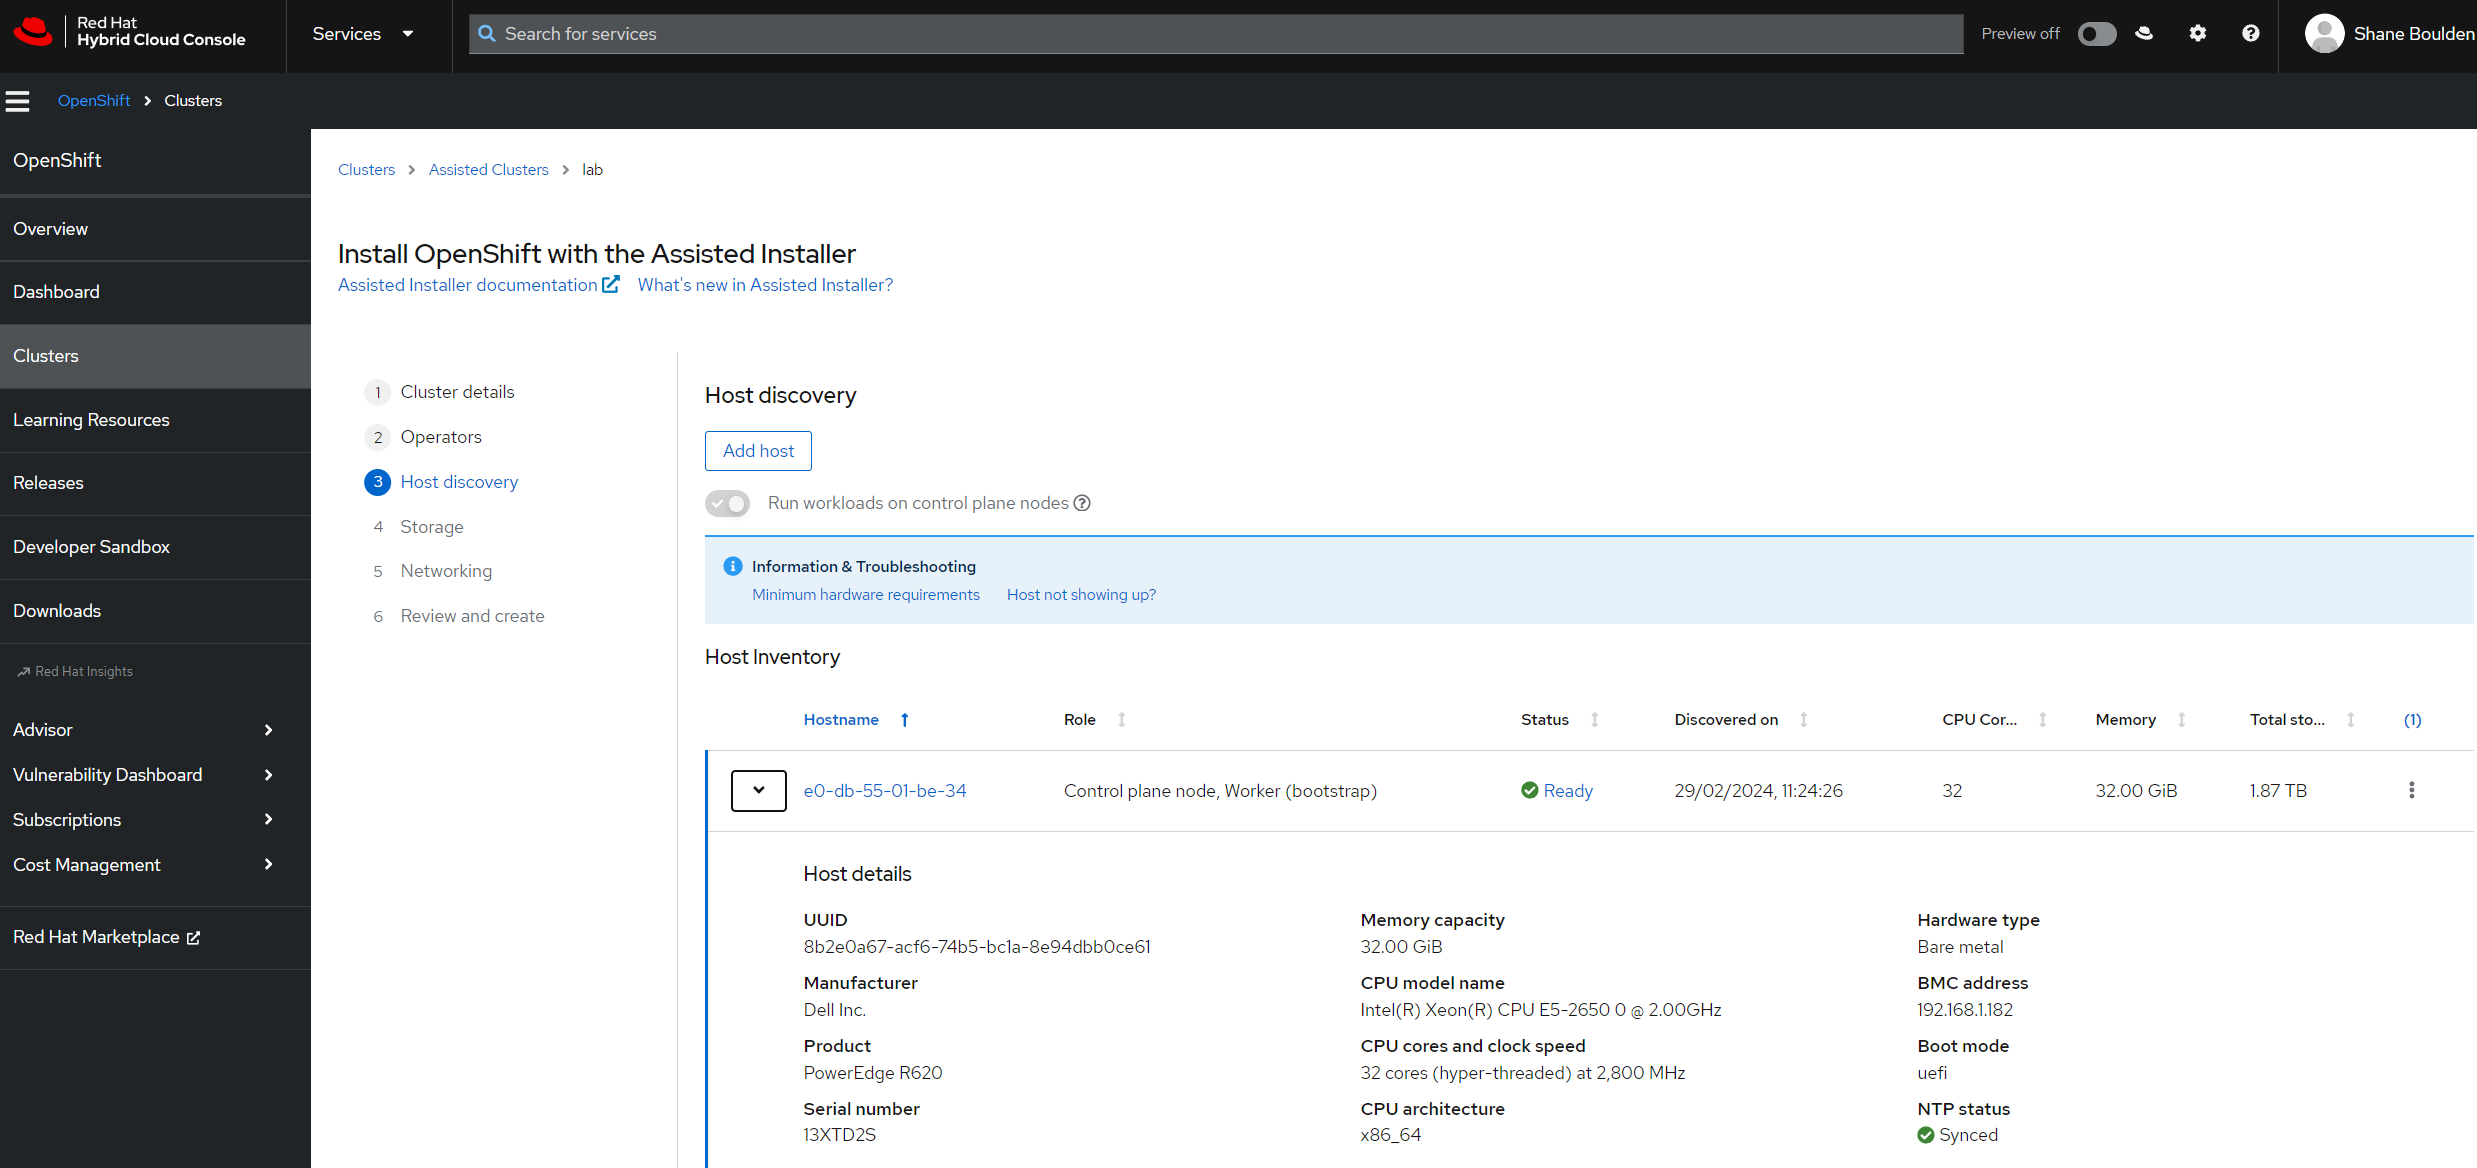
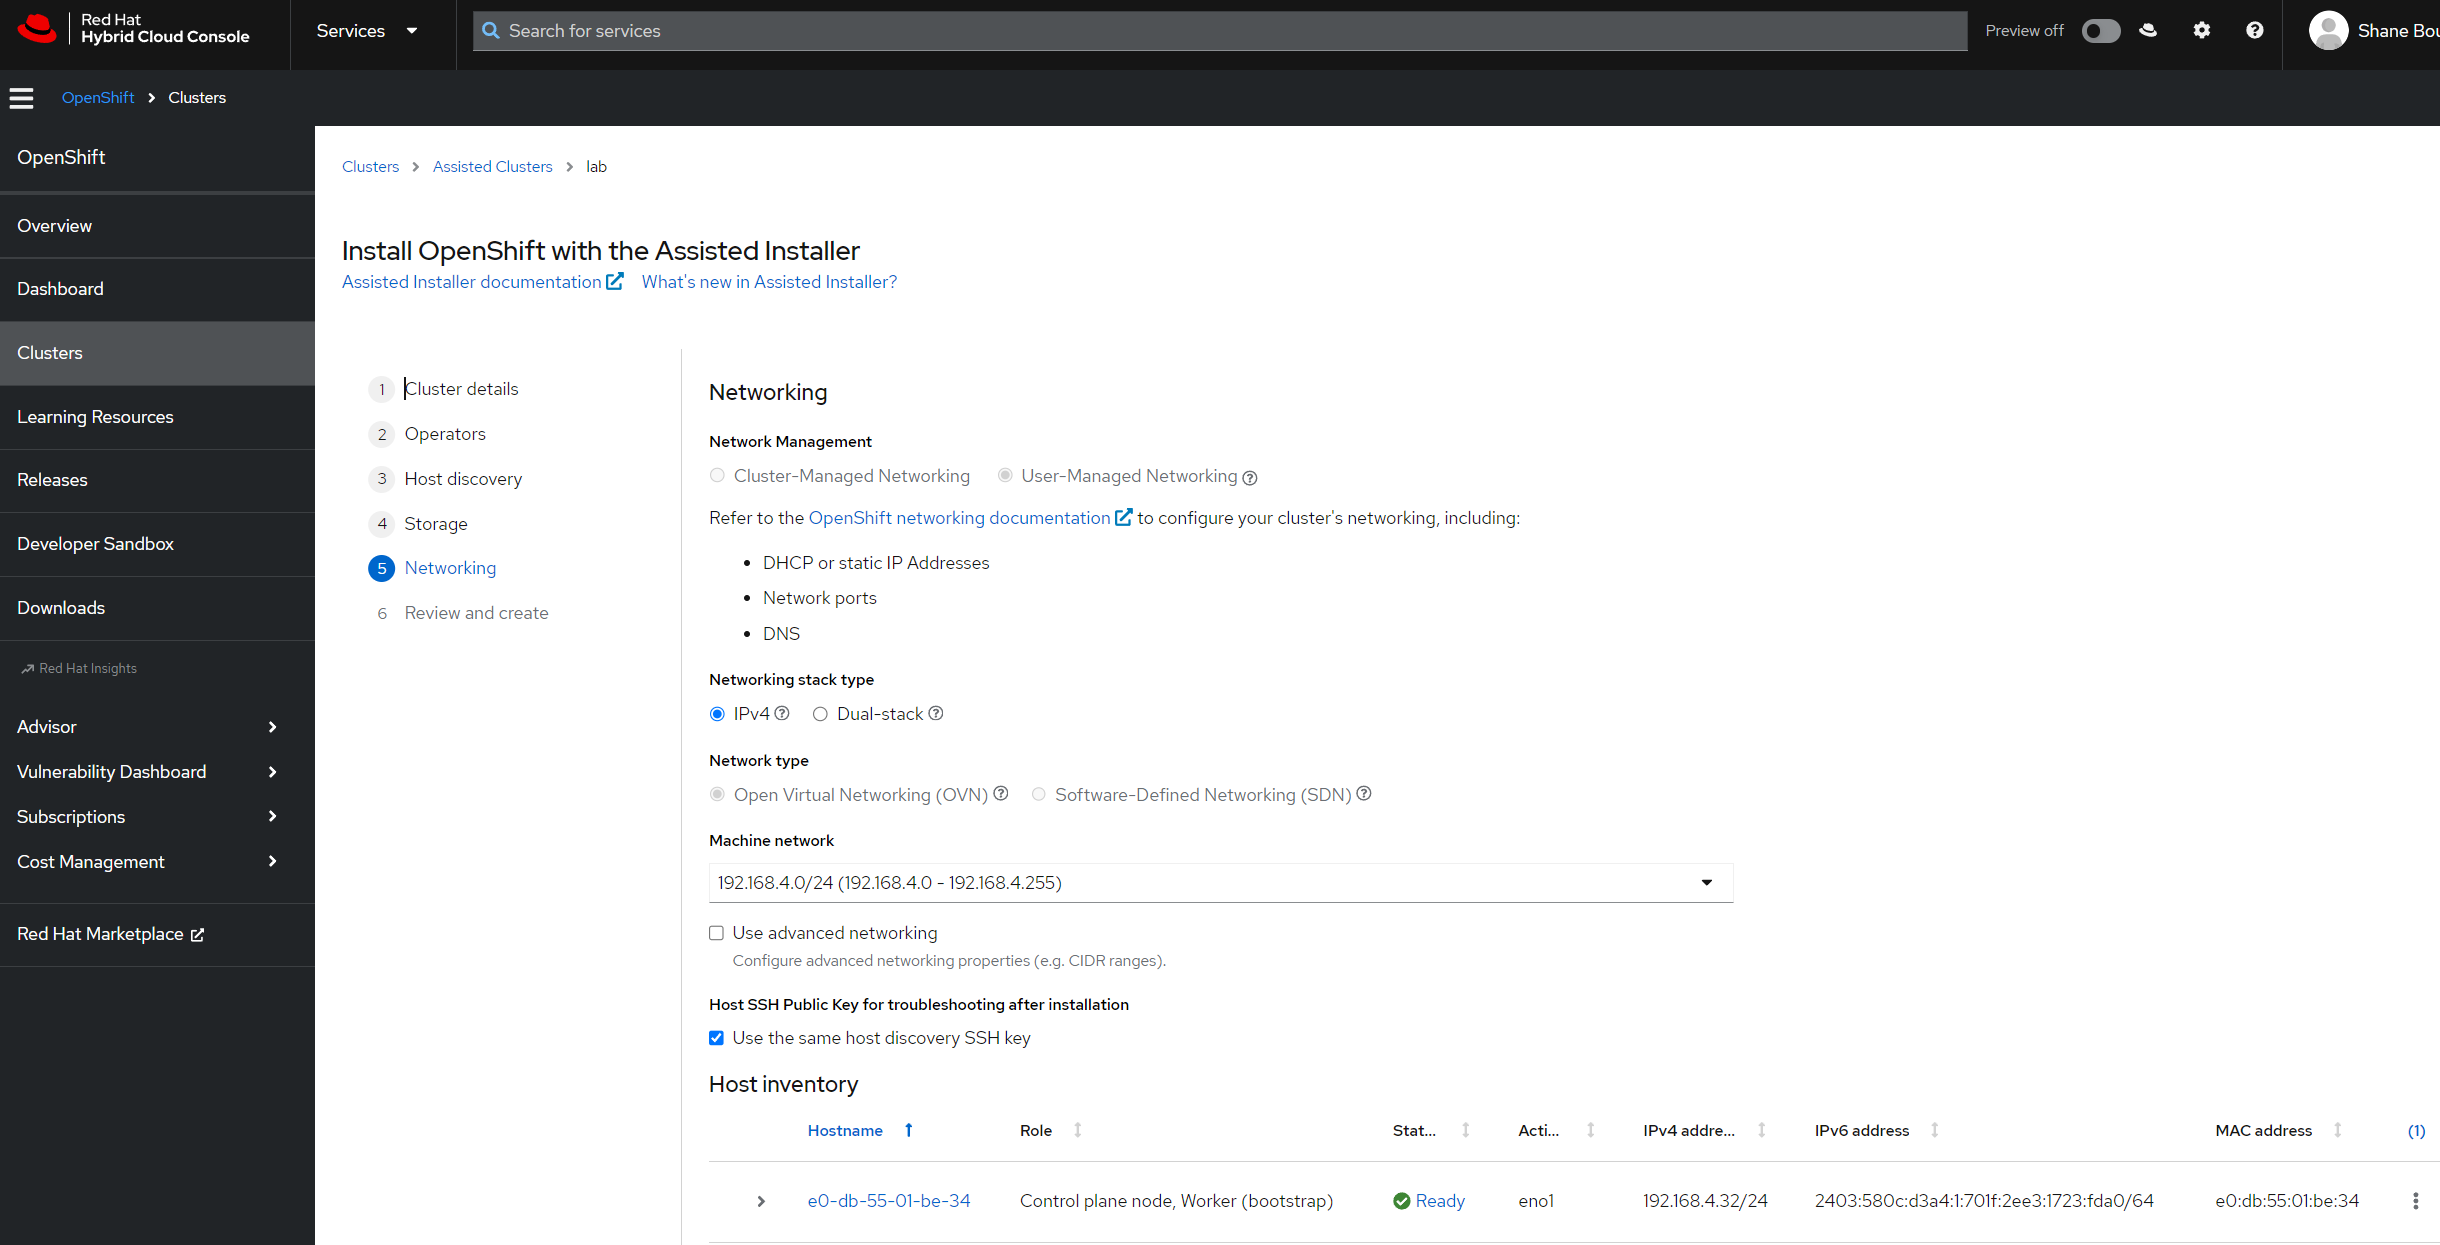
Once the server appears in the Assisted Installer UI I can continue the OpenShift installation. For my home lab there were no changes to network configuration or storage, so I can just click 'Next'.

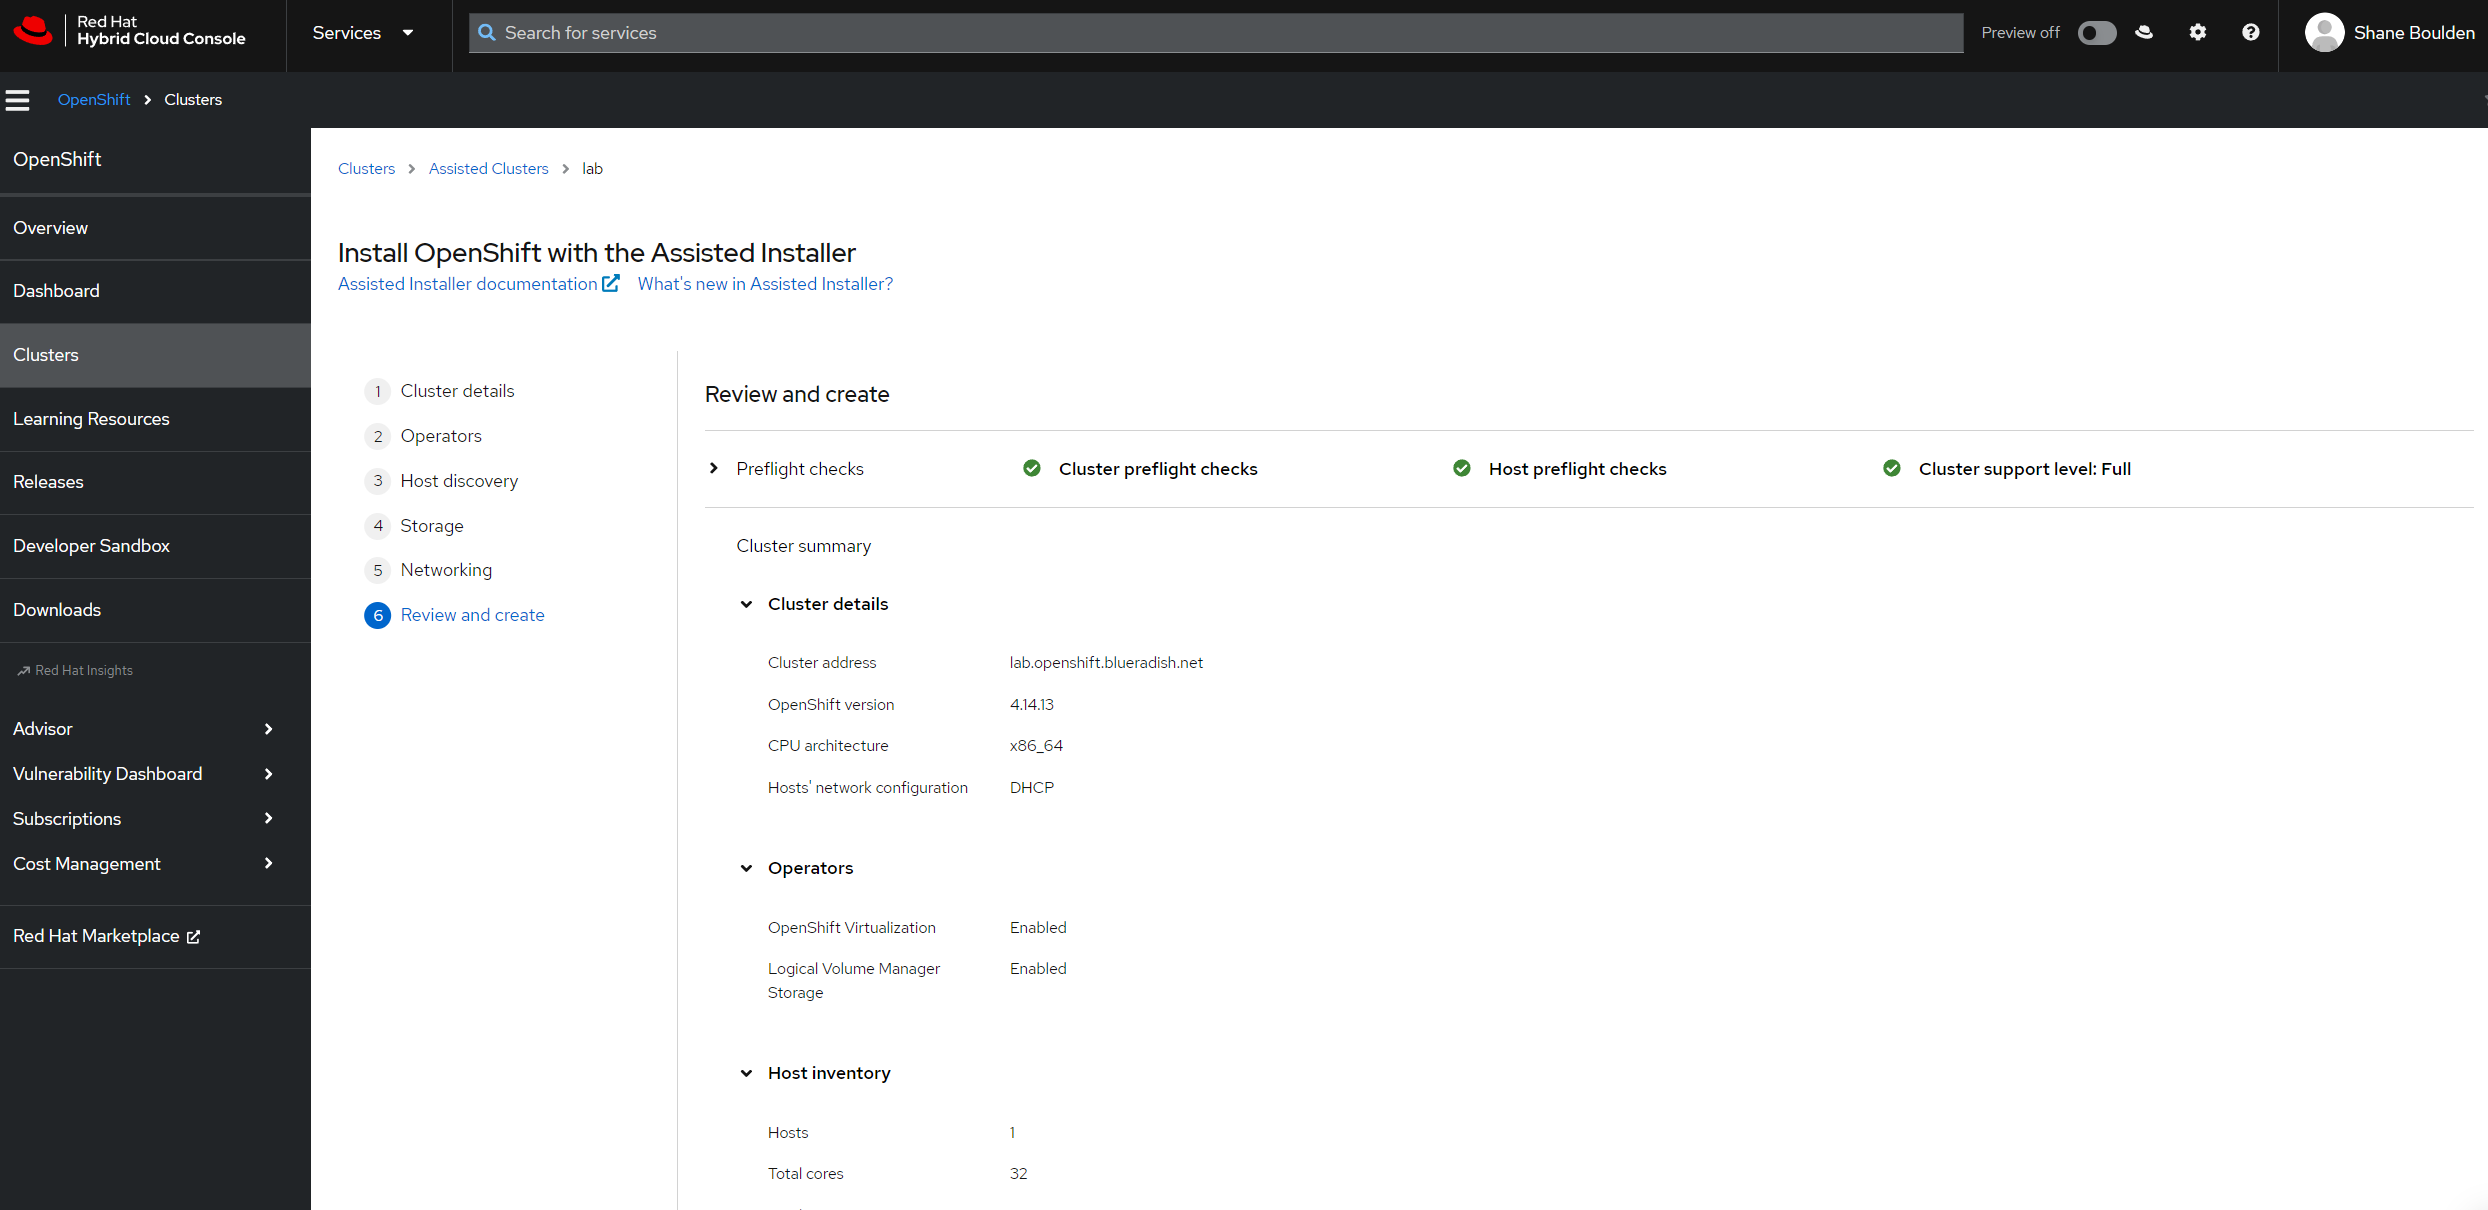
At this point my pre-flight checks are all green, and my cluster is ready to go. I can just click 'Install'


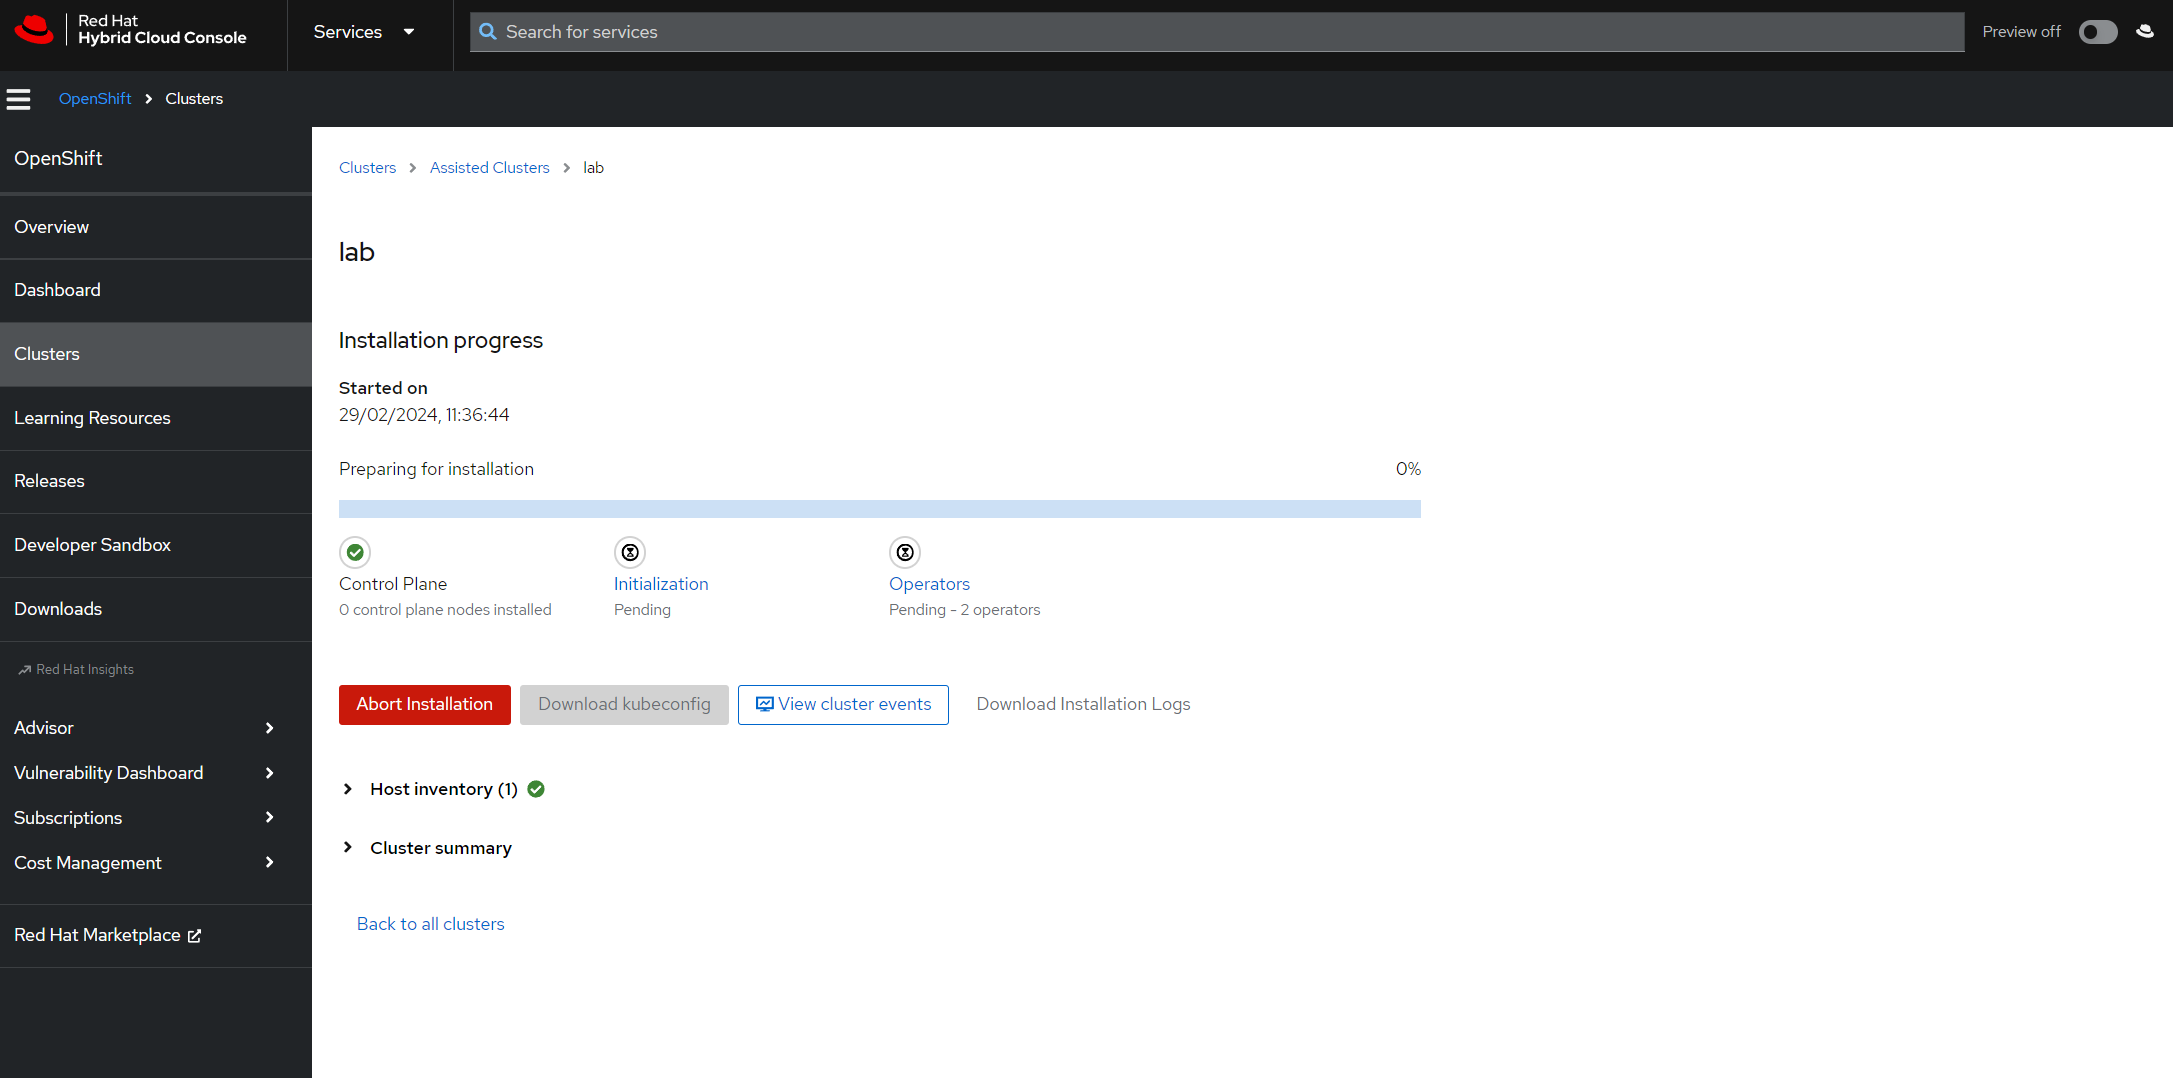
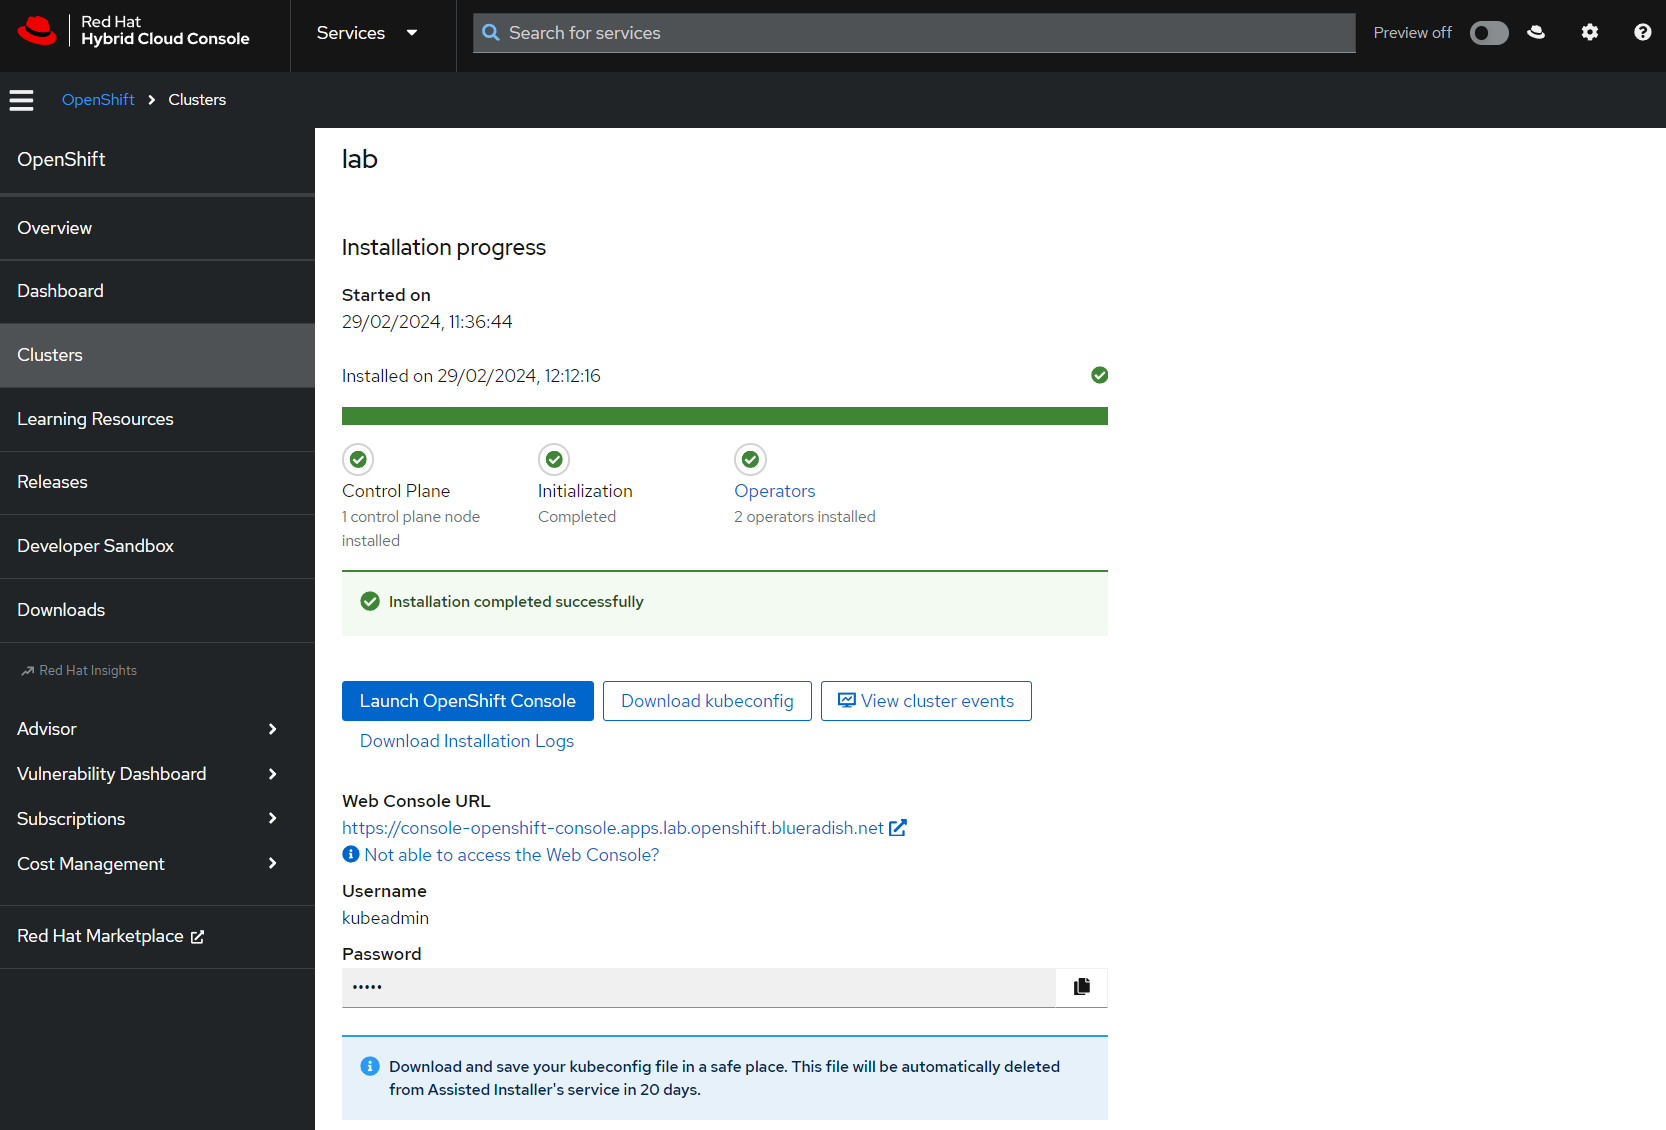
Now there's nothing to do but sit back and wait! When the cluster is ready to go, the Assisted Installer web UI will let me know, and provide some further guidance on cluster configuration.
Setting up DNS access
At this stage my cluster is provisioned and the Assisted Installer web UI has been updated. But, I can't access the cluster yet. The Assisted Installer has provided me a link to the web console, but I need to setup some DNS entries first.

You can use a self-hosted DNS, but I'm just going to use AWS Route53. There's a few reasons for this:
- My domain is already hosted via Route53, simplifying record creation
- I don't need to maintain any additional infrastructure in my environment
- The Ubiquiti UDM Pro doesn't support wildcard DNS entries
The down-side is that anyone can see I am running OpenShift by querying the public DNS records. But, I'd be surprised if anyone didn't know that I was running OpenShift in my lab at this point...
If you click the "Not able to access the Web Console?" link in the Assisted Installer it will show the DNS entries required for the cluster:

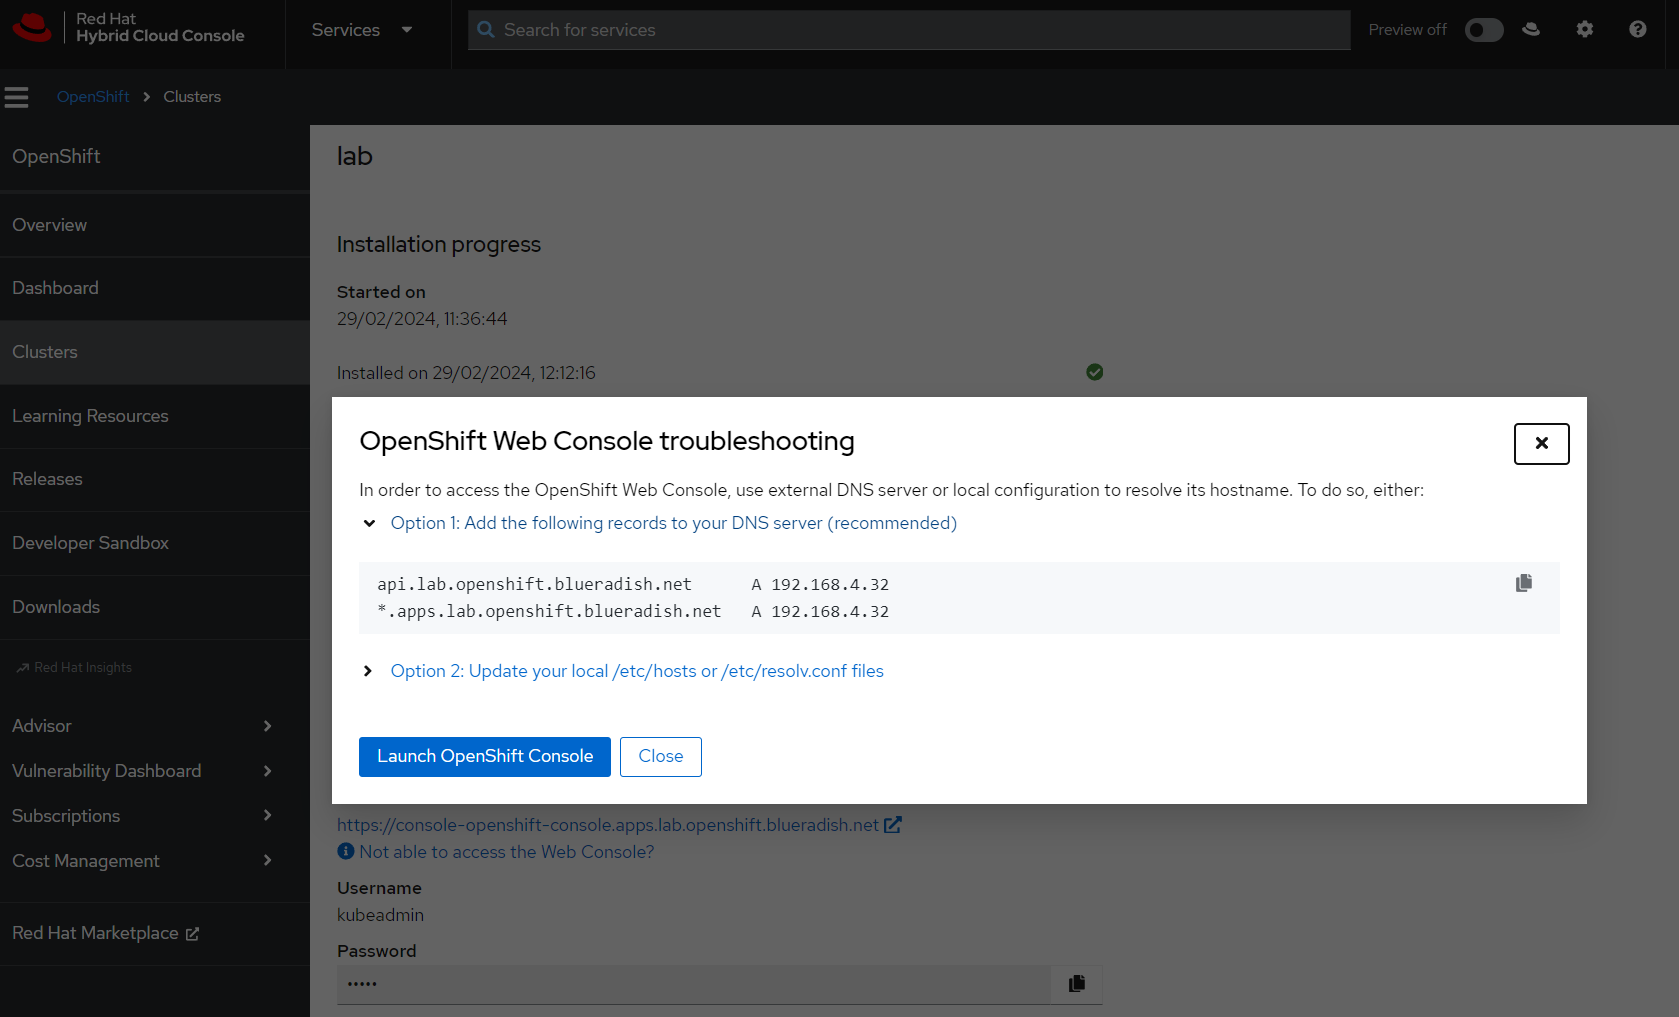
I've simply configured these DNS entries in Route53:


And now I can access the console!

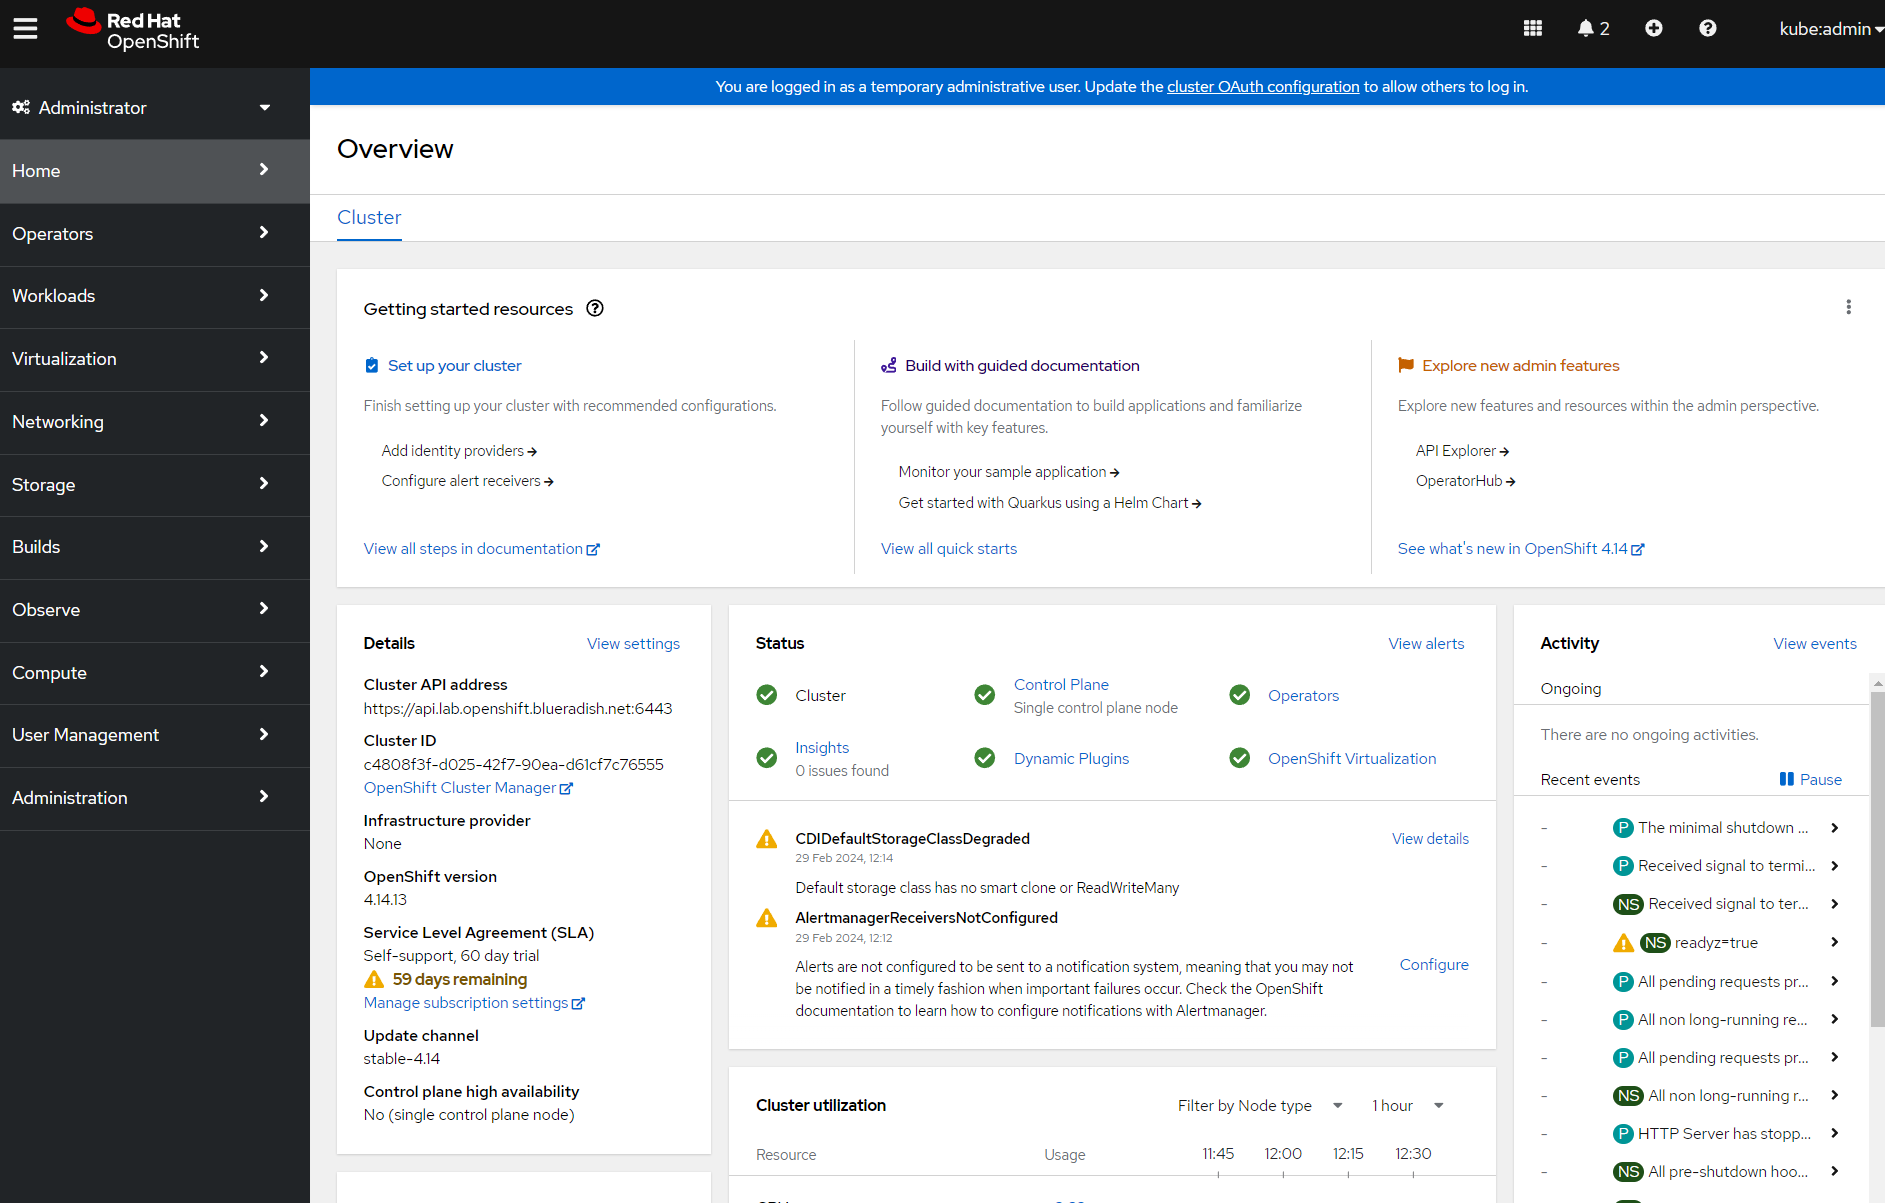
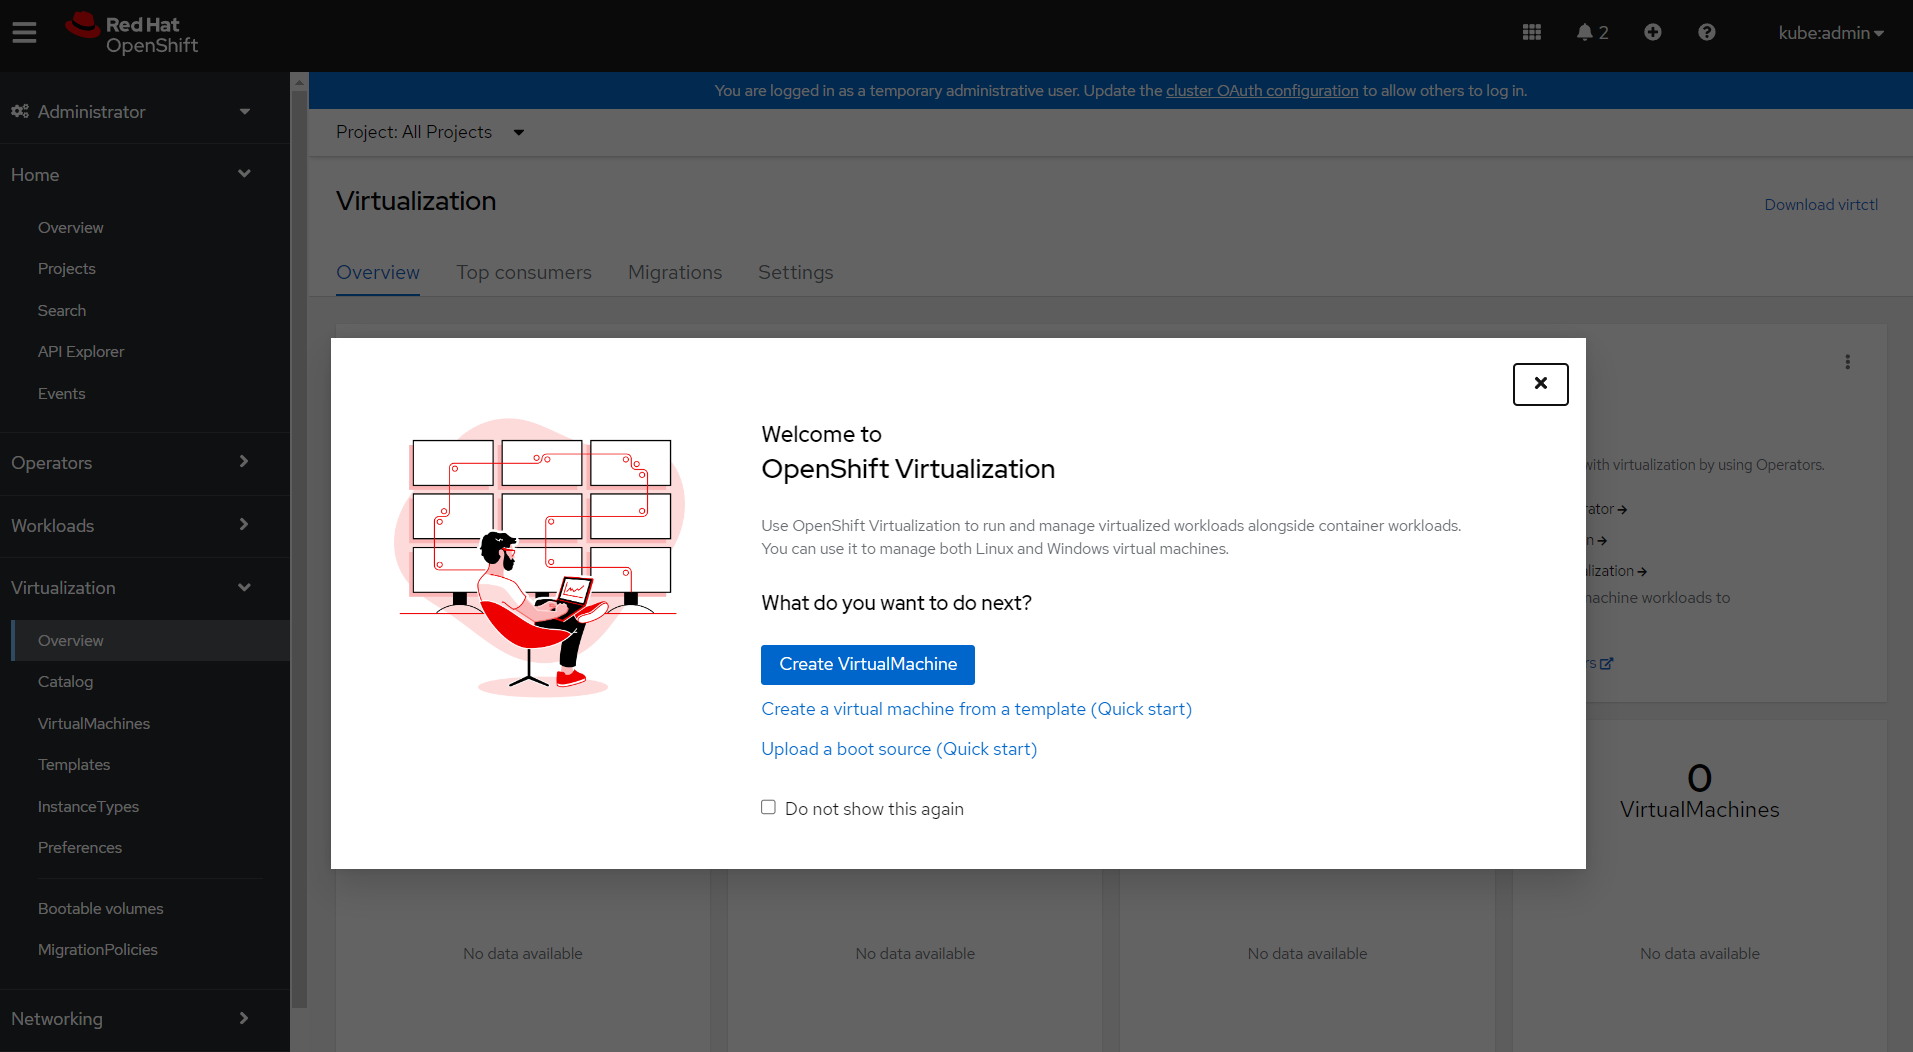
You can also see that OpenShift Virtualization has been setup and configured.

Wrapping up
The R620 is an excellent home lab server, and in this article I've looked at how I've set it up for OpenShift and OpenShift Virtualization in my own lab. I would highly recommend if you're looking at the same setup to run the server away from living spaces, as it's a little '1U screamer' - it's loud!
In the next few articles I'll look at some of the other configuration I've performed within my lab:
- Getting started with OpenShift Virtualization on a single-node OpenShift cluster
- Configuring dual-stack IPv4 / IPv6 OpenShift clusters
- Getting started with Red Hat Advanced Cluster Security for Kubernetes (RHACS) on single-node OpenShift
- Setting up Keycloak and phishing-resistant multi-factor authentication (MFA)